When my neighbor asked if I wanted an armoire her daughter didn’t want anymore, I jumped at the offer. It’s hard to pass up free, especially when my crafting space was in need of additional storage. I was heavy into furniture refinishing at that point in time. Over the previous year, I’d completed the antique dresser, stencil coffee table, shutter buffet, and bookcase projects among other dresser refinishes. The armoire was in much better shape than most of my other projects so didn’t require any structural updates. Sometimes, a more simplistic project can be a nice change of pace, especially if time and energy are in short supply. With that in mind, it was up to my creativity to decide what direction to take this piece.

Furniture Refinishing Paint Options
The options for furniture paint seem endless. I’ve tried a fair few at this point from Annie Sloane to Martha Stewart. One of my favorite brands for furniture refinishing is Fusion Mineral paint for its coverage and ability to smooth out as it dries. I decided to use Inglenook, because I’d already used it for a bench refinish and had a lot left. You can search for local shops who sell in store on the Fusion website or you can order it online like I did for this color. Something to keep in mind with Fusion paint is the color changes a bit as it dries, in comparison to how it looks the days you put it on.
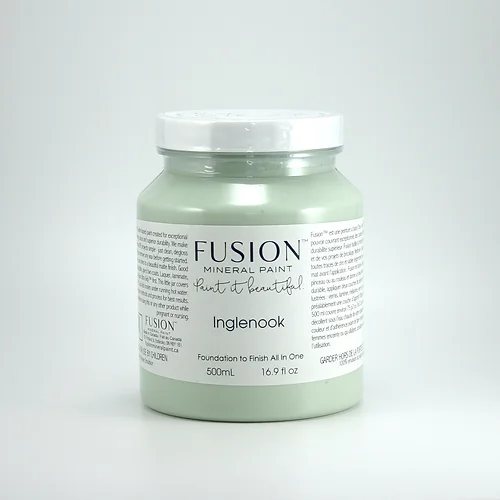
Inglenook by Fusion Mineral Paint.
As with all furniture refinishing paint jobs, it’s important you either sand the surface to give the paint some grit to adhere to for longevity or use a deglosser. I’ve used the deglosser on several projects and found pretty good results. The deglosser is quite simple and quick. After cleaning the piece, rub the degloser all over the surface with a cloth. Voila!

Trying Something New
In many of the previous furniture refinishing projects, I used stencils to spruce up the paint. It was definitely my obsession for a bit. To pull away a bit from that obsession, I decided to do something different with this armoire. I opted to give adhesive wallpaper a try. After searching Amazon for a good while, an antique bike wallpaper sparked my interest. It was completely affordable and a nice pairing with the color. When the wallpaper came, I was glad to see it indeed matched well with the Inglenook paint.


I love the measurements on the back of peel and stick wallpapers. This one had a ton of language blurbs, so the lines weren’t there to cut along as much as I’ve seen on other peel and stick products. The best way to go about adhering it to the surface is to peel the top edge and place it along the edge. From there, you need to gently pull the backing while smoothly the surface as you go. This allows you to go as fast or slow as you want. I used my hand because it was easiest but a ruler or other straight object could be needed. It was super easy to put it on the two drawer fronts and the inside backing despite being a half inch to short for the width.


The Final Touch
One of my favorite things to do is to cruise through the clearance sections at stores for crafting finds. On one such trip through Walmart, I found some dark wax. It sat with the rest of my finds until this project, which felt like the perfect pairing with the antique bike wallpaper. In general, regardless of the durability of the paint, doing a top coating will serve the furniture and your work best. A sealing wax (light or dark) is one of the options. Dark wax would be a bit much over the whole surface so is usually meant to give the piece an antique look. I put a clear wax over all the surfaces and then opened up the new can of wax. (You just said worms in your head, didn’t you, ha.)


Given this was my first dark wax attempt, I went at it with what I assumed you should do. I was slightly taken aback by how dark the wax actually was on the surface. It was a quick realization I would need to spread it quickly and wipe off the excess. Some spots showed as being a little heavy handed. I stuck to darkening the corners and creases of the door, drawers, top, and bottom frames.

I was definitely winging it and was a bit indecisive on all locations or look, but I think I did an okay job to start. After the wax dried, I thought some of the heavy handed spots needed a bit more fading. Applying the clear wax over it allowed me to lighten those areas.


Furniture Refinishing Completion
With the paint dry, the wallpaper affixed, and the wax applied, this piece was ready to be stocked with crafting supplies. Hopefully, it inspires you on your next project!


*This page contains affiliate links. This means if you use one of my links to make a purchase, I will receive a small commission at no additional cost to you. Thank you for supporting Cathartic Crafting!


