Tag: diy

20 Brilliant Ideas for Decorating with Wooden Crates

Wooden Crates have been riding the decor trend for a few years now. I fell in love with them years ago after moving into my new house and looking for ideas to decorate the new space. The wooden crates stood out as an affordable and interesting way to get creative with home decor. After running through a good many pins over time, I’ve collected those which seem to be more unique and a few of the ones I’ve done myself. If you’re a DIYer like me, you like to try to do everything yourself and need some inspiration to get your own creative juices flowing. I hope this list helps with generating some of your own home decor ideas!

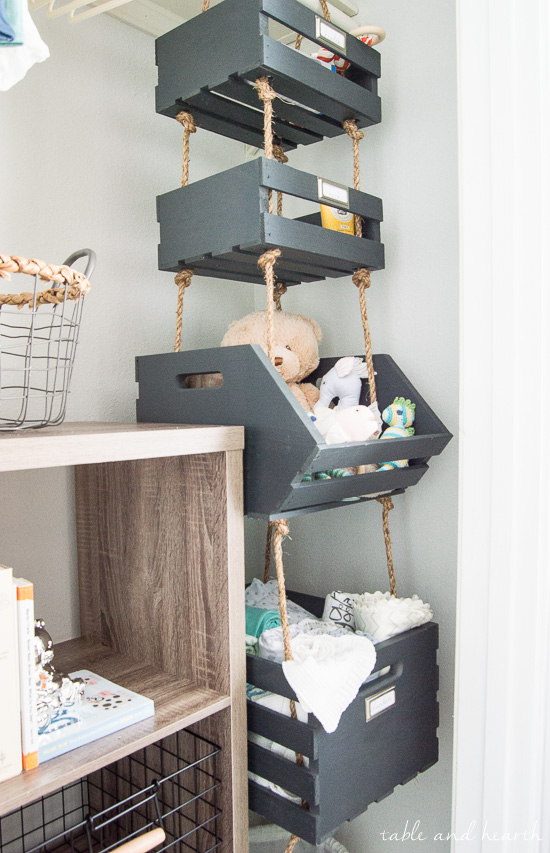
1. Hanging Closet Storage

This hanging closet storage by Table and Hearth has a such a cute look to it.
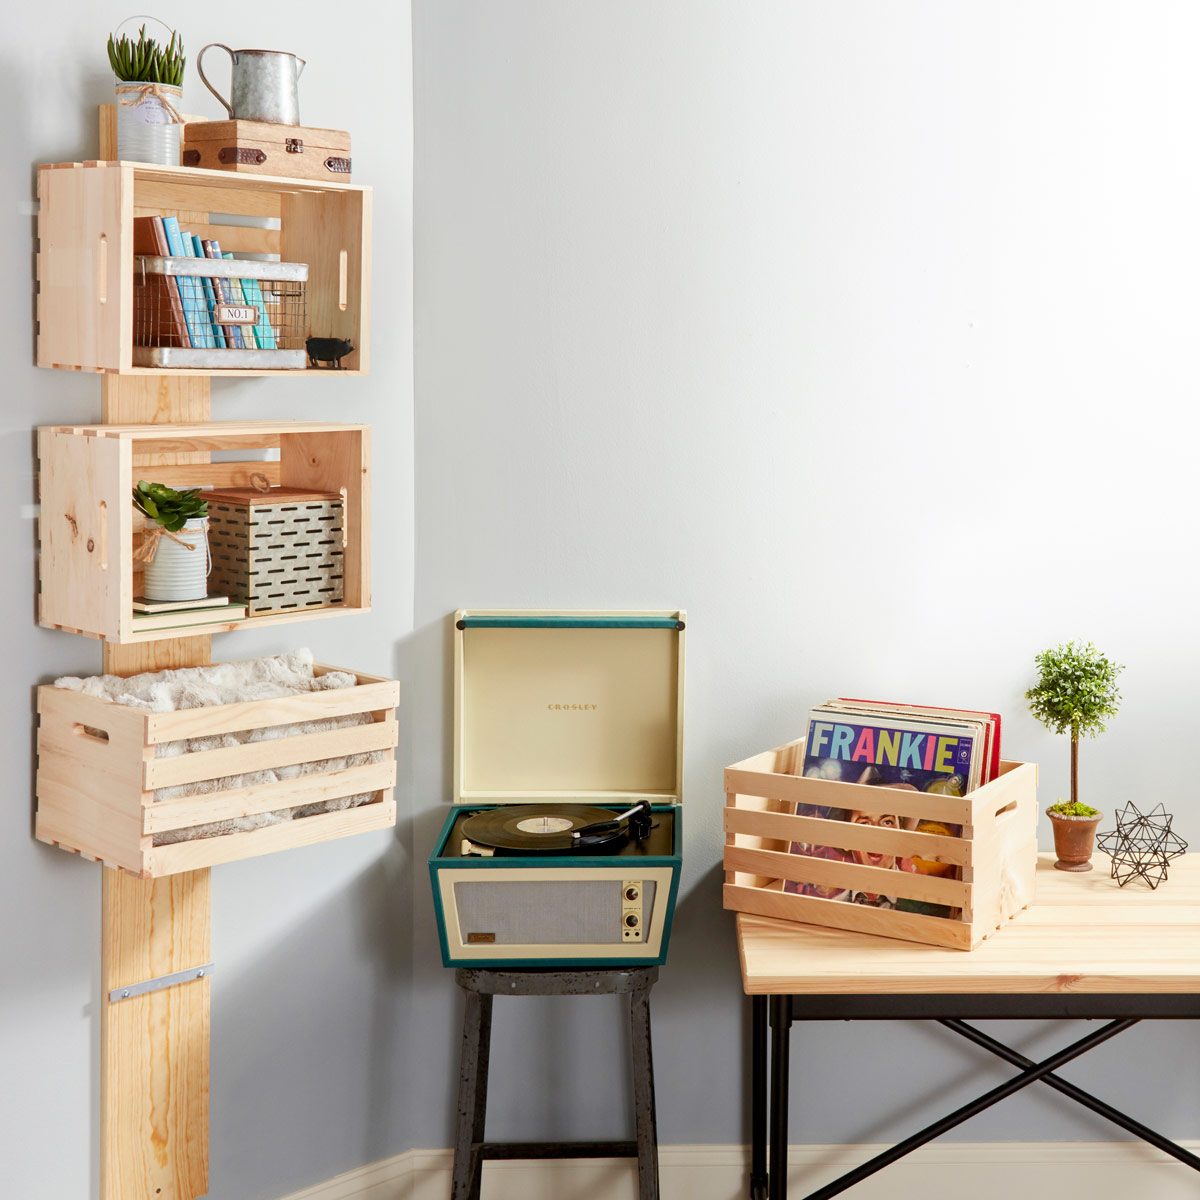
What a cool way to use vertical space! Hanging closet storage crates

2. Shelving

I’ve seen quite a lot of crates used for shelves, but this one adds a unique twist with the board used for anchoring. Check it out at Family Handyman.

easy wooden crate shelf project

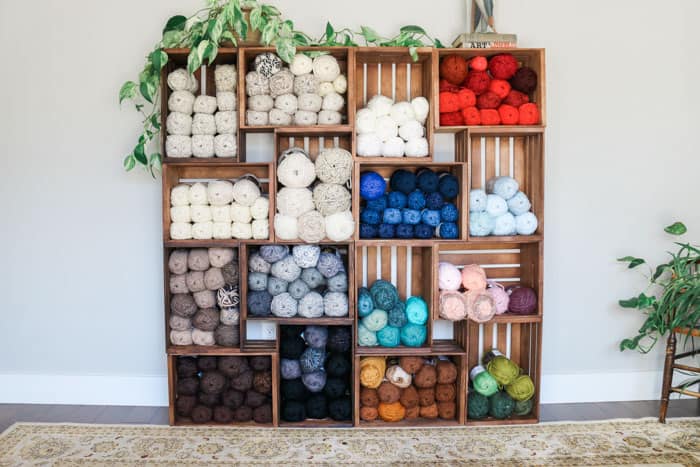
3. Modular Shelving Unit

It might be the pretty yarn display that pulled me in, but I love this shelving unit concept by Make & Do Crew. Look it up here DIY Yarn Storage Shelves Using Wooden Crates – Video Tutorial

This yarn storage changed my life! Use wooden crates to build an easy shelf to organize your yarn, craft room or books. Perfect for knitters, crocheters and weavers!

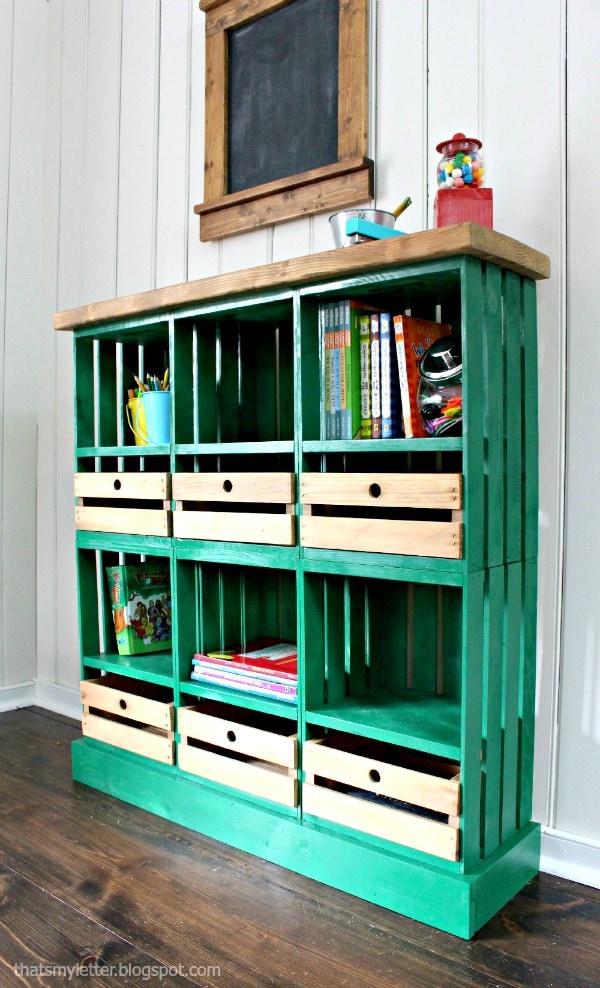
4. Sliding Drawer Crate Cabinet

Try your hand at adding some hardware with this crate cabinet with sliding drawers by Virginia Sweet Pea.


DIY Crate Storage Cabinet


5. Locker Cubbies

Jaime Costiglio’s locker cubbies are a great combination of simplicity and creativity to create a unique wooden crate structure. 


6. DIY Crate Lockers

This next idea is so fun! A simple addition of hinges and doors and it’s a whole new look. Get the info from Little House of Four on these DIY Crate Lockers.


How to build DIY lockers


7. Coffee Table

There are quite a few crate coffee table ideas out there. This one stood out to me as being more creative in addition to being rustically appealing. Get the info at Pallets: Pallet Furniture Ideas. 


pallet and crate coffee table


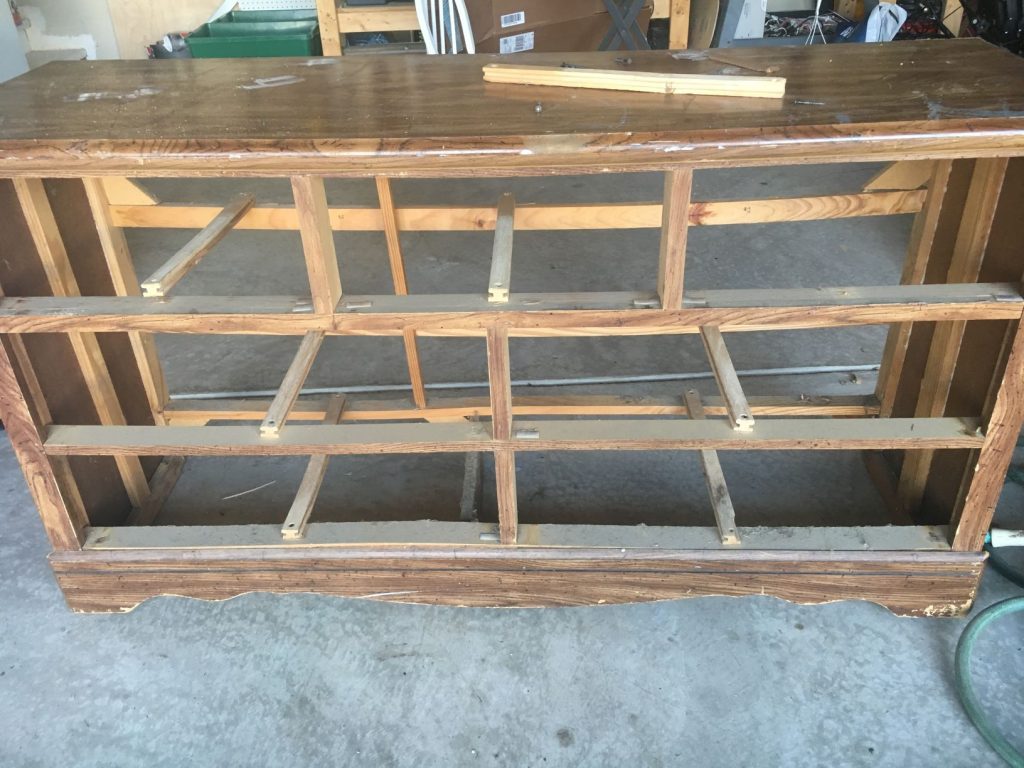
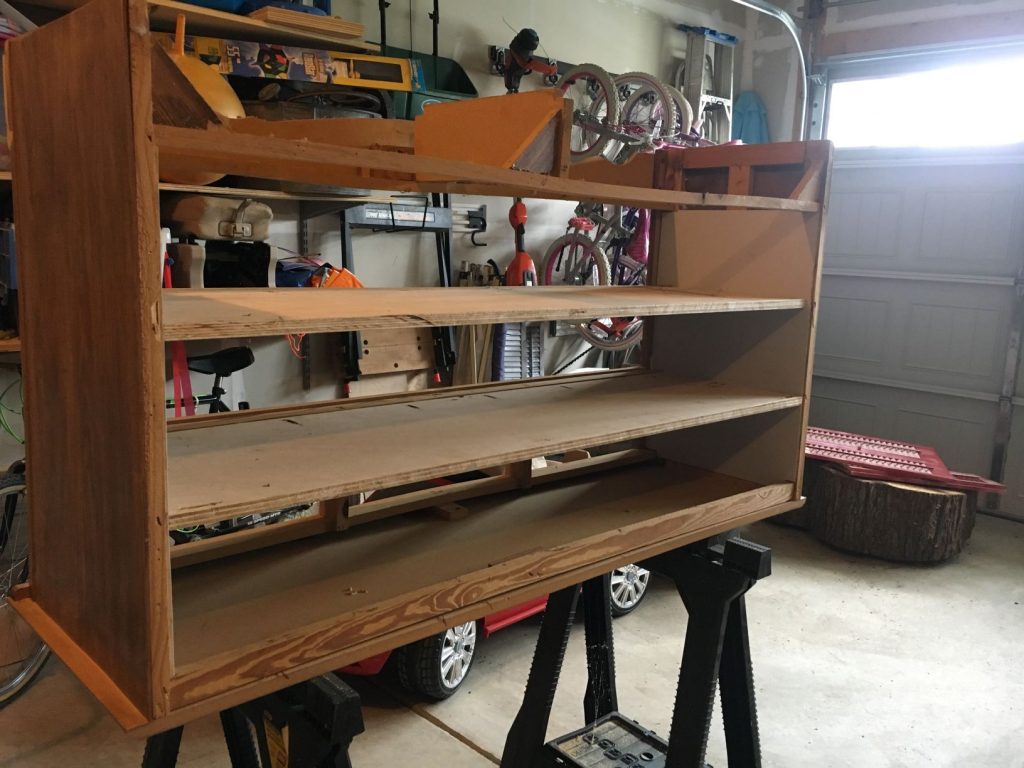
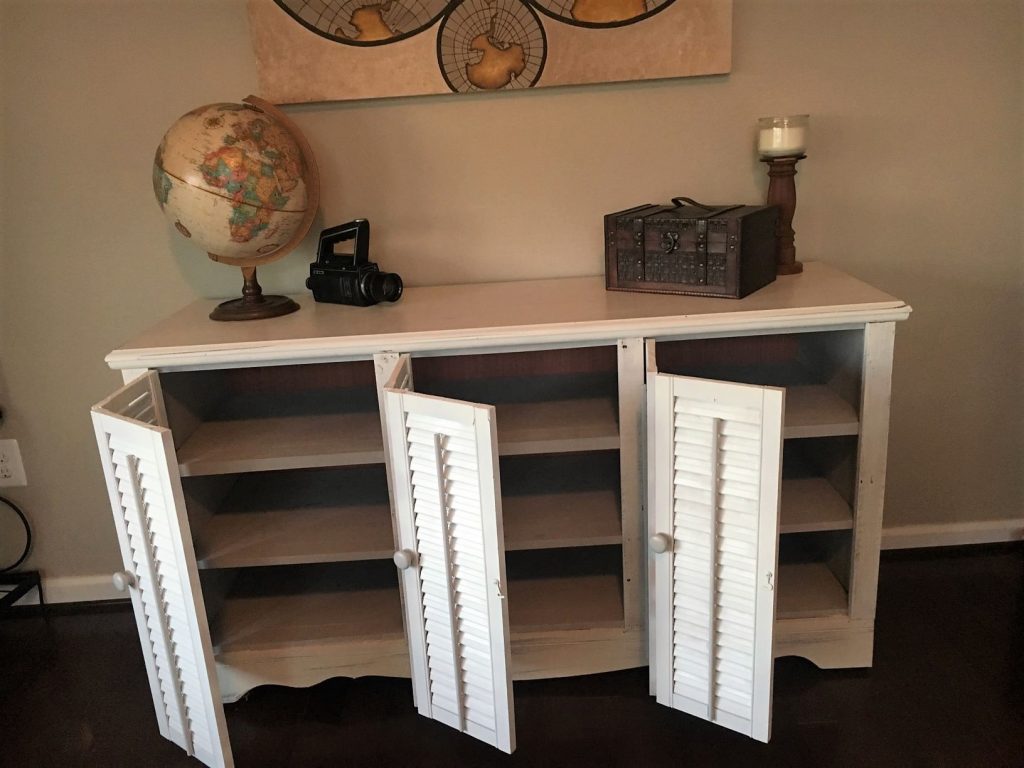
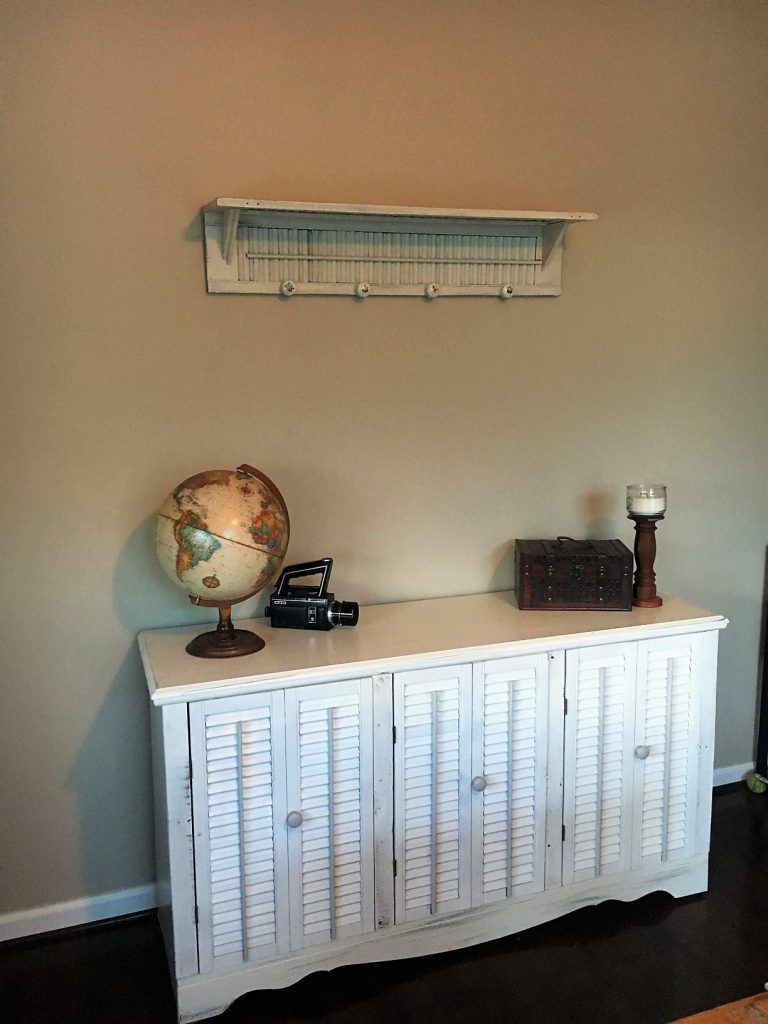
8. Shutter and Crate Sofa Table

Follow Bless this nest‘s lead and throw in a long shutter with the wooden crates for this oh so cute sofa table.


9. Cushioned Stools

When I saw this awesome simple yet adorable idea, I was bummed I hadn’t ever considered it before. An easy storage seating idea for your little ones. Get the details at The Biggest Much.
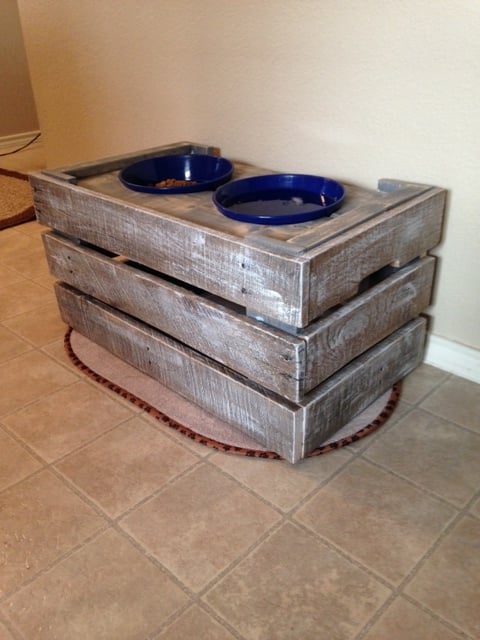


10. Dog Bowl Stand

This isn’t your typical buy a crate and rework it project but has all the appeal of the crate look. If your looking for a DIY project for your pooch, check it out at Ana White.
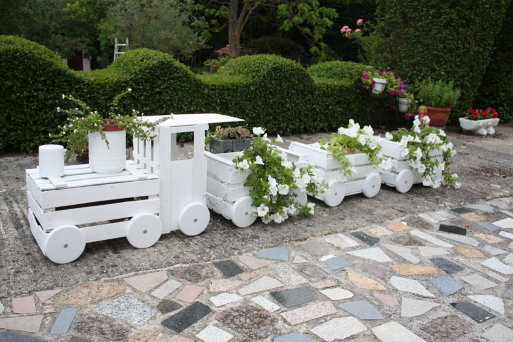

11. Train Planter

11. There are quite a few planter crate ideas out there. I choose this one for its creative concept. Definitely not something everyone has room or desire to do, but it’s certainly appealing to see. Head over to DIY Wood Crate Train Planter Tutorial for the details.

DIY Wood Crate Train Planter Tutorial

12. Dog Bed

The little sleeping pomeranian kind of steals the show in this picture. If you’re able to look beyond that cuteness you’ll definitely appreciate the simple and appealing dog bed concept crafted from a store-bought wooden crate. If you want the details, check it out here Little Things.
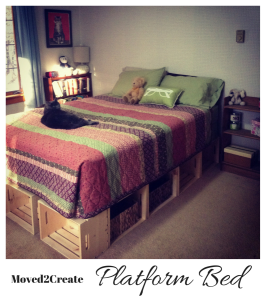


DIY crate dog bed

13. Bed Platform

I’ve been looking at ideas for bed frames for my daughter and came across this interesting crate bed platform by Moved to Create. 
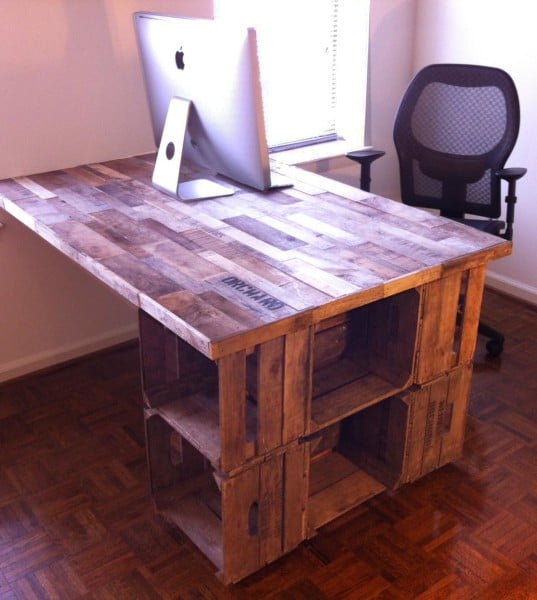
M2CBedDone


14. Desk

With virtual school in full swing, you can’t go wrong throwing together a desk like this one. Take a better look here Apple Crate Desk.

Apple Crate Desk


15. Closet Shelves

I had overbought crates when I was doing some building, so I decided to repurpose them in a simple fashion in our small pantry closet. I just stacked them up and they were ready for use. 


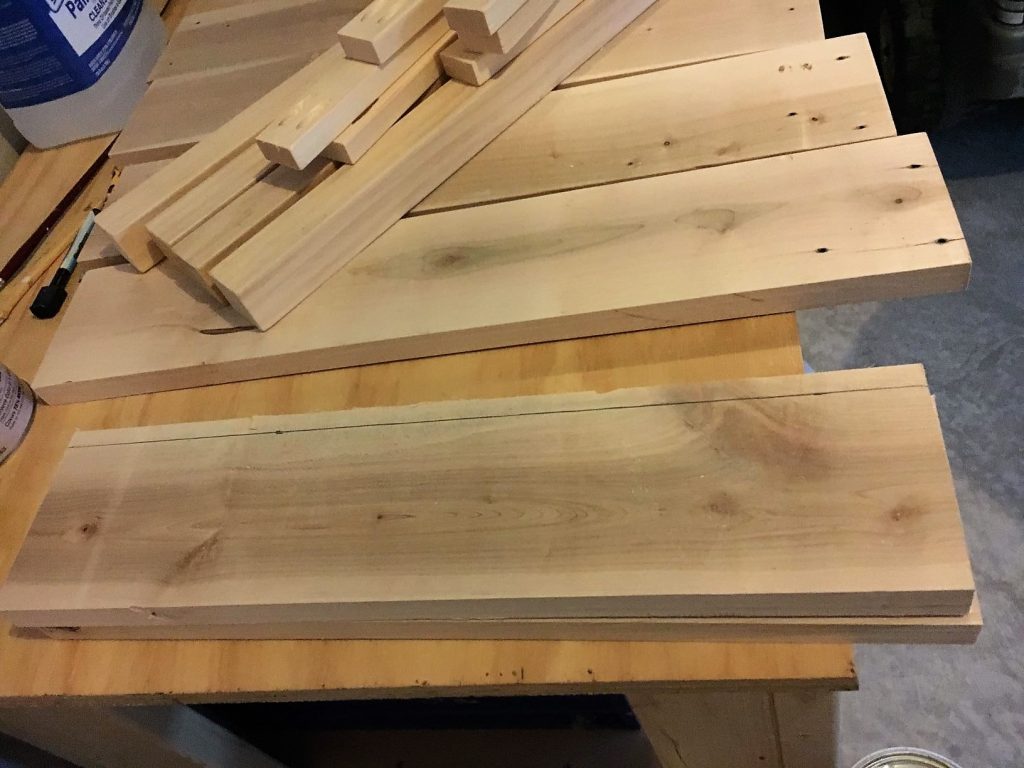
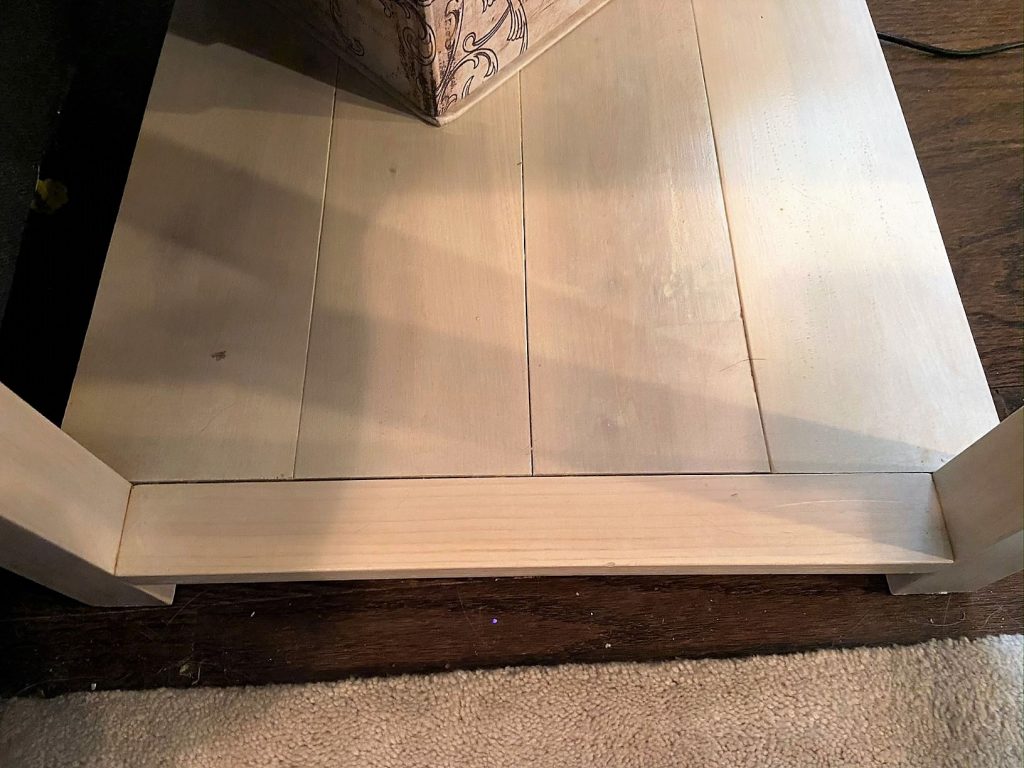
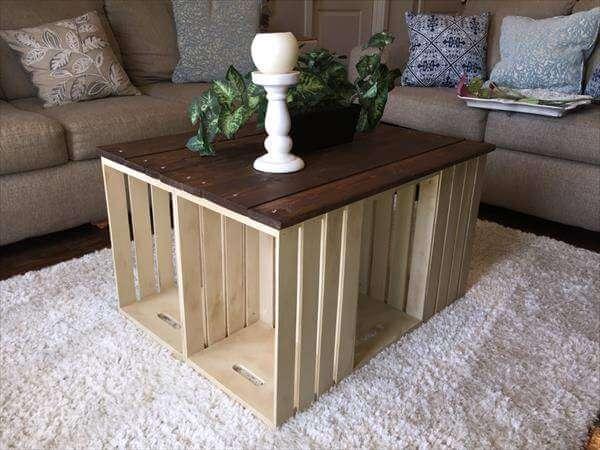
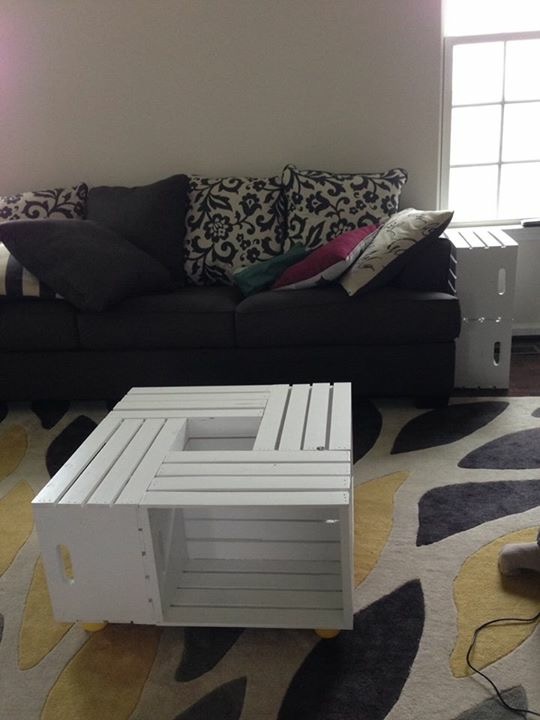
16. Square Coffee Table

When I was trying to figure out what to do for a coffee table in our new living room, I scoured Pinterest for ideas. I loved the look of this coffee table and went about making it. I also did a matching side table. 


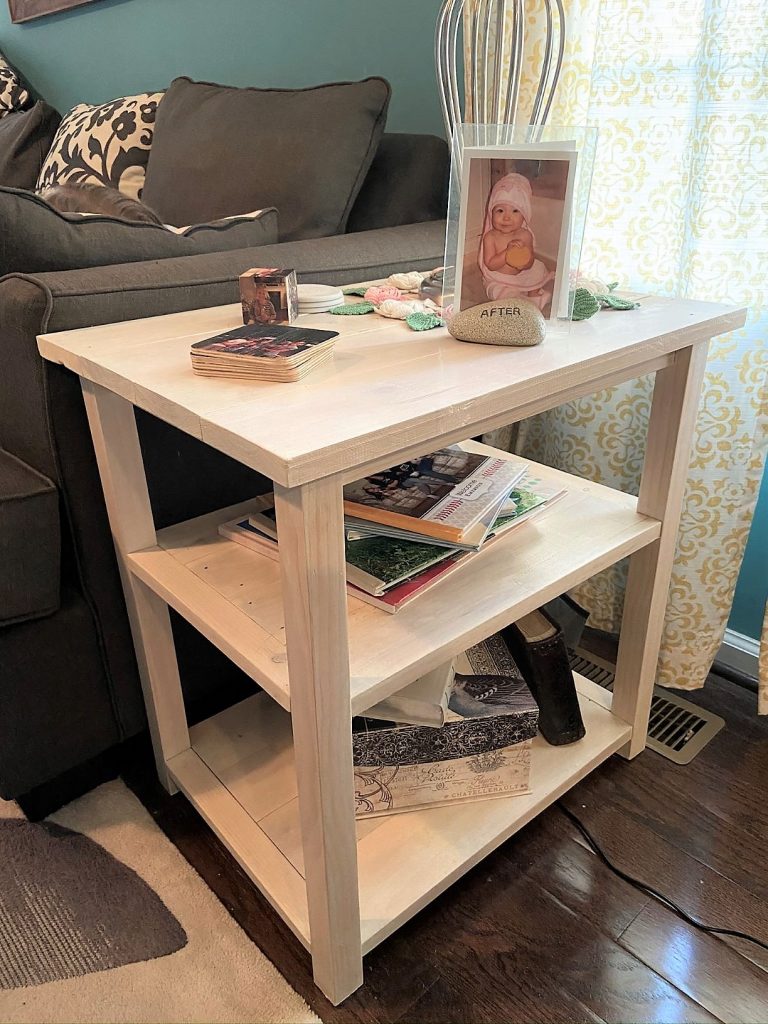
17. Stuffed Animal Storage

The coffee table ended up being much too small for the space. I opted to disassemble it to remake it into a much needed stuffed animal storage shelving system. These days it doesn’t house so many stuffed animals. Check it out in the new teen space.


18. Laundry Room Storage

I’m looking to spruce up my small laundry room. I saw this cute idea on the Home Depot blog for laundry storage space. As a side note, I might go ahead and decorate my washer and dryer with some electrical tape to get this appealing look.
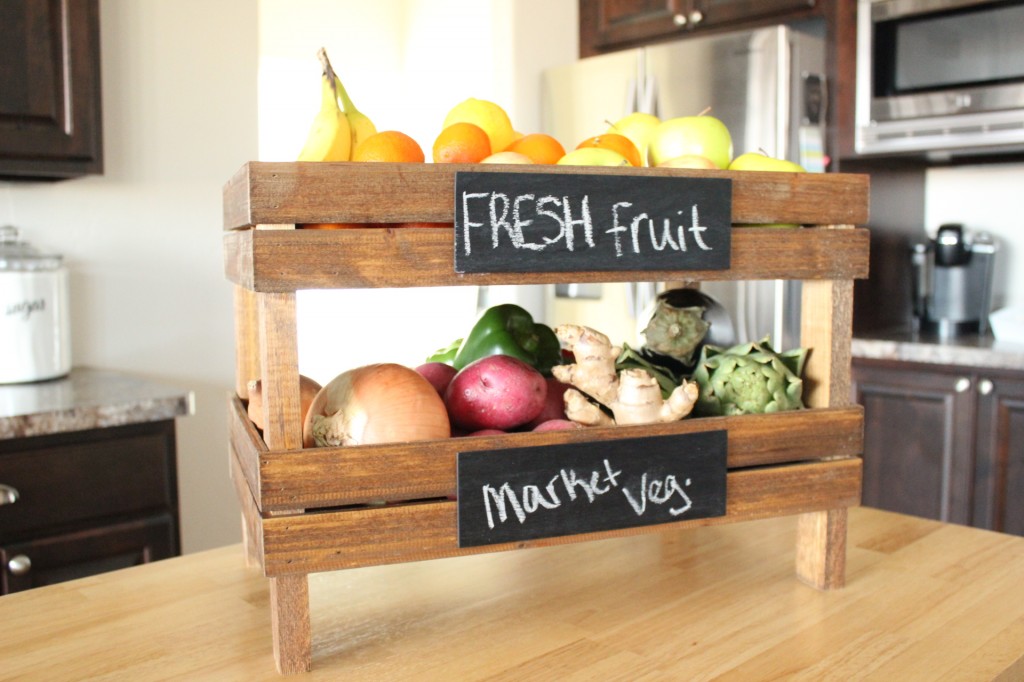
Easy and Inexpensive Laundry Room Makeover

19. Fruit Crate

If your like me and looking to wanting to switch out your fruit bowl, go no further. The Wood Grain Cottage can show you how to craft your own fruit crate.
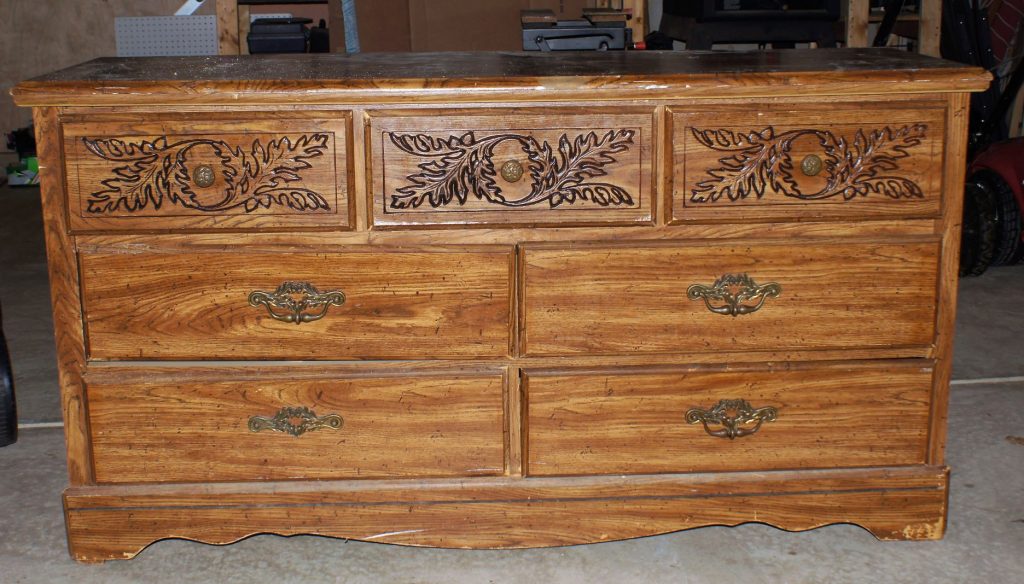
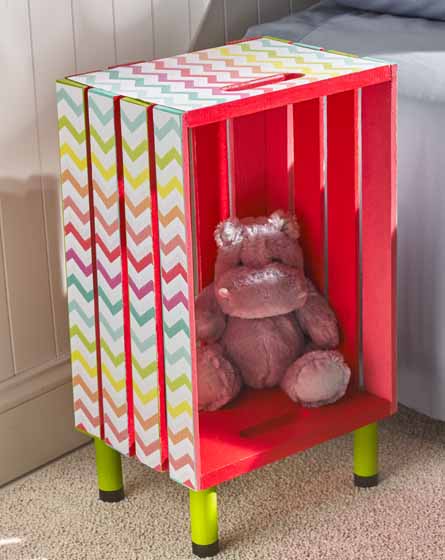
DIY Stackable Fruit Crates I The Wood Grain Cottage

20. Nightstand

Check out Plaid for this simple nightstand with a pop of color and pattern.

Kid's Nightstand

I hope you found some ideas to fit some of your home decor needs. Thanks for checking out the list!

A Straightforward DIY Living Room Table Set just for You

While trying to decide on the direction for our new living room that wouldn’t break the bank, I was inspired by pins on Ikea furniture hacks. One, in particular, struck my fancy because of its simplicity and look. I ended up finding a discounted Hemnes white coffee table which was the start of this living room table set project. If you’re looking for a simple project that will impress your friends, then follow along with me.

Personalizing Ikea

Supplies for Ikea top:

  • 3- 1x6x8
  • 1- 1x3x6
  • 1″ Wood Screws

Supplies for Side Table:

  • 1- 1x2x6
  • 1- 2x2x8
  • 3- 1x6x8
  • Stain
  • 1 1/2″ Wood Screws 
  • Kreg jig & screws
  • Wood Glue

I assume you know how wood measurements work, but just in case, here’s a nice breakdown at Arch Toolbox. Wouldn’t it be so much easier if the name matched the actual size?! I was given some poplar boards from our builder that were perfect for the coffee table and as the main part of a coordinating side table. I used pine for the store-bought wood for it’s affordability. In general, pine is a softer wood, so choosing this option could mean finding nicks and scraps in the wood at some point. Poplar is a harder wood that will take more of a beating.  

Getting started on this Living Room Table Set

This portion of the project involved ripping the boards into 6 equal pieces at 4 3/4″ x 41 1/4″. You have two options on how to connect them side by side; doweling and pocket holes. Pocket holes are easier to do but can be tricky to ensure the boards stay completely flush. Doweling needs to be pretty precise, so it can be tedious and slightly difficult to do by yourself. I chose to go with the pocket holes route for both tables here. I also decided to sand down the corners of each board to ensure there was a distinction between the boards after they were secured together.

living room table set: ikea update

After the long middle boards were screwed together, I cut the end boards to size at 2 3/8″ and 29 1/4″. I used the Kreg jig to create the pocket holes to attach the ends. With the top together, I stained it and the sides with a white stain followed by three coats of clear polyacrylic. I wanted to keep the top white to match the table and go with the white, gray, yellow, and teal color scheme of the room.

living room table set: new top

To finish this easy table upgrade, I just needed to screw the wood top to the coffee table. This was simply done by turning the coffee table over to expose the bottom. It was best to clamp the top to the table to avoid a gap between the boards. I chose not to use glue and stick with just the screws. To make sure the wood wouldn’t splinter with the wood screws, I pre-drilled the holes.

Side Table

Cuts

  • 8 – 1″ x 4″ x 19″
  • 4 – 1″ x 4 1/2″ x 24″
  • 6 – 1″ x 2″ x 13 1/4″
  • 2 – 1″ x 2″ x 19″
  • 4 – 2″ x 2″ x 24″

The width of the legs and shelves is 14 3/4″ and the height of the side table is 24 3/4″.

The side table consisted of cutting the wood to size and using the kreg jig. I didn’t care to have to do more cuts than necessary, so my schematic limited the need for notched cuts by utilizing the 1×2’s.

living room table set: boards for side table

The poplar boards I used also needed to be ripped to size for the two shelves. I used a circular saw with a guide to cut the four boards, which works well enough. I would actually much rather have a table saw to use that would ensure an absolutely straight cut. My woodworking projects would be so much easier with a few extra tools, that’s for sure, but it just goes to show you don’t need all the special tools to complete a project. After cutting all the boards, sanding them smooth and making the pocket holes with the kreg jig was up next. 

Almost finished

Pocket holes galore. I used pocket holes to connect all the pieces together as you can see below, making sure to screw the shelf into all four legs and the 1×2’s. With all the hard work done, it was finally time to stain it. Rust-o-leum Antique White stain applied with a white rag gave it the finish I was trying to achieve. It needed three coats of stain to give it a consistent white. You generally shouldn’t need to do that many coats, but I felt it was warranted with this one. The most important point when staining is to go with the grain and not to allow it to pool in any one spot. 

And that’s all that is involved with creating a simple side table and giving an Ikea table an upgrade. If you’re looking for another easy project, check out Revamp a Composite Bookcase. It uses 1×2 pine boards just like some of this one.

living room table set top
living room table set bottom shelf

Completed Living Room Table Set Project

living room table set finished side table
living room table set: finished idea table

*This page contains affiliate links. This means if you use one of my links to make a purchase, I will receive a small commission at no additional cost to you. Thank you for supporting Cathartic Crafting!

Dresser Makeover into a Surprising Shutter Buffet

So one day I was surfing the Facebook marketplace as I often do and saw a free dresser posted nearby. I already had an antique kitchen hutch, old windows, a bunch of shutters from my mother-in-law, a tall dresser, and a huge log taking up property in my garage. The picture wasn’t great but it looked worth a dresser refinish project since it was free. My husband agreed to pick it up for me while I was at work. The next text I got was that he had indeed gotten it, but the dresser was in terrible shape.

free dresser ready for dresser refinish

I figured he was being a bit overdramatic, but when I got home to look, saw he wasn’t kidding. The previous owner’s cats had taken up residence inside the drawer, shredding many of them and leaving behind a lovely aroma. It was gross and I didn’t feel like having to get the scent out and replace the drawer bottoms. He asked if I was going to toss it, but I decided to gut it instead.

Start of this Dresser Refinish

Time to Gut It

dresser refinish after gutting

I pulled out the drawers and tossed all but one, which now holds roller skates in my garage. I pulled off the disgusting back panel, the drawer bars and was left with a fresh canvas. The stack of small shutters inspired me and lead the whole dresser refinish after I decided to nix the drawers.

Dresser refinish gutted
Dresser refinish in progress
My messy garage only seems to stay clean for short periods of time.

After gutting it, it was time to cover the inside and add the shelves. I used 1/4″ plywood for the sides. (As seen below) I used a circular saw and a jigsaw to cut it to size and make the notches for the front crossbars.

Next up: Shelves

Dresser refinish with shelves

For the shelves, I used some 3/4″ plywood that I already had leftover from another project. After measuring it to size, I used a circular saw with a guide to cut it more easily. As I said in another post, I lack a lot of the tools to make tasks easier. I would love to get a new table saw at some point, because I find cutting a completely straight line with a circular saw quite difficult.

I used a Kreg jig I ‘borrowed’ from my parents years ago to create the screw holes to be able to attach the shelf to the supports.

This is what a kreg jig looks like for those who don’t know. Thought I’d save you a google search. 😉

Dresser refinished with all shelves
Yep, in the background are the shutters and log I referenced. I had been desperately trying to find someone who would be able to cut it into two pieces and coming up empty.
After getting all three shelves screwed into place, it was time to paint the shelves and outside. I used a light gray chalk paint I had leftover from a dresser refinish for the inside. I liked the slight variation in the gray and white. (Anyone recognize that carpenter benchtop?! Referenced here in my platter post . I get tons of use out of it.)
To begin with, the shutters were too long. I used an arm saw to cut off length on the end. I ended up having to wood glue and nail the middle bottom wood pieces back into place. Time to use some white Rustoleum to spray paint those bright red shutters. It took 3ish coats of spray paint to get an even finish.

Time to Include Pallet Wood

For the Shutter anchors/separators, I used pallet wood cut to size. I had four cut and ready to attach another day. When I came back out the next day to complete it, I’d found that the fourth board on the right end had been taken. None of my girls confessed to it, so I had to assume it was a neighbor boy who tended to find his way into my garage…or backyard. I was pretty annoyed because of the extra work to rip a new board.


What I don’t seem to have taken a picture of was the routering I had to do on the top edge of that bottom front panel. The dresser had a rounded edge that needed to be flat for the shutters to rest on for a finished look. If I hadn’t cut it off, it would have looked quite odd. One of my first routering projects was an Wood Platter. I’ve come a long ways since then.


After I attached the pallet wood strips with wood glue and a nail gun, I was ready to paint.

Bring on the Paint

Typically, I use Fusion Paint, but decided to give this milk paint a try. I used my Michael’s coupons to get a good deal (I can’t not) on a surface primer and a white milk paint for the outside. I wasn’t impressed with the way it coated, so I haven’t used it again.

Hinges from good ole Lowes came only in gold and silver. I decided to use some spray paint I had on hand for a more bronzey brown color.

Not pictured was the drilling of holes in the shutters to place the spray-painted dresser knobs. I had old knobs from a previous dresser refinish that were perfect for this look. You can see them in the photos below.

After hours and hours of work, there came a day that I was ready FINALLY ready to finish by screwing the hinges into the last two shutters.
All there was left to do was bring it in and set it up! I was really surprised by how much my girls liked it and pleased with how impressed my husband was with the end result.
Dresser refinished into shutter buffet with doors open
Refinished Dresser
I made a shutter shelf to match but we kept the map up there for a more polished look.

Dresser Refinish Before and After

Isn’t it crazy how much you can transform an object just by generating an idea in your mind and putting your body into action?! The added bonus of woodworking and crafting is that it’s helping your mind escape and practice focus. It’s flexing those mental muscles you may not get to use at work or when you’re running around with your kids. If you are anything like me, you also feel more at peace when you are able to check out in this way. Here’s to finding inspiration and time to ‘check out’ for some you time. You’ll be happier when you do.

*This page contains affiliate links. This means if you use one of my links to make a purchase, I will receive a small commission at no additional cost to you. Thank you for supporting Cathartic Crafting!

DIY Earring Holder Frame to Organize your Jewelry in Style

This blog was founded on the belief that you don’t have to spend a fortune in order to have beautiful things. I am a doer of ‘all things’ and have a passion for trying new things. I am learning some things as I go and sharing my experience with you. My mission is to show you that if I can do these things, SO CAN YOU! I’m starting things off with an easy DIY project, a Framed Earring Holder. Very few steps and a functional result. If you have earrings jumbled up in a jewelry box, find a frame to make into an earring holder along with me. No special skills required.

Materials:

  • Empty Frame
  • Hot glue gun & glue
  • Aluminum screen
  • Ruler/tape measure
  • Good pair of scissors
  • Spray paint or paint of your choosing

Option 2 with a chalkboard: Add

  • 1/4 in plywood
  • staple gun
  • staples
  • chalkboard paint
  • Paintbrush
  • Skinny Sticks
  • whatever saw you have available to cut the plywood

Years ago, I made a smaller earring holder, but my earring collection had overgrown that one. It was definitely time to get a make a new one! On a day my kids were out with my parents, I followed a random thought and ventured to Second Chance in Baltimore City. For those in the area, it’s a neat place to find tons of random stuff; from statues and sinks to frames and doorknobs. It’s definitely worth a trip if you’re in the market for second-hand items at reduced prices. I found a few frames and toy chest to redo for just the right project.

#toosmallearringholder
I had to fix a chip in the frame I was using, so I used a bit of wood filler to fill the hole. (bottom left) I’m guessing you won’t need to do the same, so skip on ahead. After fixing the chip, I spray-painted it with a dusty rose color.

Screen time

Start by measuring the inside lip of the frame (i.e. the widest and longest part of the opening when looking at the back of the frame). This is the size of the aluminum you need to cut with your good scissors.

Question is; what do you do with all the extra?……My Answer; store it in the garage with all the other extra materials….(and drive your husband crazy).

Since the aluminum screen already has a built-in square, you can use the vertical and horizontal lines to cut a straight line. Next up, heating up that glue gun with extra glue sticks at the ready. I’m constantly amazed at how quickly I can go through a stick.

FYI: my nails don’t normally look so nice. I was giving powder dip nails a try. I’d recommend them as a long-lasting manicure. That nail dip lasted 4 weeks for me and only needed to be redone because of the amount of regrowth at the bottom. I was completely impressed with it. If you want to learn more, check out this quick video on pros and cons.
You need to make sure to pull the screen tight while you are gluing or stapling. A sagging screen is not preferable for hanging earrings.

Final Product

That’s all I had to do to finish this frame. Time to put your earrings in and hang on the wall. Voila!

Frame Earring Holder and Chalkboard

Option 2 (and a half):

The first step for this option was to cut a piece of wood for half the opening. I cut a piece of 1/4 inch plywood to half the size of the opening, then painted it with a couple of coats of black chalkboard paint. I cut the screen to the size of half the frame with a bit of overhang to attach to the plywood.

Option 2 to attaching the screen is buying some skinny sticks (thanks for the find Walmart Skinny sticks) and stapling them. I really liked this method better than the glue. They fit perfectly within the inside of the lip and it was easier to attach then trying to hold the screen taught while hot glue dried. Can you say “small burns”?
Look how nice and tidy the staples and skinny sticks are here!

Frame becomes earring holder.

How easy was that?!

And that’s all she wrote. Two quick and easy projects to help you organize your earring collections. I hope the instructions were sufficient, easy to follow and that you end up with a great product. There’s never time like the present, so get started on your project today. If you’ve got more frames you’re hoping to give a new look, hop on over to https://www.catharticcrafting.com/more-fun-with-frames/ for some inspiration. Happy DIYing!!

RSS
Follow by Email
Pinterest
Pinterest
fb-share-icon
Instagram

Are you interested in getting alerts and information on all things coming out of Cathartic Crafting?! Then go ahead and submit your info below:

Verified by MonsterInsights