Tag: Cardboard

The Ultimate Cardboard Gingerbread House for Christmas Crazed Kids

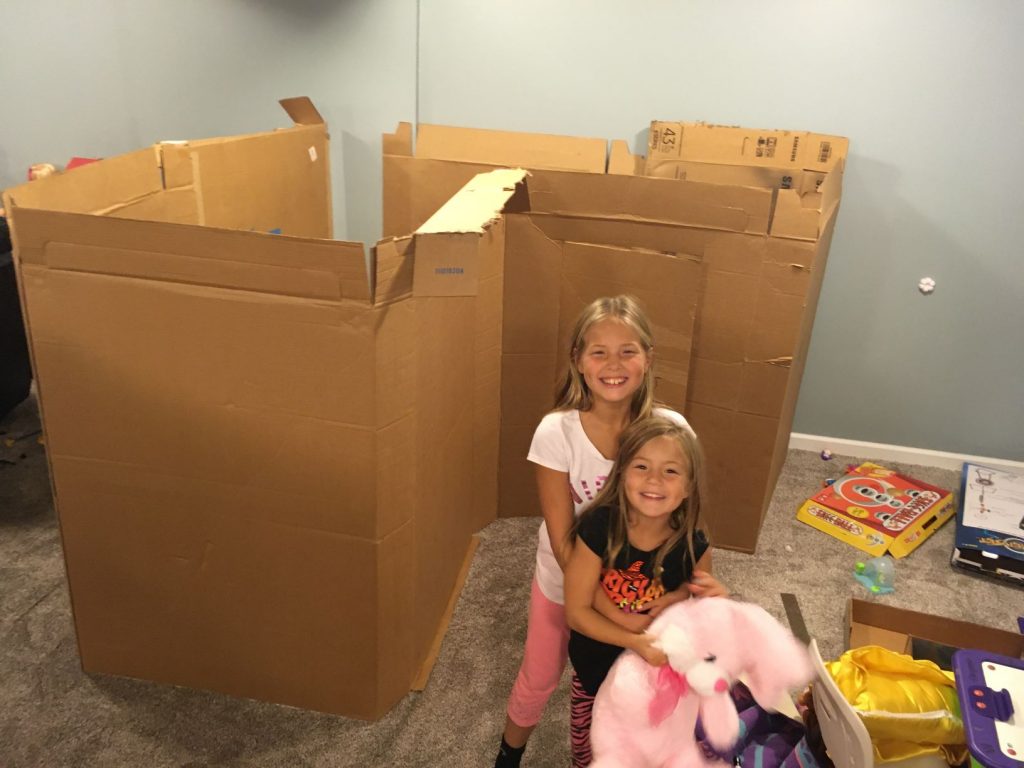
As some of my other posts show, I have a strong love for cardboard. It’s easy to find, it’s free, it’s got a nice balance of flexibility and strength, fairly easy to manipulate, and it’s recyclable. I mean, with all those great characteristics, who wouldn’t love it?! I started just as many other parents, by providing the big box to the child, allowing their imagination to run wild. Since I love allowing my imagination to go wild, that only lasted so long for me. When we moved into our current house, I finally had the open space to run a little wild.
I made my first cardboard gingerbread house about 5 years ago. It stayed up well over a year before we took it down. My youngest spent many hours playing in that little house and why I recommend you make one of your very own if you’ve got the space. I hope my ideas help to inspire your own!

Now onto the Build

Materials:

  • Big and small cardboard boxes
  • Paper towel rolls or wrapping paper rolls
  • Contact paper
  • Toilet paper roll
  • Egg
  • Sticks
  • Scissors and/or razor
  • Hot glue gun and glue sticks (check out this link for a cordless hot glue gun, I know what I’m putting on my Christmas wish list!!!)
  • Paint and paintbrushes
  • Fake snow or whatever Christmas element you’d like to add

To start, it’s really up to the boxes you have on hand to determine your eventual house shape. Hot glue is a wonderfully quick and sturdy option to glue your pieces together. Thankfully, I had huge boxes from a refrigerator, a washer, dryer, and couches. I’ve found it’s quite easy to cut at the corners by running a razor down through it. 

I painted the wrapping paper rolls with the candy cane strips before cutting them open in one straight line. This was to open them up for gluing on the corners of the house/box. I truly loved the effect. We made some peppermints out of other bits of cardboard and hot glued them onto the front. From there, it was just a matter of painting the house front as we desired. 

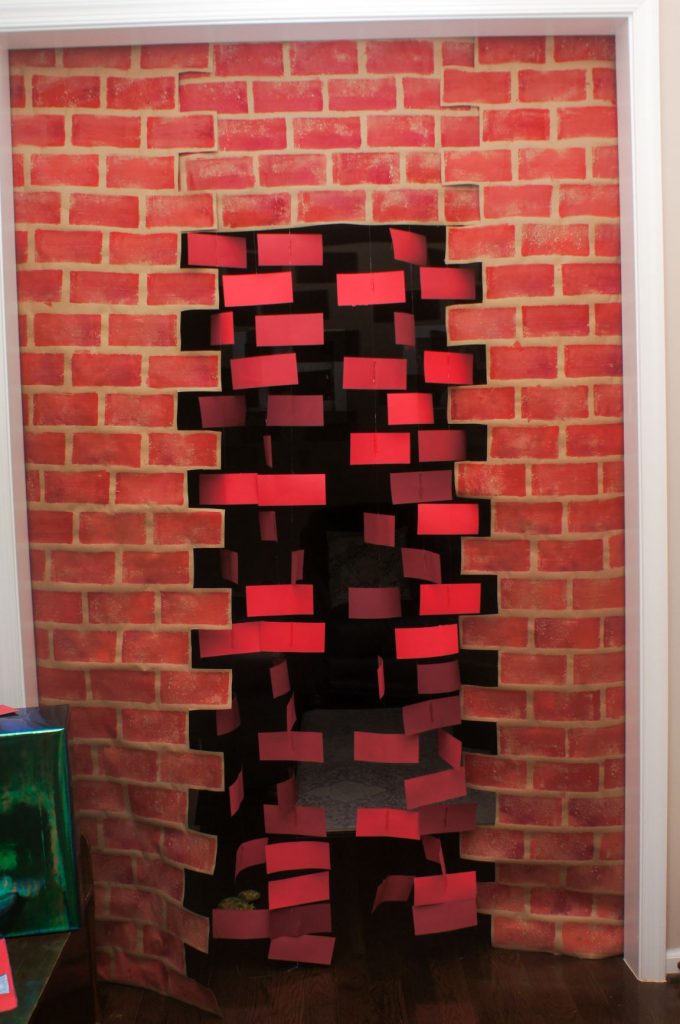
The Front Door: the magical entrance to an imagination space

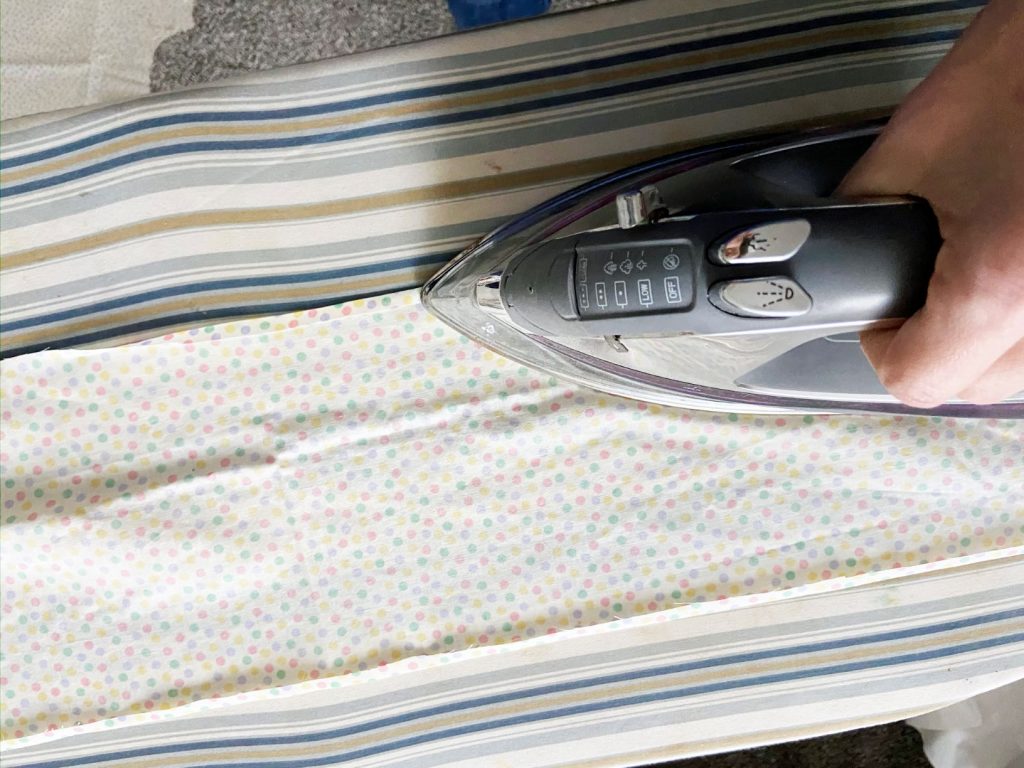
For the door, I cut out an open panel to let the girls have a spot to look through while in the house. To give it a personalized touch, I used contact paper so my girls could create a little winter scene. I sealed it with a backside of contact paper and glued it to the back of the door. 

For the handle, I knew I wanted to make it able to turn and “lock” into position. Below is what I came up with based on what I had on hand. My motto is generally to use what I have rather than look to buy something. I used a toilet paper roll and two wooden dowels I had for cake stability or some other craft project. It was easy enough to cut the hole for the toilet paper roll and holes for the sticks that would keep the door in place. The problem was that the toilet paper roll wasn’t strong enough on the edge now to be crushed.

A bit of ingenuity

I came up with using an egg out of my fridge. I blew out the innards and then coated it in Mod Podge to seal it and give it some added strength. After that, I stuck the egg into the end of the toilet paper roll. Looking back, I admit it does seem rather odd, but it worked perfectly and lasted a really really long time. It wasn’t until we had some little boys over to play that one egg ended up crushed, cause, you know, BOYS. 

For the chimney, I used a white square cardboard box. It was easy to cut the bottom at the angle of the roof. Then, my oldest daughter helped me to paint the stone look of it. I used some super hard corner cardboard pieces (the kind that comes with appliances or furniture) as the roof seam. 

“He sprang to his sleigh, to his team gave a whistle,
And away they all flew like the down of a thistle.
But I heard him exclaim, ere he drove out of sight—
“Happy Christmas to all, and to all a good night!”

Clement Clarke Moore, The Night Before Christmas

Stepping inside this Cardboard Gingerbread House

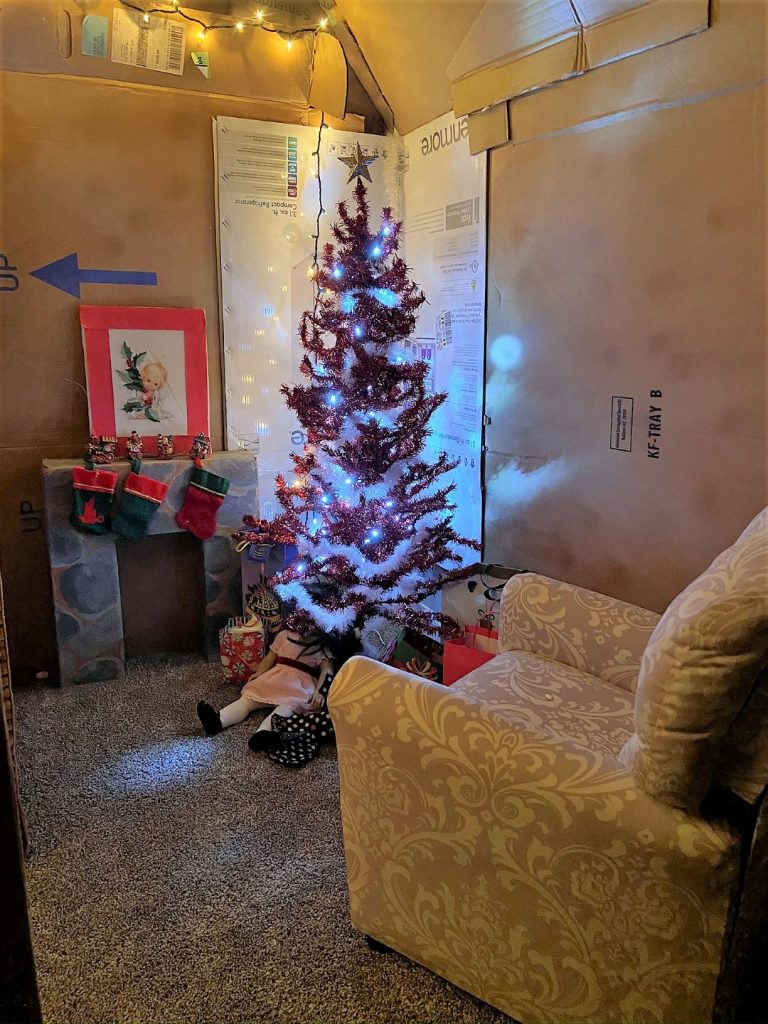
Obviously, a cozy Cardboard Gingerbread house isn’t much without a roaring stone fireplace. Using another super-stiff box, I cut it in half and then cut the front down the middle to be able to bend back for the fireplace shape. My oldest was then 7 and really enjoyed helping paint the stones. You can really see the concentration on her face here. Did you know crafting with kids can build their confidence? As they start to see the results of their work, it proves how much they can do just by trying. 

With the fireplace in place, it was only a matter of rolling up some brown cardstock into sticks and cutting and gluing some tissue paper together to create the roaring fire. There were cut off corner pieces needing to be repurposed, so I glued them to the corners as shelves. In the below photo, you can hopefully see I used some bent cardboard as roof supports to keep it solidly in place. It was easy enough to then tuck the light strings into the open spots. 

Just a few hours of crafting and engineering precision, created years of enjoyment for my three girls!

Upping the ante with Cardboard Gingerbread House #2

For my daughter’s 6th birthday, I made a Haunted Cardboard house for the birthday party. Since I’d put so much work into it, we weren’t about to take it down right afterward. Together, we spruced it up to turn it into another cardboard gingerbread house. Because I’m a bit of a hoarder, not really, just an avid “repurposer”, we were able to use the chimney and fireplace we’d created the first time around.

Join me on the Inside

Obviously, the square footage of this house was a great deal more than the previous one. The girls were able to go full-on Christmas on the inside. It was such a fun Christmas activity to get us in the spirit!

“Twas the night before Christmas, when all through the house
Not a creature was stirring, not even a mouse;
The stockings were hung by the chimney with care,
In hopes that St. Nicholas soon would be there…”

Clement Clarke Moore, The Night Before Christmas


*This page contains affiliate links. This means if you use one of my links to make a purchase, I will receive a small commission at no additional cost to you. Thank you for supporting Cathartic Crafting!

How to Throw a Magical Harry Potter Party


My oldest and I were (and still are) true Harry Potter fans, so we planned years ahead that she would have a Harry Potter Party theme for her 11th birthday. I was beyond excited about the idea. I started my Pinterest board and made it my mission to create a fantastical version for my daughter. With her birthday being in mid-September, I started with preparations in July with the wands. My husband may have asked a few times how long I would be working on making wands, but you can’t mess with the artist’s methods and desires. Below is the full rundown on our Harry Potter Party. 

We blew up white balloons and drew owls on them with Sharpies. We attached an owl balloon to each invitation and hand-delivered it to each house for a truly authentic experience.

Harry Potter Party: The Journey begins with Platform 9 3/4

“For in dreams we enter a world that is entirely our own.”

Albus Dumbledore

Diagon Alley

I used the same technique for both Platform 9 3/4 and Diagon Alley. This involved shades of brown and shades of red, a paper plate, water, and a sponge cut to brick size. I put a mix of the cheap acrylic paint shades on a plate and thinned them with water in a syringe. The sponge would absorb the color before I stamped it onto the curtain. I used a curtain panel I found at Goodwill for Platform 9 3/4 and butcher paper for Diagon Alley. 

Using cardstock in shades of red, clear fishing wire, and hot glue I made the rotating ‘bricks’ to keep with the authentic Harry Potter Party feel. This may well have been my favorite part of the whole party.

Quick Stop at Gringotts Bank for some Spending Gold

Each wizarding student received a gold coin from Gringotts Bank. On the back of the coin was a unique Harry Potter image. I had printed off images onto one piece of paper and taped them to the back of the coins. This was intentional so there wouldn’t be fighting at Eeylops Owl Emporium.

Eeylops Owl Emporium & Magical Menagerie

In order to keep party costs as low as I could, I asked family to help me check out Goodwill stores for good condition cats, owls and frogs to stock the menagerie. Now here is where the coins came into play. I picked a pet out of the stock and would call out the Harry Potter image I’d placed on it. This matched with the coin. I knew that kids would likely like specific animals and didn’t want to have them fighting over the same one. This pet was one of their party favors as well.  

Monster Book of Monsters at Flourish and Botts

For the full tutorial on my DIY Monster Book of Monsters, check out the instructions here.

Ollivander’s Wand Shop

There are definitely lots of options for you to pick from when it comes to wands. Premade is always an option, but if you’re like me, you enjoy the opportunity to express your creativity and save some money at the same time. I used Long Cooking Chopsticks as the base of the wand. From there, I used a variety of clay, hot glue, spray paint, and paint to create my own wands. The only one I made true to Harry Potter was the elder wand.

My mother in law happened to have a tall wide vase for me to use for the wand to choose the wizard. I used some purchased fairy lights inside the vase and left the on/off switch outside of it for me to be able to control the light. Each little wizard came up to pick a wand. They would continue to touch different wands until the lights lit up to indicate the wand had chosen. It was great fun. 

On to Hogwarts and the Sorting Hat

I seemed to do a fair bit of paper Mache these days. My sorting hat may very well have been the kick-off to that trend. Cardboard served for the brim, butcher paper to shape the point, then newspaper and flour-water mixture as the glue. I rejected not looking at a picture of a sorting hat while doing the face, but it is what it is. It also ended up being slightly small but worked out. 

The Great Hall

I bought battery-powered candles to hang from the ceiling with fishing line and tape.

I called each wizard to the chair and place the hat on their hat. There was a blue tooth speaker behind the chair connected to my phone. Based on the birthday girl’s list of picks, I played the particular Youtube bite on the Wizarding house selection. 

Classes Begin

With the wizards sorting into their houses, it was time for classes to begin…

I bought this Marauder’s Map for my daughter. If you really want to up your game though, check out this one: 

Herbology

For Herbology, I bought clay and tiny pots for the wizards to make their own mandrakes. They did a great job with them. I baked them in the oven while we completed the other classes. 

Live Portraits

We were cleaning out a storage room at work which had started to mold. It was just my luck that one of those items that had significant mold was a large painted picture with a magnificent frame. They were going to toss it, so instead, I took it home to take the painting out and repurposed it. It was a perfect set up for some live motion photos of each youth. It’s one of my signature party favors to include a photo of each youth with the theme. Just like in my detective party with the arrest photo.

I did a photo and a boomerang photo as they finished up with their mandrakes, which helped fill in time during the transition to Potions class.

Potions Class

This was supposed to be a growing snake, aka Basilisk, but I can’t say that it really worked very well. I was fairly worried I would set off the sprinklers.

Professor Flitwick’s Charms class

Wingardium Leviosa

Using their wands, they have to say “Wingardium Leviosa” and keep the balloons up as long as they could. The wizard who was able to keep it up the longest was the winner. 

We rounded out the classes with a games tournament. They sorted into their houses and played board games until their was only one winner for each house. Then the house winners, played against each other to get to win the house championship. With classes complete, it was time for a trip to Hogsmeade.

Day Pass to Hogsmeade

Honeydukes

I used Muggle Magic’s Honeydukes Chocolate Frog Box design for these boxes. I printed them on cardstock to ensure they would be sturdy enough. For the frogs, I used Instructables.com’s recipe and tutorial. I ordered the Bertie Botts Every Flavor Beans and the frog mold from Amazon.

Harry Potter Party Must Have: Butter Beer at the Leaky Cauldron

For adult and youth wizards alike, I used this Butterbeer recipe that includes Schnapps. For youth, I obviously took out the schnapps. They weren’t much fans of it, so I had a fair amount left after the party. I will have to use the ice cream version next time.

Next time I do this party (for the next two girls). I may opt for some premade options like Flying Cauldrons Butterscotch Beer.

Dumbledore’s Pensieve

I borrowed this Pensieve idea from Raegun Ramblings. It did not turn out that great, because I was rushing to get it done between getting home from work and the party starting.

To top off the sweets, I made a chocolate book cake to fulfill my cake decorating hobby needs. 

So that’s the rundown, I truly hope you enjoyed it and are able to grab some ideas for your very own Harry Potter Party.

*This page contains affiliate links. This means if you use one of my links to make a purchase, I will receive a small commission at no additional cost to you. Thank you for supporting Cathartic Crafting!

Haunted Cardboard House for your Kids who Love a Little Scare

Those who know me, know my love of cardboard. It’s such a versatile and cheap product to craft with, which leads me to have stockpiles of it at times. My youngest daughter’s birthday is October 29th, so while brainstorming ideas for her birthday party, we thought about how we could make it a true Halloween birthday party. I’d previously done an indoor cardboard gingerbread house that my girls loved. It seemed perfectly logical to do a Haunted cardboard house for her spooky birthday party. She had grand ideas for how she would make it haunted and couldn’t wait to have her friends over.

Starting a Haunted Cardboard House

The request from my daughter for this haunted cardboard house was that it be bigger than the gingerbread house. We have quite a bit of free space in our basement, so I was okay with accomodating that request. 

For these larger-scale houses, larger boxes make things a lot easier than piecing together smaller ones. The size and shape of the house can really depend on what you have to work. I didn’t have a plan going into making this and allowed the box shape and size dictate how it would work best.

My neighbor had large furniture boxes out for recycling, which I happily took off their hands to get moving on the wall frames. I typically use hot glue to glue the pieces together because it dries quickly and works well with the paper surface. Sometimes, it doesn’t hold together well enough if I’m not quick to get it together. For those times when it wasn’t holding together, I used some wood glue and weights while it dried.

In order to set the frame, I decided to utilize some small clamps to hold it while I moved things around to find the right shape and size. I was able to do a fair bit of gluing in the garage to remove the fear of getting hot glue on our basement carpet. Folks, hot glue can only really be cut out of carpet (from previous experience). While in this planning phase, I was also able to cut the door out with a razor and a square on the cement floor.

Time to Move to the Final Destination

With the plan in place, it was time to move all those cardboard pieces to the basement to get this Haunted Cardboard House structure together. With the pieces standing, it was a bit like a maze down there. The girls loved it.

I had to put a call out for more cardboard to the neighborhood and thankfully the call was answered. I was then able to construct the roof. That was the hardest part of the whole thing. The cardboard was heavy and shifted while I tried to glue it together by myself. I had to get my helpers on board to hold it while I glued it. For this part, the glue didn’t work as well. I ended up using a drill to make holes and piecing the heavy pieces together with screws, bolts, and washers. They made for a very sturdy structure. 

Safety Warning!!

Hot glue is, shall we say, Freakin’ HOT! It was about during this part of the build that I got myself with the glue while trying to get the heavy roof together. As I quickly tried to “stop the burn” (as we say in American Red Cross) by rubbing the glue off, it took a layer of skin with it. I’ve burned myself quite a number of times while working with hot glue, but this was by far the worst. We go through quite a lot of types of bandaids in this house. I’ve got to hand it to these NexCare waterproof bandaids. They maintained through a lot of movement. Investing in heat protection gloves is probably a good prevention idea though. 

The structure was thankfully set. My daughter said she had envisioned it being bigger than this, but I was unfortunately out of any larger pieces of cardboard. It would have to do.

Faux Scalloped Siding, Ghostly Windows and Shingles

The structure was thankfully set. My daughter said she had envisioned it being bigger than this, but I was unfortunately out of any larger pieces of cardboard. It would have to do.

Now was the fun part of adding the details for a haunted house. Using printer paper, a razor, and my circle cutter, I went about cutting a ton of circles to create a scalloped look on the front panel. I wanted to hide the seam that was there from joining separate pieces of cardboard. I used Loctite Spray Adhesive to make this quick work. That spray didn’t work so well with the cardboard to cardboard gluing but worked here. I spray painted them gray after that. 

For the windows and shingles, I cut cardboard to size and drew details or spray painted. If you haven’t tried spray painting cardboard, be warned. It takes a lot of spray paint to cover it. It felt like it would have been a better plan to paint the whole cardboard piece before cutting shingles. For the windows, I painted the cardboard with cheap acrylic paint before gluing on the frames and shutters.

After a quick google search, I found the images I wanted for the ghosts in the windows. I enlarged them and altered their colors in Microsoft Word. If you don’t have a picture editing program, Microsoft Word can be surprisingly handy for this kind of need.

With the addition of some Halloween decorations, spooky lights and sound, the outside of this Haunted Cardboard House was ready!

Stepping Inside

I put the big bubble wrap (the kind that comes in packaging) under the Frozen rug, so it would pop when the kids walked on it. I think this would have worked better if it had been a hardwood floor as opposed to carpet. It took a fair bit of jumping to get them to pop. I had a dollar store spider that drops every so often hanging from the ceiling to give a good scare. 

There were some body parts and skulls along with an electrolyzed skull and Frankenstein’s head. My main attraction was the spooky touch and feel center. I had a pumpkin bucket full of eyeballs (peeled grapes), a pumpkin bucket full of brains (cooked spaghetti), a box of witches fingers (carrot sticks), a witch’s tongue (sliced banana), and a box of teeth (popcorn kernels). 

When I brought the group of kindergartners down into the dark basement, they were already on edge. I took one little one into the house to have her do the feeling activity. As soon as the spider dropped, she ran out of the house scared to death. I ended up having to turn on the lights on and encourage my daughter to lead them through the houses. After that, they had a ton of fun! 

Party Fare

Of all the things I do, I think I find using candy melts and molds, one of the most difficult to get right. I’m not sure if it’s something I’m doing wrong or if it’s just tough in general. I made these little oozy cake pop brains as a party treat to be placed along side the Cauldron Cake. The design of the cake was all the birthday girl’s ideas. She was quite happy with the end result and the taste of the Oreo cookie cakey insides.

DIY Bakery and Lemonade Stand Charm for Entrepreneurial Kids

While under stay-at-home orders in Maryland, my two younger daughters took hold of a bakery and lemonade stand idea. They knew they wouldn’t be able to sell the goods at that time but were completely smitten with the idea of it. It just happened that while redoing my oldest’s daughter’s room, she had decided she no longer wanted this large composite bookcase. Inspiration hit after the initial request for the stand, so away we went with the creation of it. 

When life gives you lemons, make lemonade.

Materials & Tools

Quite thankfully for our budget, I didn’t have to buy any materials for this project. I used items already sitting in wait for re-purposing. 

Materials

  • Composite Bookcase
  • Old Window
  • Scrapwood
  • Spraypaint
  • Screws
  • Cotton Material
  • Drawer liner

Tools

  • Square
  • Drill
  • Saw
  • Kreg Jig
  • Clamp

Getting to Work


I wanted this project to be as easy as possible. The easiest way I figured we could accomplish it was to cut the bookcase just above the secured shelf. This would allow for a small lip of the soon-to-be counter space. Rather than just drawing a cutting line, I used a square as my guide by clamping it on.


Safety Announcement!

Protect your hearing!! My girls have come to use their earmuffs to help quiet the noise of my saws. They also lovingly remind me to wear my safety ear muffs when they see I’m not wearing mine. I know from family experience that protecting your hearing now is important for the years to come. Be sure to wear those ear muffs when using any loud tools. I bought a pair of ear protectors for my garage visitors.


The girls in their PJ’s inspecting my work.

Here comes the Color!!!

This project was a great opportunity for the girls to join in the refinishing fun. Obviously, the blond wood color wouldn’t do for their personal bakery and lemonade stand.  They picked from my assortment of spray paint cans and got to work. I let them do what they could and filled in the light spots later.

Old Window Repurposing

Awhile back, I bought a stock of old windows for $20 and hosted a Window repurposing party. I had a few who weren’t able to make it so have been storing the windows every since and using them for as ideas spark. The girls set to work cleaning one of the windows. They cleaned the glass and scraped off some of the old paint before painting it white.

The width was just about perfect while the height was off by 3 or 4 inches. I found a spare board that worked to fill some of the difference. Using my handy Kreg jig, I attached the board to the window and made pocket holes around the window to attach it to the bookcase. 

With the window on, it was just about complete. Drawer liner from my Antique Hutch Project served to spruce up the shelves. As you can see from the above, the girls were pleased with the results. All that remained for the bakery side of things was to hide that gap. 

Time to Bring Out the Sewing Machine

The girls picked out material from my stash to make a ruffle. I can still remember my mom teaching me how to make a ruffle as a kid. You need to cut a piece of material that is almost twice as long as what is needed and start by finishing off your edges. I’m not an expert sewer, so I’d recommend checking out some other great sites, like Treasurie, for how to best do that.

To make the bunching, you sew a loose straight stitch along the whole length without backstitching. 

Then pull one of the threads while pulling the material in the opposite direction. It may be necessary to start pulling on the opposite side when it starts to get hard to bunch. 

When it’s at the right length, backstitching and a shorter stitch along the length secure the ruffles. With the ruffle complete, I hot glued ruffles to both the bakery and lemonade stands.

Bakery and Lemonade Stand Wares

A lemonade stand is dependent on some beautiful lemons!

We were making the bakery and lemonade stand just after Easter, so we went ahead with baking some Easter Sugar Cookies with icing.

Store-bought pizzelles dipped in chocolate with a smattering of sprinkles were next up on the menu list. The girls also chose to use the mini Easter desserts given to them by their grandmother.

A Quick Menu Sign

Every bakery needs a menu, so I selected this wood cut out from my stack. I used Martha Stewart Chalkboard Paint in purple and gray. 

Personalized Money

I would be remiss if I didn’t mention my love of personalized items when creating for the kids. I thought it’d be fun to give them play money to use during quarantine in liue of doing a lemonade stand at the end of the driveway. www.PrintablePlayMoney.net had free templates which were exactly what I was looking for. The girls were crazy about the idea, so away we went. A quick photo and duplication in Word gave them a stack of bills ready to hand out for us to pay for the goods.

Bakery and Lemonade Stand Open for Business

To finish this project, the girls made their own cardboard sign and offered storybooks they wrote for the waiting customers. I used cardboard and acrylic paint to create lemons, cherries, and a cupcake for extra flare. 

The girls are ready and itching to get out to the end of the driveway to put their stand to use with real customers. My ten-year-old wants to use the profits to donate to a charity cause she’s just that kind of girl. I hope you find some inspiration in our found objects project making lemons into lemonade. 

2022 Update: My girls have indeed used their stand for good since its inception. Check them out at Determined to Donate on Facebook.

*This page contains affiliate links. This means if you use one of my links to make a purchase, I will receive a small commission at no additional cost to you. Thank you for supporting Cathartic Crafting!

A Full Day of Valentine’s Love

Valentine’s Day doesn’t have to only be about a special dinner and cards for classmates. Carry the heart shaped fun throughout the day with simple activities your kids will enjoy. 

I love you coffee

valentine's coffee

Nails!

My 9-year old’s goal this year is to have fresh nail designs each week. We went with a simple achievable design this week.

Valentine's nails

Hair!

I’ve had a life-long love of braiding hair, so I feel blessed to have girls with gloriously long thick hair. Below are three ways to incorporate Valentine’s hearts into their daily do’s.

Breakfast!

Heart-shaped Chocolate Chip Pancakes

Valentine's chocolate chip pancakes
Chocolate chip pancakes using a heart-shaped pancake mold

Lunch

Valentine’s Heart Pepperoni Pizza

Heart-Shaped Sandwich

Valentine's Heart Sandwich

It doesn’t get much easier than cutting a sandwich with a big heart cookie cutter.

Valentine's fruit kabob

Fruit Kabobs with Heart sticks from the Dollar Tree

Dinner

Valentine's pasta
Valentine’s pasta Aldi find that seems to come back each year. Paired with shrimp, asparagus and parmesan cheese.

Dessert

Sugar cookies

Sugar cookies are a go to recipe for our family to use the holiday specific cookie cutters we have stored away with the holiday decorations. A few years ago, I was excited to find a heart cookie cutter kit with 5 different sizes of hearts. I keep them available in the kitchen all year long for whenever I want to see some extra food love.

Valentine's Sugar Cookies

Strawberry Truffle Kiss Cookies

Valentine's Strawberry Truffle Kiss Cookies

Check out this delicious cookies recipe from Inside Bru Crew Life. It was a hit for my family

Crafts

Valentine’s Cardboard Candy Box

To say it simply, I’m a huge lover of cardboard. I try to find any way to use it. Way back when I used to work direct care with teenage boys, I showed them how to make a candy heart box with cardboard, hot glue, and scrapbook paper. We additionally made homemade candies to put into wrappers, just like you’d get in the store. Some of them gave their homemade creations to girlfriends. It was a great bonding experience to craft together and expand their thoughts on how they can be creative.

To make your own, cut two hearts in the same size small enough that one 12×12 piece of scrapbook paper can be used to cover the cardboard. Then cut two 1.5 inch wide strips of the same length for the top that will go along flush with the outside edge. Hot glue them on. Finally, cut two more 1.5 inch wide strips of the same length and glue them just inside of the bottom heart to allow for the top to fit on the outside. Finish it off by gluing the scrapbook paper to the outside.

Valentine’s Love Fortunes

If you’re looking for a super simple yet super sweet way to communicate your love, give these felt fortune cookies a try. Anyone could put them together for their loved ones. Materials:

  • Chinese food container
  • Felt in your desired colors
  • Foliage wire
  • Paper
Valentine's Love Fortunes

Cut as many circles as you see fit in the same size and then cut the thin foliage wire to the width of the circles. Glue the wire onto the middle of the felt circle and you’re just about finished.

Write your message on a thin strip of paper. Then hold the paper in the middle of the circle while you fold the felt in half and pull the ends downward. This year I also tossed them into the girls’ lunches for surprise messages. Other years, I have had the girls write messages to their dad or wrote them myself. Spending 30 minutes this year, can have a lasting effect for years.

Here’s to love being in the air for you this Valentine’s Day! If you’re looking for more crafting ideas checking out my other Craft posts.

RSS
Follow by Email
Pinterest
Pinterest
fb-share-icon
Instagram

Are you interested in getting alerts and information on all things coming out of Cathartic Crafting?! Then go ahead and submit your info below:

Verified by MonsterInsights