Tag: Kids room

Easy Cricut Hexagon Stencil Dresser Refinish

While we discussed the move to our new house, my youngest daughter had a specific image in mind for her new room. She absolutely had to have a hexagon stenciled wall. Thanks so our new homes previous owners, I had four dressers ripe for refinishing, so it was a great opportunity to use another hexagon stencil to spice up a dresser. I did a brief search for a hexagon stencil but didn’t find what I needed. That only meant it was a great opportunity to use my new Cricut to create the stencil for both the wall and dresser.

Prep Work

I love a project that doesn’t involve much prep work. As I’ve stated in other posts, sanding isn’t my favorite thing to do by hand. With my feathered bench refinishing project, I used a deglosser for the first time and found a new love. That same sander deglosser was what I used to take off the remaining shine of this old dresser.  Using a clean rag, the deglosser was rubbed on all the surfaces of the dresser. 

Paint Choice

Paint choice is important and the choices are endless. The fun thing about being in a new town is finding new stomping grounds. My girls and I checked out a nearby antique shop and certified stockist of Annie Sloane paint, called The Farmhouse. The thing about specialty paints, like Fusion Paint and Annie Sloane, is that it can be difficult to find exactly what you want without having to cart yourself clear around your state. I lucked out here with this shop being just 10 minutes away. The pure white paint was calling me, so that’s what I went with for the hexagon stencil dresser. The only other project I’d used Annie Sloan paint with was my Antique Chabby Chic Hutch redo. Many refinishers love Annie Sloan, so I kind of felt obligated to give it a more full-scale try. 

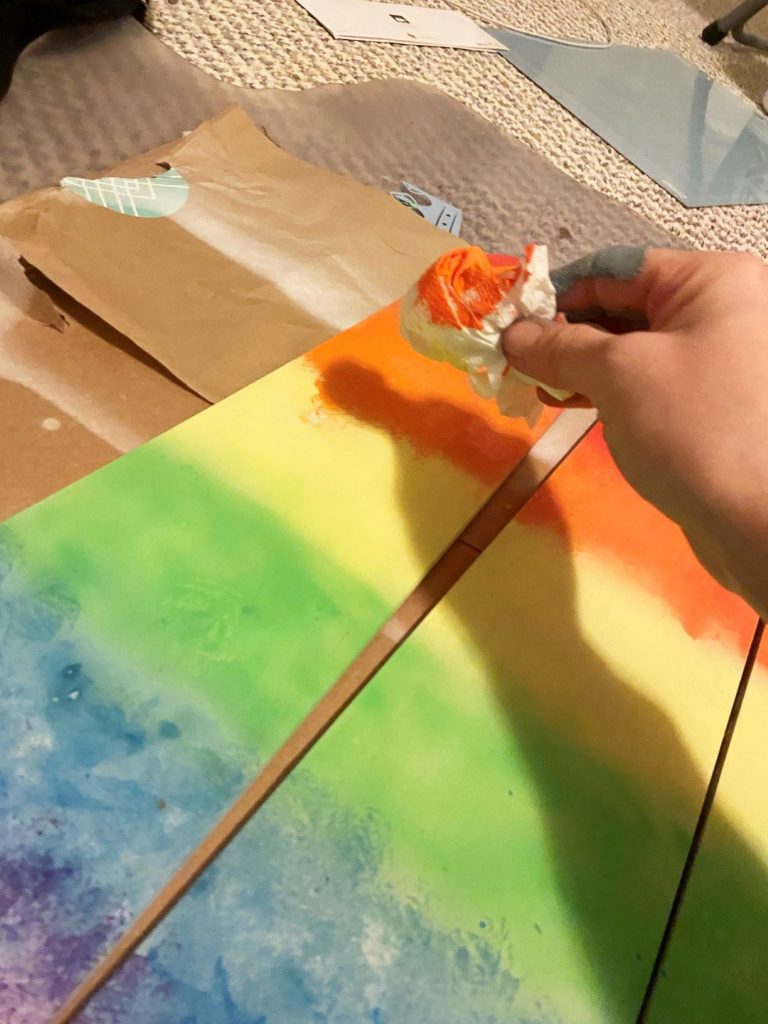
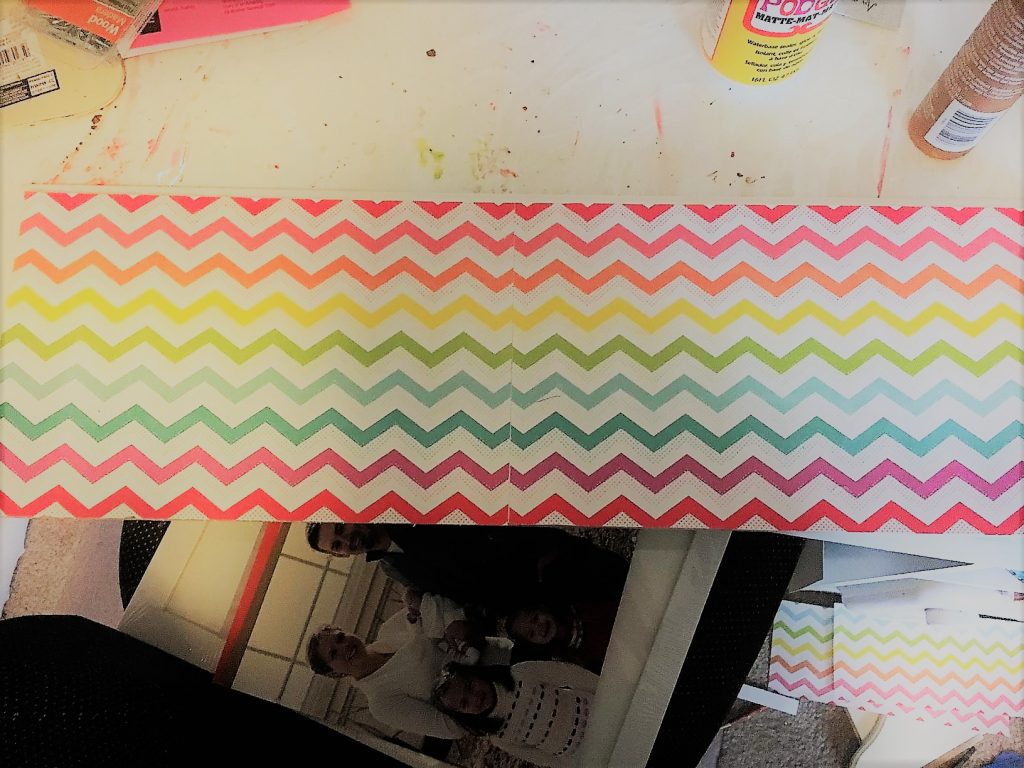
The hexagon color pallet was a given, I used the same colors as the walls in my daughter’s room. 

The handles stumped me a bit on color choice. I didn’t want to run to yet another store to buy different spray paint, so I choose out of my existing stock of colors. The teal was the closest I had to the hexagon stencil colors but it didn’t feel quite right. In the end, the teal is as they remain, although I ended up buying some clearance sea glass at Michaels that may just end up covering the teal at some point. Only motivation and other finished projects will tell!

Paint Application

You hear a lot about the importance of the paintbrush choice when refinishing furniture or really any other painting project. This rounded paintbrush is an Annie Sloan brush. The website description says “Annie Sloan’s bristle Chalk Paint® Brushes are perfect for producing a textured, vintage finish. The bristles are strong, yet pliable, and are made of predominately pure bristles with natural split ends, allowing you to paint expressively. They hold a large amount of paint and can also be used for applying wax.”

I agree it holds a good bit of amount and definitely gives it a textured finish. Pictures below will show proof of it. Since the dresser started out with a dark cherry finish, the first coat of the Pure White Paint didn’t appear to cover much. I ended up doing three coats to get full coverage. It didn’t really feel like much work at all. I would throw a coat on, go complete some other tasks, then return for another round.

Hexagon Stencil

Unfortunately, I realized after the fact I was millimeters off on my wall hexagon stencil so was determined to get this smaller 3-inch hexagon stencil right. I used 12 x 12 Acetate stencil material I bought on Amazon to create the stencil with my Cricut. Here is the stencil pattern if you’re interested. After the tedious work of getting it just right, I went about painting the hexagons. 

The stenciling component was smaller in scale but felt like it took longer than painting the coats over the enter thing. I did one 12 x12 section at a time. Waiting was the name of the game, because I had to wait for it to dry enough to lay the stencil on the next section without creating a mess. After about 15 sections or so, the top was finished! My hexagon loving 7 year old was over the moon. 

The Finishings

The call in me to rough it up a bit had to be reined in to fit the modern look of the hexagon dresser, but I decided to go for a small amount around the drawer edges. This is simply accomplished with sandpaper and muscle. With a less than careful new user, I figured there was bound to be some scratching of the finish in its future. It seemed worth it to give it some of that charm ahead of time. 

As I noted above with the rounded paint brush, there was a definite texture to the finish. This can be seen in the first image below. My daughter was less than keen on the roughness, so I opted to sand down the ridges to a smoother finish. After the sanding, the finish was so wonderfully soft and smooth. The middle and right pictures show the difference. 

And with that, this Hexagon Stencil Dresser Refinish was a wrap. At the time, I didn’t have the right wax on hand. I moved it to the room to get it out of the overwhelmingly messy basement. My little gal loves her room and dresser with all the finishing touches just as she dictated. She’s the same daughter who wanted the Imagination Galaxy closet, which I completed the day before we moved furniture in to our new digs. This is also why she wants no part of giving up her room for the new baby sister due in December. This new room is definitely her safe space to feel completely in her element.

Safe Spaces for your Mental Health

Some of us don’t always have a safe space where we can create things just as we’d like. Sometimes, anxiety or feelings of extreme stress can strike when we don’t expect it in public, at the office, or at home. Not only is it important to create physically comfortable and safe spaces for when the need strikes, it can also help to create safe mental spaces. Using some soothing safe space imagery,

You can train and tone up your imagination like a muscle, so it works for you and not against you, helping you manage or soothe emotions at times of stress or difficulty. This builds inner-confidence and resilience, benefiting your overall wellbeing.

Sarah Rees, CBT therapist

On her website, Sarah Rees offers instructions on 7 steps to Safe Place Imagery Practice. If you’re feeling bogged down by mental madness, why not try to mentally create a place of calm in any situation. I know I benefit from focusing on something specific for a short time to unwind from the stress knots. For me, it tends to be running through how I’m going to accomplish a project that has been pending or is stuck on how it can be completed. I hope you find your mental and physical places of comfortable and calm today!

*This page contains affiliate links. This means if you use one of my links to make a purchase, I will receive a small commission at no additional cost to you. Thank you for supporting Cathartic Crafting!

Brilliantly Beautiful Kid’s Rainbow Room Idea

As I posted in a previous Rainbow decor and rainbow fan post, my middle child is an avid rainbow lover and has been since she was a toddler. We redid her room for her 10th birthday in full rainbow fashion. Nine months later we were getting ready to move. With the prospect of a new room to design, a rainbow room was still the desire. She wanted a rainbow tree similar to one I painted on a canvas for her. From there it was just a matter of figuring out how to get the rainbow around the room. That’s when the butterfly rainbow room idea was born!

Rainbow chair, rainbow shelves, rainbow curtains, and rainbow lamp from our previous room makeover.

Rainbow Room Tree Mural

I also have a lifelong love; of drawing and painting trees. That’s not to say I’m super great at it but it’s been a focus of many of my sketches and paintings. At my daughter’s painting party a few years ago, I painted a rainbow tree for her on a small canvas. We used that as the inspiration here. I started by painting the trunk using cheap acrylic paint. After the base coat dried, I started with the details to give it some dimension. 

Using bunched-up paper towels, I dabbed each color starting with purple onto the wall. I can attest that it’s much easier than trying to paint leaves. After doing a layer of coloring, I did another coat of a dark shade of each color. Again, the idea was some added dimension. That’s all it took to finish the tree.

Rainbow Butterflies in Action

I got a Cricut for Christmas and had been itching to use it for something. This was the perfect opportunity to create sheets of rainbow butterflies to fly around the room. Here’s the template I created, which I’m attaching free for you to use, Butterfly Template.  To start, I bought a rainbow pack of cardstock. With the template created and the cardstock in hand, it was just a matter of waiting for the many sheets to print/cut. 

Butterflies Lifting Off into the Air

Using a double-sided tape roll, I stuck each butterfly to the wall with the wings flapping out. My daughter wanted the 3D effect, which I totally understood. Some butterflies fluttered to the ground and needed a bit more stick to them. I placed a good amount flying out from the tree and then the rest fluttered around the rest of the room. 

Completed Rainbow Room

From removing clutter to adding art that speaks to your happy emotions, your living spaces can contribute to your mental health. I know my daughter is completely happy in space being surrounded by the colors and things she loves. As noted in the article, How to Optimize your Space for Your Mental Health,

While there are many ways to improve your mental health including therapy, meditation, exercise, hobbies, a healthy diet, and time spent with loved ones, there are also small things we can do to create a shift in our mood. One of those small things is tweaking the space in which we live and work. These small changes and tweaks can make a world of difference in your overall mental well-being.

Very Well Mind

Don’t delay in creating your happy places!

*This page contains affiliate links. This means if you use one of my links to make a purchase, I will receive a small commission at no additional cost to you. Thank you for supporting Cathartic Crafting!

Unique Rainbow Ceiling Fan Revamp for your Color Loving Kids

My daughter’s love of rainbows started when she was 2 years old. One of our favorite videos of her entails her proclaiming, “This is the most beautiful cake in the world, mom!!” as she looked at a rainbow cake in a board book. I couldn’t get out of that particular weekend without making her a replica of that rainbow cake. For her 10th birthday, I gave her a rainbow room makeover. After our recent move, we had another opportunity to go on a rainbow room adventure. We started with an easy rainbow ceiling fan.

Her fan is the same one in my parents’ kitchen. It has reversible fan blades, so I didn’t feel so bad about devoting this side to the rainbow update. 

Spray Paint Base

I knew that I was going to try spray painting, so I started with giving the brown a coat of white spray paint. I think any kind of spray paint would do.

After a quick-drying session, it was time to use the airbrush for a cheap win. If an airbrush isn’t at the ready in your craft space, a paintbrush will certainly do. I liked the prospect of a lighter and even color. 

I used watered-down acrylic paints for my airbrush. Given airbrushing is pretty new to me, I haven’t quite perfected my airbrush technique. Things when alright until I got to yellow. I don’t think I made the yellow thin enough because it started to get difficult to spray. What should have been a quick task, ended up being a frustrating one. And such is life. 

To touch up a little of the splatter spots, I used a paper towel dipped in the watered-down acrylic paint. With a bit of blotting, it was ready to go back on the ceiling. I do the watered-down paint as a cost-saving method but I think I may opt to see the difference in purchased airbrush paints. 

Rainbow Ceiling Fan

The fantastic thing about the rainbow fan blades is that when it’s spinning, the circular rainbow really comes together. My rainbow lover was thrilled with the end result! Having physical spaces that you love definitely helps your mental space. When your stressed by your physical space, it’s going to be difficult to keep your mental space right.

Mental Health Awareness

It’s not just adults who suffer from mental health issues, children can struggle with it in much the same ways. It’s important to check in and keep a pulse on how they are doing and handling all the “new” ways of life.  On Our Sleeves is a Movement for Children’s Mental Health. It provides evidence-based resources to help kids cope during this challenging time, provided by the experts at Nationwide Children’s Hospital in Columbus, OH. 

A rainbow is often a sign of hope, the beauty after the storm, a pot of gold and good fortune at the rainbow’s end. For many, a rainbow carries a personal symbolic meaning–representing inclusivity and diversity, an all-embracing image of love and friendship.

For others, a rainbow might not mean good fortune and beauty, but something far off. The pot of gold isn’t there, or the love and friendship is there for others but not for them. Somewhere over the rainbow is far, far away. What does the rainbow mean to you? Share using #OnOurSleeves.

On Our Sleeves

For other creative activities to expand your mind and relationships, check out Crafting a Calming Corner to Assuage Parent and Child, How to Throw a Magical Harry Potter Party, Budget-Friendly DIY Monster Book of Monsters from Harry Potter or The Ultimate Cardboard Gingerbread House for Christmas Crazed Kids.

*This page contains affiliate links. This means if you use one of my links to make a purchase, I will receive a small commission at no additional cost to you. Thank you for supporting Cathartic Crafting!

Imagination Closet for a Child’s In House Getaway

A new house means new opportunities and ideas. While we were planning for our coming move, my youngest put forward two ideas for her new room. One of them was a galaxy with black paint. I loved her creativity but wasn’t ready to go full-on black painted room. Thankfully, the closet in her new room was soo much bigger than what we had at our Westminster house. That fact translated really well into shifting the idea into a galaxy-inspired imagination closet for her to use as a hideaway. With more time being spent at home during this pandemic, it’s definitely an opportune time to provide more creative spaces for play and mental benefits. For us, it was also a way to get my youngest to be excited about the move.

If you know a thing or two about play therapy, you know the beneficial effects that come with allowing a child to express themselves through pretend situations. Children who play pretend can come up with their worlds and characters, through which they emulate some of the social skills they’ve observed in the real world and figure out how they apply to any given situation.

Betterhelp.com

Paint Choice

I didn’t do much analysis on which paint to use. I went with the easiest to get. This Krylon paint had great coverage, so it only needed a few touch-ups after the first coat. With a lot of projects to complete, this was a must.

We took the weekend to paint several rooms in the new house. My oldest felt more comfortable helping with the hidden closet than painting rooms.

Bringing out the Stars

Using what spray paints I had on hand, I started on the details of this imagination closet. Colors included lavender, purple, teal, blue, gold, and white. Short bursts of color worked to bring out the galaxy. I did a quick google search of different galaxy pictures, as is my usual practice. I admittedly am not great at painting and drawing without a visual. Lightly pushing on the white paint spray tip was the way to get speckles of stars in this galaxy. It took me about 10 minutes to finish the spray painting of the out of this world imagination closet.

Time to make it glow!

After several nights of unpacking at the new abode, it was finally time to paint the closet with glow in the dark paint. It was definitely maddening to have such a long list of tasks while working my normal job during the day. I’d grabbed a bottle of glow in the dark paint at Michael’s for a different Halloween project but didn’t end up using it. It was a new paint type for me. It didn’t take much to put it on for it to glow. I was quite surprised by how well it showed for a cheap paint! We painted in the dark with a black light which was also a first. My youngest was thrilled by the activity and a great time for us to spend together in creative activity. 

My daughter commented on how her painting was terrible compared to my glow in the dark painting. I can’t say whether this self-deprecation and lack of confidence is a common difficulty with other young kids but mine definitely exhibit it frequently. When I have to help squash their self-doubt, it pushes me to reflect on my own mentalities and lack of confidence. I know I think similar things to myself so it’s really no wonder I hear it coming from them. I am thankful these creative activities present opportunities for discussion between us and chances for growth within us all. It’s a chance to combat those doubts and build confidence in different venues and skill development. 

Personal Benefits from this Imagination Closet Project

I am thankful this small project has provided a place to escape and be imaginative, and it continues to develop the relationships with my girls and my mental space. Even as adults, I believe we should all participate in a bit of imagination. It can’t hurt to escape from reality every now and again, especially when it becomes a bit overwhelming.

 Creative activities and imaginative games with others give us the opportunity to recharge our brains, take a much-needed break from our daily stressors, and help us connect with those around us.

Betterhelp.com

For other creative activities to expand your mind and relationships, check out Crafting a Calming Corner to Assuage Parent and Child, How to Throw a Magical Harry Potter Party, Budget-Friendly DIY Monster Book of Monsters from Harry Potter or The Ultimate Cardboard Gingerbread House for Christmas Crazed Kids.

*This page contains affiliate links. This means if you use one of my links to make a purchase, I will receive a small commission at no additional cost to you. Thank you for supporting Cathartic Crafting!

Successfully Controlling Stuffed Animal Clutter with a Craft

OH THE CLUTTER!!

I don’t know about your household but ours has often felt the stress of stuffed animal collections gone wild. We were getting by with stuffing them into cloth hampers, but it hit a point where it just wasn’t enough. With Christmas just around the corner, I’m going to go out on a limb to say you’re hoping to declutter before the extra “joy” enters the house for the holidays. Below is a list of some fairly simple projects that are functional and visually appealing.

Stuffed Animal Clutter Projects to Complete Today

  1. Macrame stuffed toy holder by Fiber Art Love

To start this list off right, check out this utterly adorable macrame stuffed toy holder. The add of the flowers is just right. I haven’t made it yet but it’s going on my list of projects!

2. Corner Animal Cage by Down Redbud Drive

This little corner stuffed animal cage makes for a simple woodworking project. This one is definitely the maximum storage capacity leader. 

3. Bungie Cord Box by  Shades of Blue Interiors

This bungie cord box is another take on the same technique but on an obviously much smaller scale. It looks super clean and accessible.

4. Toy Baskets by Mommity

I first saw this idea years ago and have loved it ever since. There’s something just simply charming about using these planters to hold all those lovies. 

5. Hidden Drawers by Sunny Side Up

Admittedly, this is not a simple project for everyone but isn’t it absolutely fantastic?! I’m about to move into a new house and I’m ‘toying’ with the idea of doing this somewhere. 

6. Chair Plushes by Rafa Kids

If you’re looking for something unique and cozy, this stuffed animal chair is it. 

7. Corner Rope Shelves by Honeybear Lane

Although inaccessible to little hands, this high shelf is cute and will definitely keep the floor clear of stuffed animal clutter.

corner rope shelves nursery

8. Stuffed animal chair by Googie Momma’s via Thread Riding Hood

After seeing this, I couldn’t wait to create this chair myself. I ended up using it for a Calming Corner and later for a reading nook. 

9. Crate Shelf Storage by Me

This six crate shelf can hold a ton of those squishy friends you tend to find on the floor. It came about from a crate coffee table that was just too small for the space. Check it out here. 

10. Hanging Toy Storage by Rain on a Tin Roof

A 5-minute project sounds like a gold mine with all the other to-dos on the list. This vertical storage is perfect for the circus theme room it was completed to compliment.

diy stuffed animal storage

11. Hanging Storage by It’s Always Autumn

If you love an ode to carnival rides, try this hanging toy storage. It reminds me of a Ferris wheel ride. 


Organize your stuffed animals with this easy to build hanging toy storage swing!

12. Hanging Cloth Bag

My youngest’s room is always a mess, so it became necessary to add MORE stuffed animal storage. I have lots of extra material, so she was able to pick out the material she wanted. She completed it by gluing some paper butterflies and flowers to make it her own. Crafting is always best when we can all play a part. 

Stuffed Animal Clutter Mental Health Side Effects

The possibilities are really endless. Hopefully, you found one (or a few) ideas to get your clutter control craft underway. Clutter can negatively affect mental health for many minds, so it’s important to get it under control when it becomes unwieldy. According to Prevagen

More mess means more stress. Clutter can affect your ability to focus, your sleep, and your anxiety level. It also triggers coping strategies that make you more likely to grab junk food. That mess may even make you less productive.

Prevagen: How Clutter Affects your brain

And with that, I bid you adieu to start on your crafting and clutter control! 

Crafting a Calming Corner to Assuage Parent and Child

Anyone out there have perfect emotionally balanced children? I’m definitely not raising my hand to that one. In fact, we have nicknamed my daughter’s alter ego as “the hulk” because, while she’s normally such a docile sweet child, you better watch out when something gets to her. When she gets angry, you can hear the stomping and huffing from the other side of the house. Given my human service field, I’ve always talked to my girls about their emotions. Even so, my little hulk really struggled with controlling herself when she became escalated. There came a day when she actually asked if we could create a calming corner for her to fight off her anger. I was all for it because it would be a great way to help her learn the important skill of self-regulation.

Calming Corner Benefits

Self-Awareness and Self-Management: Calm down corners help children to practice identifying feelings and emotions to better manage stress, self-regulate and control their impulses. Having a space designed to support them emotionally and physically helps them feel safe and comfortable, allowing them to let down their guard to process different feelings.

Relationship Skills: Learning how to communicate one’s feelings and emotions can be difficult, but calming spaces such as this help children practice mindfulness and develop skills they need to identify their emotions and communicate them when necessary. Stronger communication skills help them form stronger relationships with others and develop skills in empathy.

Action for Healthy Kids

Calming Corner Seating Choice

First things first, seating. You could obviously choose a regular chair if that’s what you have on hand. I think a calming corner needs something soft and cushioning. I opted to knock out three birds with this one stone. We had stuffed animals galore and were running out of space, so it was a perfect time to use a Pinterest pin I’d saved long ago. I used Googie Momma’s via Thread Riding Hood pattern for a stuffed animal chair. I’m a true lover of budget-friendly projects, so I chose to use material from some curtains I’d made for our previous house. (This is exactly why I find it so hard to get rid of anything, you never know when you might come up with a way to repurpose it.)

I was able to dive into my creative mental space (check out Crafting my Mental Health Regimen), make a stuffed animal storage space saver, and a chair for the calming corner all in one go! I couldn’t believe how many stuffed animals this chair housed. Such a win!

Other DIY Options

Here are some other easy DIY Bean bag chairs to try: 

DIY: Sew a Kids Bean Bag Chair in 30 Minutes

DIY Bean Bag Chair

Child Size Bean Bag Chair -DIY Video Tutorial


Curtain to Limit Stimulation

I happened to have a bed curtain, so I used it as the curtain for this space. I considered making one (of course), but my daughter said she liked this see-through one.

There are other ways to make a private space. Here’s one from She Builds Her Home using a curved shower curtain rod.


Stocking Your Calming Corner

A calming corner isn’t much of a space with out something to distract them from the emotional overload. Thankfully, with all the recent trends, we had a good stock of fidgets, squishies, spinners, etc. to stock her little shelf of distractions. She also put a whiteboard and marker for drawing. Check out Mindful Amazing for some great printables to stock in the calming corner. A weighted blanket or weighted stuffed animal would be a great add as well. How about some simple craft kits?! 

We didn’t go much beyond that but depending on the child, you might consider all the other senses. Noise-canceling headphones or a soothing sound machine for the child who tends to overload on auditory stimulation. A visual distraction, like a light machine or glitter bottle, would be another great option. For olfactory, an oil diffuser or scented lotions would work. There are really so many possibilities. To garner buy-in from a resistant child, let them decide what to put there.

Creating the calming corner together doesn’t mean they are automatically going to choose to go there when it becomes necessary, so be prepared to reinforce using it when needed. My hulk was super resistant when using the corner was necessary. Take one tantrum at a time to stay sane. 

For more resources on self-regulation, check out Child Mind Institute’s “How Can We Help Kids with Self-Regulation?

Fantastically Colorful DIY Rainbow Shelves

Rainbow Shelves

Dare to love yourself as if you were a rainbow with gold at both ends.
― Aberjhani, Journey through the Power of the Rainbow

In 2015, we moved our family of five from a three-bedroom house to a five-bedroom house with loads of extra space. It was glorious for all of us, especially for the 7 and 4-year-old sisters who were previously sharing a room. The oldest liked sleeping with the door open, with music and lights on while the younger one preferred sleeping with the door closed in the quiet and with the lights off. Besides being able to control their own space, they also got to choose their room themes. The then 4-year-old unwaveringly went for

R A I N B O W

as her theme of choice. Curtains and sheets were easy to find. Shelves, on the other hand, weren’t something I could find in any nearby stores. The obvious choice was a mommy/daughter project to craft our own.

Supplies: 

  • Wood Cubes
  • Small Wood Screws
  • Wood Glue
  • Paint
  • Scrapbook Paper
  • Mod Podge
  • Paint Brush

I came across a nine square set of nesting cubes and decided to make them into a fun shelving unit for my rainbow lover’s room.

Each cube had a bracket to hang each individually. I thought it’d be easier to have them connected to each other. This would mean I’d have fewer nail holes in the wall. I used tiny wood screws to secure the cubes to each other in the fashioning of our design. Something to keep in mind when screwing into any wood is the likelihood of splintering or cracking when drilling the screw without predrilled holes. If there’s a chance it’ll crack or you’re unsure, it’s best to drill a hole prior to screwing in the screw. Be sure to use a drill bit no bigger than the width of the screw core to prevent the hole from being bigger than the screw.

After the cubes were secured to each other, my middle child and I started with the painting. Her motto is ‘you can never have too much rainbow in your life’. I love when I can infuse mommy-daughter time with crafting (so long as it’s more fun than frustrating). Generally, it’s a double bonus for me to have girls who enjoy doing some of the same things as me. As an adult, I have come to realize as a child I learned so much by simply watching and helping. I hope my girls learn as much from me on how to be handy and self-sufficient as I learned from my parents.

A fun Rainbow Pop with Patterns

We could have kept it simple by painting all the surfaces, but I thought it’d be fun to give it a pop of pattern to the cubes, in addition to the pops of color. It was more likely to see the ceiling of each cube when hung on the wall. This pushed my decision to use scrapbook paper to spruce up the ceiling of each cube. (Scrapbook paper really has so many uses.)

I cut colored and patterned paper to the size of the corresponding cube. Using my favorite Mod Podge, I glued them to the wood surface. I’m sure you can read the Mod podge instructions for yourself, but I’ll explain it here for you as well. Use a paintbrush to paint it onto the surface first. Then paint the back of the paper and smooth the paper onto the surface to remove any bubbles. This isn’t necessarily as easy as it sounds. Those pesky bubbles and wrinkles can be a pain to get smoothed out. Finish it up by painting the final top coating to protect the surface.

I have had the same bottle of mod podge for years. It’s lasted me through many projects. Check out some other projects you can use with mod podge.

Once the paint and glue were dry, hanging and filling the shelves were the only tasks left. My little Lily was excited to get her things in there.

Rainbow Shelf #2

We already had a shelf on hand for the next rainbow incorporation. I decided to do a fun bottom since that would be the only part to really show. I used scrapbook paper and Mod Podge again to adhere the paper to the surface. While cutting the paper to size to fill the length, the chevron pattern matched perfectly. In looking at the photo below, I obviously failed to put the two pieces in the right spots. It’s very likely I was slightly distracted by my chattering girls. It doesn’t take long for Mod Podge to work, so I was stuck (literally) with my mess up. My OCD self still gets annoyed with this mistake, but luckily my middle child was okay with it.

Rainbow scrapbook paper
Rainbow scrapbook paper shelf

Simple and easy is the best way to be when the task list is long. One project down in a night’s time and a daughter over the moon with her finished rainbow project.

Try to be a rainbow in someone’s cloud.
― Maya Angelou

RSS
Follow by Email
Pinterest
Pinterest
fb-share-icon
Instagram

Are you interested in getting alerts and information on all things coming out of Cathartic Crafting?! Then go ahead and submit your info below:

Verified by MonsterInsights