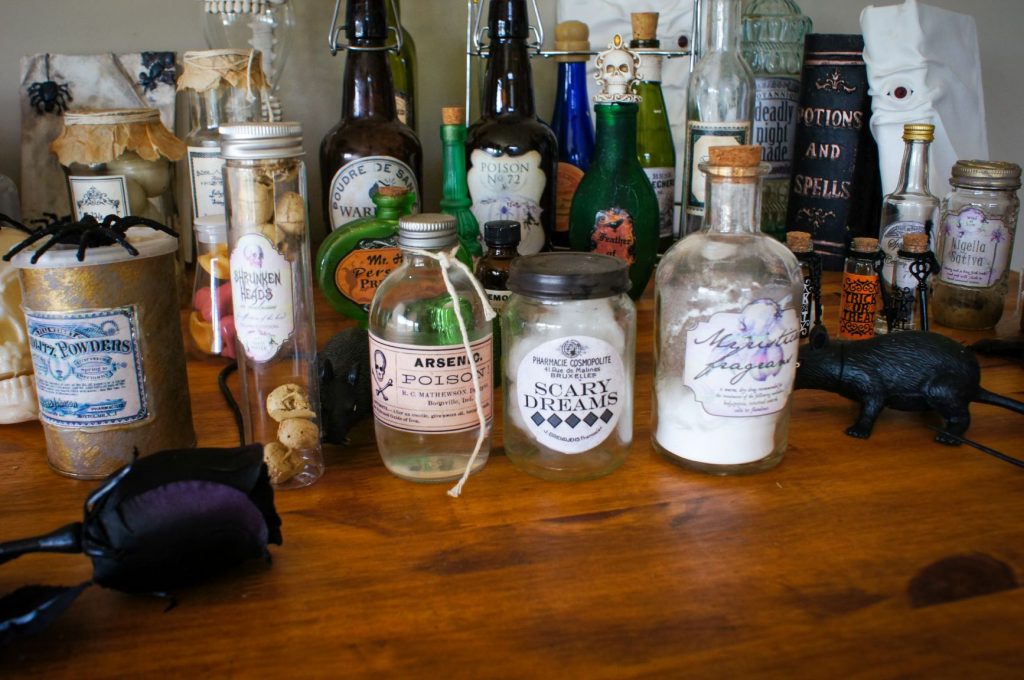
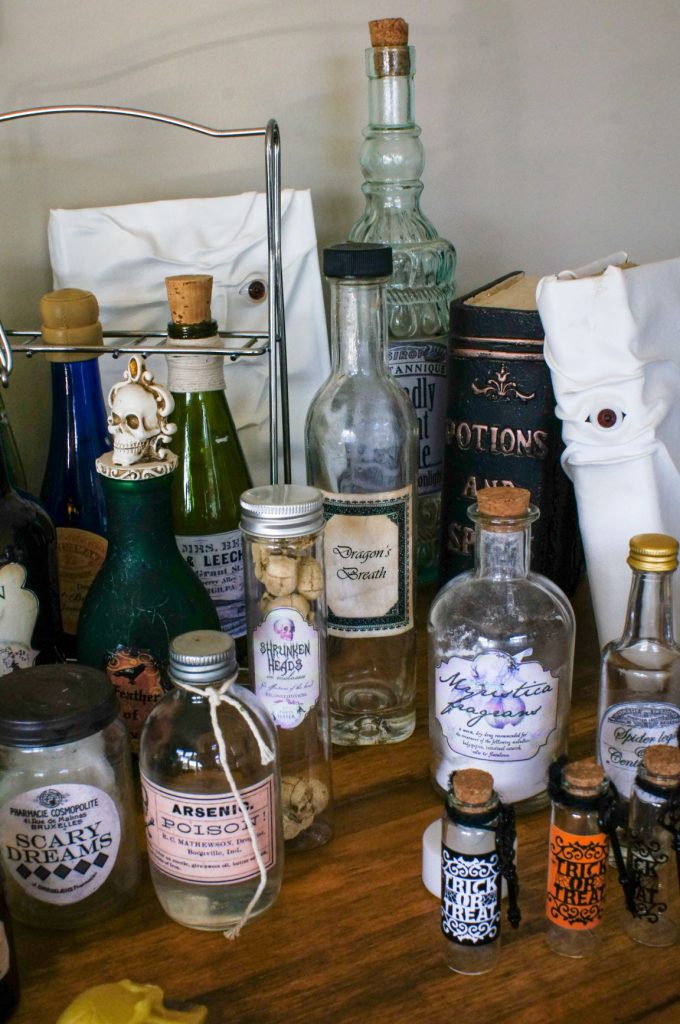
A few years ago, I couldn’t wait to start a collection of Halloween apothecary jars to add to my holiday decor. I started off with collecting regular food jars and random Goodwill finds to change into new and creepy decor. It doesn’t take much more than some simple materials to really get started.

Halloween Apothecary Jar Ideas
Materials:
- Coffee Filters
- Printer and Printer Paper
- Clay
- String
- Paint
- Mod Podge
- Glue gun and Glue sticks
- Food items: egg shells, Cantaloupe rind
- Store bought creepy crawlers
- Corks
- Sandpaper
- Saw
For this Ear of Troll I used the rind of some eaten cantaloupe. I gave it a week to dry out in the garage before closing it into the jar. I used a blank label in Word to type in the name. Mod podge was my go-to glue for all of these labels to get them to stick and to give it a coating for longevity. For this jar, in particular, used coffee filters served as the lid covering with string and craft glue decorating the jar curve.


Free label sites I used:
Spooky Apothecary Labels from Brooklyn Limestone
Free Halloween Bottle Labels from Holidappy
Apothecary jar Labels from Halloween Forum
Rattle Snake Eggs
Similar techniques were used for these Rattle Snake Eggs Halloween Apothecary jar. The eggs were from a friend with chickens laying eggs in a variety of shades. Using a needle, I poked holes in both ends with one end being slightly larger to allow for the egg innards to be expelled. It’s also a lot easier to break up the yolk using the needle poked repeatedly through the holes. Once all that was done successfully without breaking the egg, I blew into the smaller hole to force the contents out the larger hole. Then I was ready to eat some scrambled eggs! I also gave the eggs a day to dry out a little more before coating them in Mod Podge.


Jellyfish Stingers
The same techniques are applied here for the outside. For the jellyfish stingers, I used hot glue on a baking pan. When it was cool, I was able to peel it off and stick it in the jar.


Store bought creepy crawlers are center stage in this jars: Worms, mice and cockroaches anyone?


Clay Creations


Next up, for these three Halloween Apothecary jars, I used baking clay for the unicorn horn and bat wins and model magic for the fingers. I quite enjoy crafting clay creations. For the horn, I first rolled two equal ropes of clay. Then I twisted them together and rolled them on the counter to get a narrower pointed end. Presto! A lovely unicorn horn. I didn’t finish it off with glitter but it could definitely be a nice add.


Model magic is really easy to shape but doesn’t hold fine details like a real clay does. I used press on nails to give the real nail effect here. These lady fingers were complete with some painted on blood. You could really go grotesque with this if you want!

Pill Bottle Makeovers
These 5 bottles were all crafted from empty pill bottles. I used a saw to cut the tops off before sanding the smooth surface. The next step was to draw the label and image with hot glue. I used matte/satin paint in grays, browns, and black to paint all the bottles. Then, I glued on labels and string.

Two Minute Snake Skin
For this lovely Halloween Apothecary jar of Snake Skin, I painted the jar with a few different colors of cheap acrylic paint that matched with the coloring of the label. (The color of the label being the result of a malfunctioning printer. The Lord knows the amount of angst that printer caused me at the end of its life.) Generally for painting all the lids, I sanded them first to ensure the paint would adhere.


The actual innards of the jar were a combination of plastic wrap and hot glue. I cut a rectangle of the plastic wrap and laid it over the foil to protect the counters. From there, I glued a snake skin-esk pattern onto the plastic wrap. I noticed that as the glue got hotter, the plastic wrap shrunk more, which I was not so much a fan of seeing happen. If I were to do this again, I would do a portion, then unplug the glue gun for a 15 second cooling. Then repeat until finished.


I got the free label for this jar from:
http://suzyhomemaker.co.uk/halloween-apothecary-with-9-free-potion-bottle-labels/


I hope you gathered some of your favorite ideas for crafting some of your very own Halloween Apothecary Jars. If you’re looking more spooky Halloween decor, check out my Spooky Halloween Book Covers.


I’m so glad you managed to make use of a few of my apothecary labels. So sorry your printer gave you problems, but you made a great job of them regardless. Your collection is looking great and I love your hot glue snake skin! Thanks for referring back to my post, it’s much appreciated. Bright Blessings, Sue ~ The Witch at OneandSeventy
You’re very welcome. You definitely deserve the credit for the great labels! Thanks for checking out my post. I’m still new to this blogging life and hoping it’s useful to others.
Love all of your ideas 💡
Thanks so much. I hope they inspire you or help you with your own!