My oldest daughter and I were super excited to do a Harry Potter themed birthday party for her 11th birthday. As I started on the plans, I knew I wanted a Monster Book of Monsters to be apart of it. From there, it was only a matter of finding the supplies and finding time.
“It is our choices, Harry, that show what we truly are, far more than our abilities.” Albus
Materials
- Wooden Box
- Fur
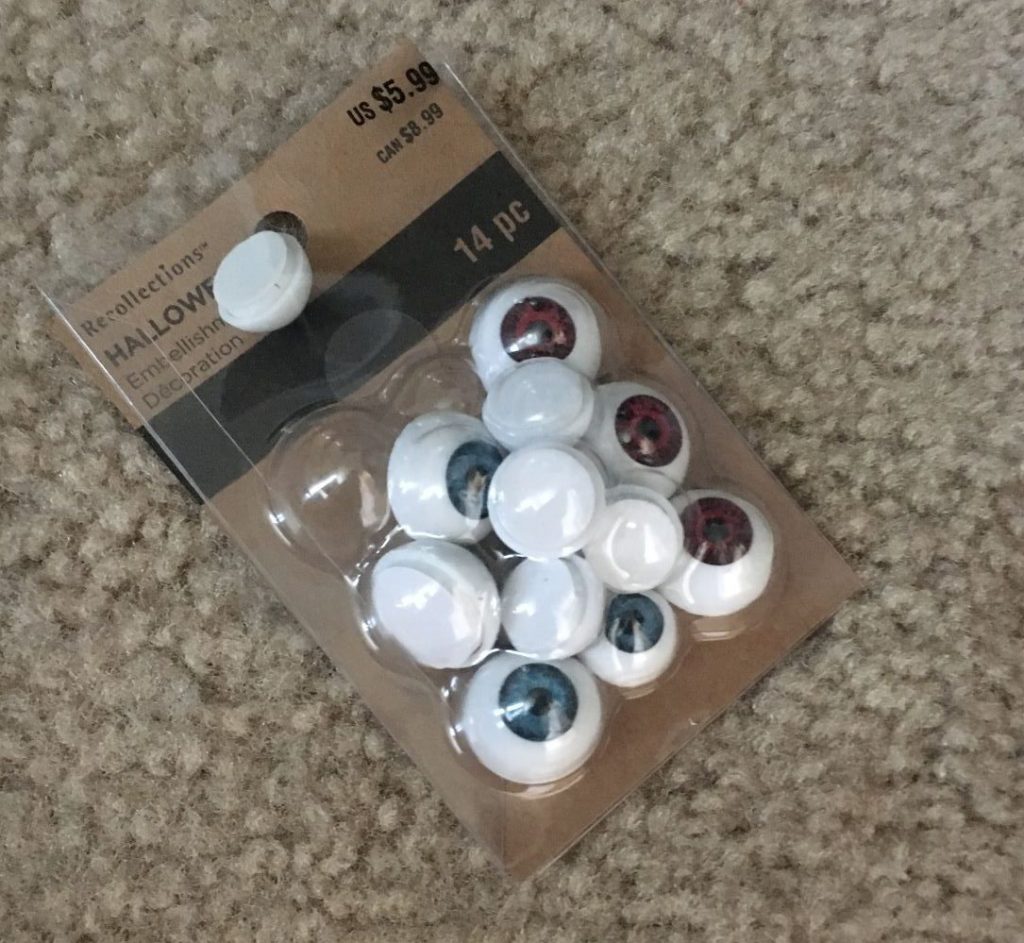
- Eye Balls
- Clay
- Paint and Brushes
- Craft Glue
- Hot glue and glue gun
- Scissors
- Paper and Printer
- Mod Podge

Ready, Set, Go
I found a perfect wooden flip lid box at Michaels. I’m not sure if they still have this one, so here’s a different wooden book box that is currently available there.

I used light brown, red, and white clay for the fangs, teeth, tongue, and gums. First, the teeth were constructed into points. After flattening the red into a strip, I positioned the teeth to lie on the red strip. I layered the back with another red strip before pushing the red down around the teeth to show the ‘root’. The only thing you need to be careful of is not touching the white after touching the red. The picture shows that I did a bit of that. The fangs were super easy. Roll them to be smaller on one end and then curve them and presto!

After baking the clay parts, it’s time to kick them up a notch with some paint to add dimension. I painted a bit of dark red and black onto the gums and tongue. Yellowish-brown served to give the teeth a gnarled look. Next, I painted the box with tan and dark brown to give it the look of pages as well as I could. Given that much of it is covered, I didn’t feel like I needed to give it much attention.

Monster Book Fur Cover
For the cover, I used two fur pieces I happened to find on clearance at Michaels. Crafting doesn’t get much easier than this step. Here it comes; glue the fur to the wood. Then….wait for it to dry. After that, I trimmed the length of the fur, because it was definitely too much. I also cut the perimeter into points and extra shagginess.
Those Eyes are Looking at You
Now onto the eyes. I also got the eyeballs at Michaels, but you’re not likely to find them in a store if it’s not around Halloween. To be honesty, I wasn’t sure what to do with creating the eye mount. I thought about using oven-bake clay but was afraid it would melt the eyes. At the end, I went with a mountain of hot glue instead. After I piled it up, I painted it brown. I didn’t have enough red eyes, so I also painted the irises red.

The book label was created in Microsoft Word and printed on computer paper. I trimmed the fur shorter in the spots where I was going to put the label before gluing the labels down. I put Mod Podge on the label to stiffen the paper.


From there, it was just a matter of gluing on the fangs, teeth and tongue. I used hot glue initially, which worked just fine. Over time, the fangs have gotten knocked off a few times, so I’ve recently used super glue to get them to hold. As my girls would say, this DIY Monster Book of Monsters is easy peezy lemon squeezy.


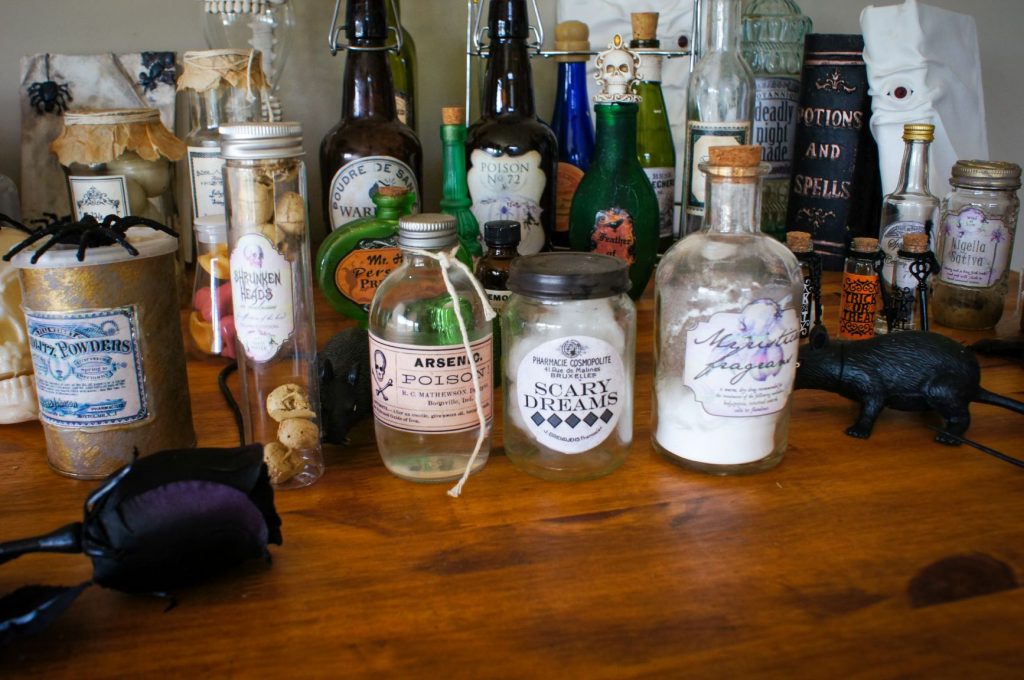
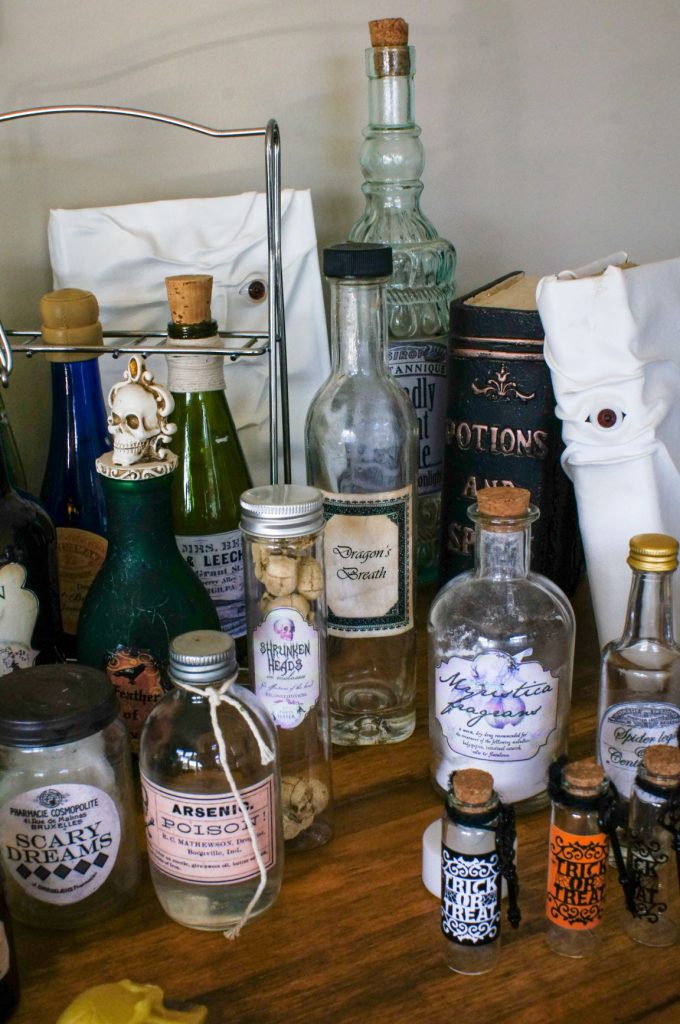
If you’re looking for other Harry Potter crafts, try some apothecary bottles for Potions class or get some Harry Potter Party Ideas from my party post.