Tag: Kreg Jig

Capture Nature’s Beauty with a DIY Live Edge Coffee Table

As we were starting to furnish our new living room, I was really hoping to create something more unique. I refinished my grandmother’s antique trunk to use as the coffee table but ended up using it as a side table due to its height. I happened to come into possession of a thick cut of large tree trunk that became the inspiration for this Live Edge Coffee Table. The first step in the monster process of leveling out the thick-cut can be found in my other post. This post is about creating the base and top finish.

Live Edge Coffee Table Steps

Materials

  • 2×4’s (likely only 1 is needed but depends on your slab)
  • Decorative Metal sheeting
  • Pocket Screws & Kreg Jig
  • Spray paint
  • Resin
  • Wood screws
  • Stain (if desired)
  • Wood glue

Live Edge Coffee Table Finish Options

Version One

After much belt sanding and subsequent backache on my first slab, I was ready for putting on the finishing touch. For this one, the finishing touch was going to be the polyurethane coating.

When doing a clear coating, one coat is almost never going to suffice. For this slab, I believe I did 5 or 6 coats. The more you do, the more durable it becomes. Obviously, this means you’re in for a waiting game. No special tricks needed here; brush on the poly and wait the appropriate time to dry. Then, do a light sanding and another coat. Repeat.

I used to think it would be necessary to stain to get more color out of the wood. Unless you desire a totally different color, staining is not necessary. The polyurethane brings out the natural tones in the wood. Below you see the difference in the raw wood and the poly-coated wood.

After the polyurethane dried, the top was at long last complete. I can’t begin to describe the pride and relief in finally completing it. After having the huge slab resting against the wall for well over a year, while I tried to figure out how to tackle it, I didn’t know if I’d ever get it done. My husband had asked when we could get rid of it and I had told him I was giving myself one more month to find a way to do it. That was what I needed to kick myself into gear.

Version Two

By live edge coffee table number two come onto my must-do project list, I was ready to try a “brand new to me” technique, EPOXY! Epoxy (or resin) is essentially like doing 40 coats of polyurethane. I was admittedly a bit scared thinking about how it could go astray. After completing it, I can tell you it’s not that scary if you simply follow the directions. As the instructions will tell you, you have to mix exact amounts of the two chemicals and have two containers to use for mixing. The silly struggle for me was finding the containers because I didn’t feel like running to the store for something minuscule yet again. FYI, it’s much easier if you get these: 

My other unknown was how much would be needed. I decided it’d be better to have too much than too little so used the whole kit. Then, it was on to my very first pour!

The anxiously anticipated epoxy pour….

It was definitely necessary to use a flat scraper to spread it around the full surface. Speed is important here folks. The epoxy doesn’t take long to start drying on you. It’s also important to cover your floor to prevent it from adhering as it drips. I wanted it to go over the live edge to protect the bark. 

A smile because it was going well!

After the pour, it was necessary to blow on the air bubbles to get rid of them. A heat gun or hairdryer works, as does going “ha” on them with your breath. I went with the last method. My girls were perplexed by what I was doing. Thank goodness this project was prior to the pandemic!

The biggest issue I ended up having with version two was the extra porous edges. The epoxy completely absorbed into the edges. I ended up having to do another layer of epoxy to finish it off. FYI, epoxy is not cheap, so I was not thrilled by having to do another layer. My other recommendation (based on this experience) is not to do it in the garage where there are gnats. I kept having to fish those little buggers out of the sticky epoxy. 

Version 2: Beautifully Glassy Finish

The Base

I made two tables that needed slightly different bases based on the uneven bottom of one of them. The basic idea here was to create two interlocking rectangles.

Version One

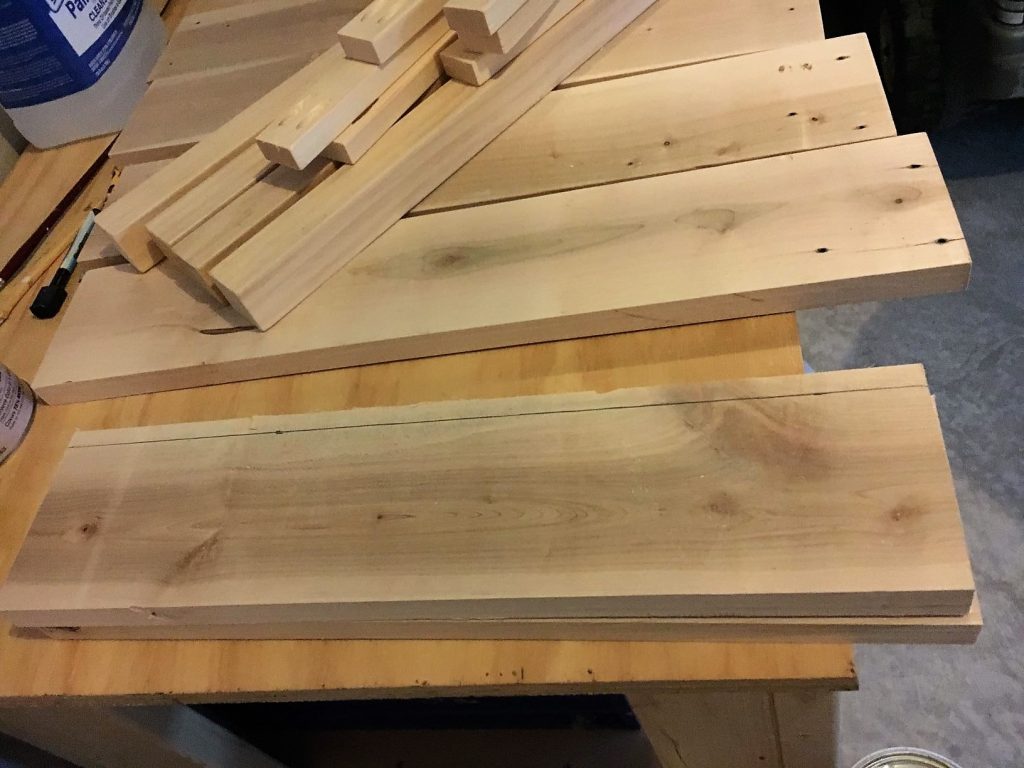
The height of the leg is dependent on the thickness of the slab of wood and the desired height of the table. I wanted a height of 19 inches, so it would be at the height of the couch seat. The measurement of the ‘leg’ should be from floor to tree slab to hide the ‘base’ 2×4’s. The base 2×4 measurements depend on the width of the tree slab. I decided to make it about 4 inches less than the slab diameter, so it provided enough support for how heavy it was and the top of the legs would be slightly hidden. 

Although the four legs will be the same height, the four base pieces will not be the same. Two will be the full length. Then there will be four short pieces. In the photo above, you can see I have the right length of the short pieces when I place a test piece in the gap. With all the cuts complete, the next step is to create the pocket holes with the Kreg jig in the base pieces and drill in the pocket screws. Below, you can see I measured the midpoint on the cross-sections to ensure it would be square before screwing in the pocket screws.

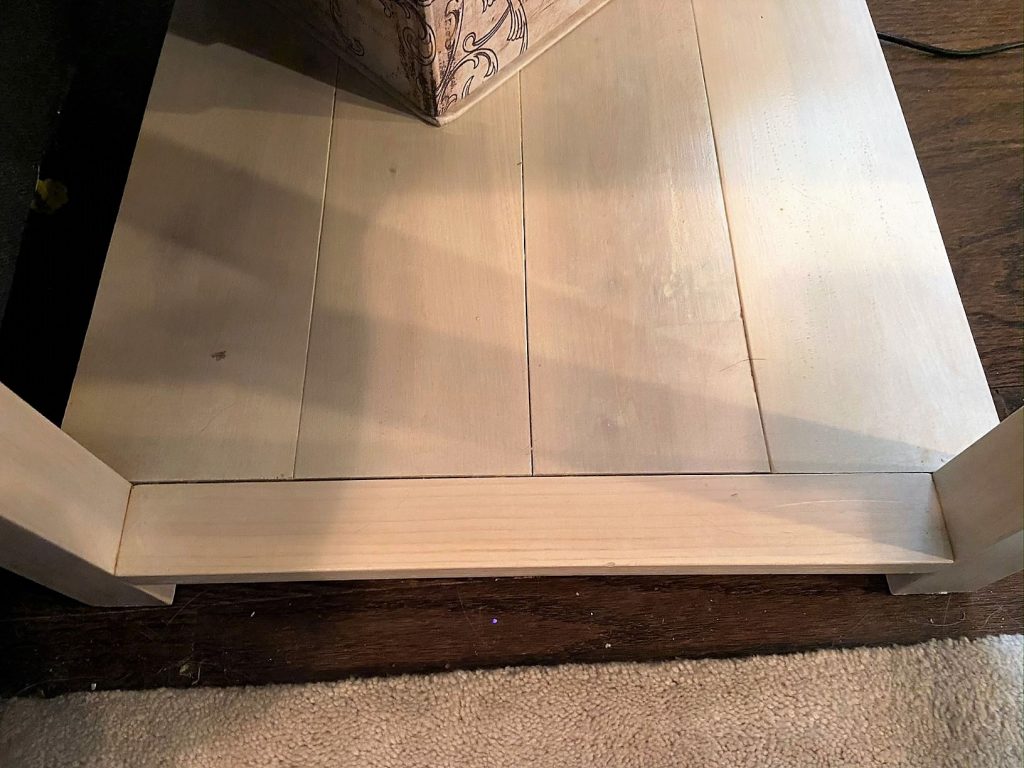
With the pocket screws in place, this table base build was complete! It was so much easier than having to level the tree slab with a router; to that I’m certain. It was then just a matter of attaching it to the tree slab with long wood screws.

Version Two

Since my other slab was thicker on one side than the other from the chain saw cut, I used a board from a crate table I had made and repurposed. I had to adjust the height of the table lengths based on that difference to ensure the top would be level. (Talk about a pain in the behind.) Then, I built the base in the same way as version one.

Gotta make sure that table is level before you screw it all in!

Version two was actually the one I started with, so I thought the legs would be just as they were. I stained the base with a dark stain and thought I might have been complete. It looked quite blah, and my husband said he thought it would be better to have more of a solid base. That comment inspired me to consider decorative metal sheeting and away I went to the hardware store. Metal sheeting; another first!

Metal Sheeting

The first time I did this, I used metal cutting sheers (borrowed from a coworker) to cut to the appropriate height for coverage of all legs. It worked alright, but it was definitely difficult to keep from catching my skin on the cut metal. I cut three sides to fit the width of space leaving the stained wood leg exposed.  

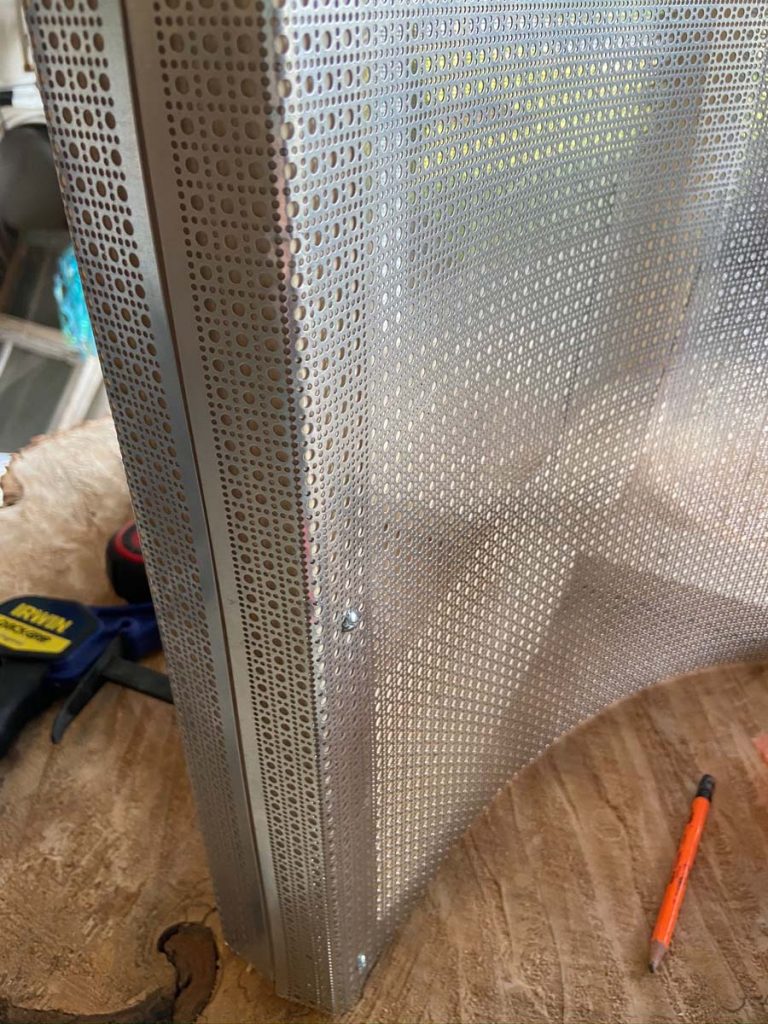
The second time around, I learned my lesson with the sheers and used this handy dandy little tool to saw through the metal. I also decided on a different method for the edges of the metal sheeting. Given there was a border on the metal sheet, I didn’t want to cut more than one side. This desire gave me the idea to use the whole width of the sheet as-is for each space between legs and wrap around the leg.

Using glue epoxy and clamps, I held the sheeting in place while I screwed wood screws into the available holes to secure it to the legs.   

I hammered the edges of the metal edging so it wouldn’t be a hazard.

Metal Sheeting Version 1: Exposed Wood

Metal Sheeting Version 2: Covered Wood Leg

I hammered the overhang to fold over the edge to meet in the middle with the other side. I tried using some epoxy glue here. It didn’t work very well, so I recommend skipping it. My last step was to hammer in flat head nails on the outside edge to keep it from flaring out. 

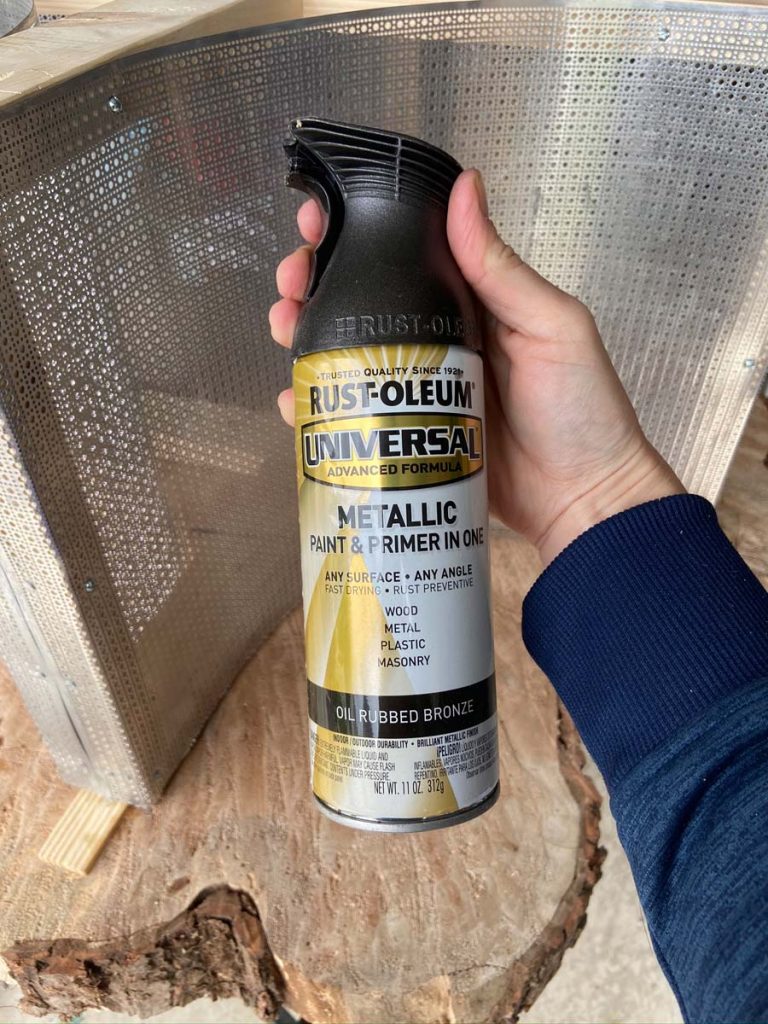
Last of all, it was time to spray paint the metal sheeting for my desired bronze look to compliment the bark. It took two coats and then I was finished. Thank the LORD!!

Two Completed Live Edge Coffee Tables

I hope you enjoyed the rundown on how I created these two tables and it inspires you to overcome some of your own fears of taking on bigger projects. As you overcome those little fears, you are sure to build that self-confidence in yourself and your growing skills. For me, it expanded my creativity as well to think of new ways to get to a great end product.

*This page contains affiliate links. This means if you use one of my links to make a purchase, I will receive a small commission at no additional cost to you. Thank you for supporting Cathartic Crafting!

A Window and Shutter Refinishing Combo Must Do

With three girls in my house, the bows and headbands were getting out of control in their shared bathroom. Previously, I made some headband holders and bow holders. They were overloaded and a bit unsightly. I had several windows and shutters in my garage waiting for a good project idea to hit me. With the desire to spruce up their bathroom, I came up with the idea to use a window and shutter to create an organizer for their hair paraphernalia. I was super excited by the idea as it served as cute décor with purpose. It was definitely a win-win situation; I got a larger window and a set of shutters out of my garage stockpile and created a quick organizer for all the bows, headbands,  earrings, and misc items. My girls thought it was a hit, so I hope you enjoy it as well!

The very sad looking before photo: a ribbon frame bow holder and an owl earring holder.

Bathroom Window and Shutter 411

The window started out as a single pane old window without the crossbars. My initial plan was to use a Cricut to cut a message to stick on the window. After an accidental slip causing the pane to break, I decided to go with a Plan B for the glass area. Plan B included constructing my own crossbars using a router and glue. More on that later…

This is what I was working with at the start.
Incidentally, this is around where it slipped off the bench and cracked the glass. It was a happy accident.

Easy Refinishing Step: Painting

The shutters were in need of a color correction from the cherry red. After separating the shutters into two pieces, I spray painted them with gray. Then, the window frame needed some refreshing with some white chalk paint.

Attaching the Shutters

Then, I attached the shutters to the window frame by attaching one side with the remaining hinges and the other shutter with pocket holes. (FYI: pocket holes are created with a Kreg jig. (If you need more info check out some of my other posts: Shutter Buffet, Living Room Set)

It was after this picture that the windowpane broke. After that mishap, it was on to plan B. I used 1/2″ square dowels and a router to cut out notches for the cross beams to fit together. Essentially, you are notching a 1/4 inch into the dowels in the spots you want the dowels to fit into each other. When they are pieced together, they should remain at 1/2″ width glued together. Four dowels and 8 notches. This requires starting with a square and tape measure to ensure your notches are going to line up correctly. 

Shelves:

Using 1/4″ board scraps, I made some framed shelves for the bottom of the shutters. I thought of them like window flower boxes. Then, I used a metal screen to cover the openings of the shelves. It was easy to cut them to size and hot glue them onto the inside of the 1/4″ wood. Wood, glue, and screws attached the shelves to the shutters.

Pop-out Earring Holders:

With plan B in play, I was inspired to utilize the empty space for additional purposes. I decided to replace the hanging owl earring holder with an earring holder window square. The same square dowels were used for the frames as for the crossbars. In case you are interested, I include a tutorial on constructing an earring holder with a frame and metal screening on my picture frame post


Shutter Headband Holder:

To say it simply, my 6-year-old has A LOT of headbands. The shutter pull bar was a perfect way to hold them in place.

Towel Hooks to Finish it Off:

The builders of our home put one long bar towel holder in this bathroom, which sufficed for the last 5 years. I was tired of not having a place to hang multiple towels separately. With that notion in mind, I decided to put up towel hooks on the bottom of the window frame. I’m really happy about the added options the double hooks now provide.

Bathroom Window and Shutter Finishing Touch

Using a fairly thick wire I had on hand and some fabric, I made a wreath for the window and shutter decor. I used the wire to “sew” (aka poke holes) into the material. 

Then, the bows could then be easily clipped around the wreath. 

With the placement of the headbands, bows, towels, and earrings, this window and shutter bathroom organizer was complete. After all the work was said and done, it was so much more beautiful than the previous version. Thankfully, my daughters corroborated that belief.

*This page contains affiliate links. This means if you use one of my links to make a purchase, I will receive a small commission at no additional cost to you. Thank you for supporting Cathartic Crafting!

Faux Wood Plank Shoe Enclosure to Keep Shoes Out of the Way

We got a Greater Swiss Mountain puppy this past year, which ended up meaning our shoes were no longer safe. I decided to use some extra wood sitting in the garage to create a shoe box to keep them safe by the back door. It’s also served to keep the area cleaner and trip free. Rather than keeping the plywood as is, I opted to do a faux wood plank technique to the top.

Our puppy Skye, particularly enjoyed our flip flops.

My Materials

  • 3/4″ plywood
  • 1/4″ plywood
  • 2 hinges
  • Spray paint
  • Stain
  • Drawer knob
  • Painter’s Tape
  • Screws

Tools

  • Painter’s Tape
  • Nail gun and nails
  • Kreg jigs
  • Circular saw
  • Drill
  • Saw horses

Using the circular saw, I cut the plywood to the width of the wall space and the depth of my husband’s shoe. If I had had enough 3/4″ plywood in my scrap pile, I would have done the bottom with it as well. Unfortunately, I didn’t, so I used 1/4″ plywood instead.

I decided to use this Rustoleum spray paint I had from an ombre project I completed for my niece. The pop of color was a nice surprise on the inside. Rustoleum has good coverage.

I used some inch long wood screws to attach the bottom to the sides. Since it was just a simple project to keep our shoes safe, I didn’t worry too much about having 1/4″ board on the bottom being attached with glue and screws.

Faux Wood Plank Time

I thought it’d be fun to give the top the look of panels. To achieve this, I taped it to allow for the stain to create lines. The darker stain was first with two coats to make sure it would be dark. I switched the painter’s tape to cover the dark stain and then did the lighter stain. After that, I did a second coat on a few of the spots to have a third variation.

I put on two hinges I had handy. It seemed better that we’d have to pull up on the door to open it and make it puppy proof, so that is what I went with doing. I drilled an easy hole in the middle of the front panel and screwed in a knob to finish it off.

Safe and sound

The finished product for family shoe organization and safe keeping! If your looking for more organization ideas, check out the Family Command Center above the shoe box here.

(more…)

DIY Bakery and Lemonade Stand Charm for Entrepreneurial Kids

While under stay-at-home orders in Maryland, my two younger daughters took hold of a bakery and lemonade stand idea. They knew they wouldn’t be able to sell the goods at that time but were completely smitten with the idea of it. It just happened that while redoing my oldest’s daughter’s room, she had decided she no longer wanted this large composite bookcase. Inspiration hit after the initial request for the stand, so away we went with the creation of it. 

When life gives you lemons, make lemonade.

Materials & Tools

Quite thankfully for our budget, I didn’t have to buy any materials for this project. I used items already sitting in wait for re-purposing. 

Materials

  • Composite Bookcase
  • Old Window
  • Scrapwood
  • Spraypaint
  • Screws
  • Cotton Material
  • Drawer liner

Tools

  • Square
  • Drill
  • Saw
  • Kreg Jig
  • Clamp

Getting to Work


I wanted this project to be as easy as possible. The easiest way I figured we could accomplish it was to cut the bookcase just above the secured shelf. This would allow for a small lip of the soon-to-be counter space. Rather than just drawing a cutting line, I used a square as my guide by clamping it on.


Safety Announcement!

Protect your hearing!! My girls have come to use their earmuffs to help quiet the noise of my saws. They also lovingly remind me to wear my safety ear muffs when they see I’m not wearing mine. I know from family experience that protecting your hearing now is important for the years to come. Be sure to wear those ear muffs when using any loud tools. I bought a pair of ear protectors for my garage visitors.


The girls in their PJ’s inspecting my work.

Here comes the Color!!!

This project was a great opportunity for the girls to join in the refinishing fun. Obviously, the blond wood color wouldn’t do for their personal bakery and lemonade stand.  They picked from my assortment of spray paint cans and got to work. I let them do what they could and filled in the light spots later.

Old Window Repurposing

Awhile back, I bought a stock of old windows for $20 and hosted a Window repurposing party. I had a few who weren’t able to make it so have been storing the windows every since and using them for as ideas spark. The girls set to work cleaning one of the windows. They cleaned the glass and scraped off some of the old paint before painting it white.

The width was just about perfect while the height was off by 3 or 4 inches. I found a spare board that worked to fill some of the difference. Using my handy Kreg jig, I attached the board to the window and made pocket holes around the window to attach it to the bookcase. 

With the window on, it was just about complete. Drawer liner from my Antique Hutch Project served to spruce up the shelves. As you can see from the above, the girls were pleased with the results. All that remained for the bakery side of things was to hide that gap. 

Time to Bring Out the Sewing Machine

The girls picked out material from my stash to make a ruffle. I can still remember my mom teaching me how to make a ruffle as a kid. You need to cut a piece of material that is almost twice as long as what is needed and start by finishing off your edges. I’m not an expert sewer, so I’d recommend checking out some other great sites, like Treasurie, for how to best do that.

To make the bunching, you sew a loose straight stitch along the whole length without backstitching. 

Then pull one of the threads while pulling the material in the opposite direction. It may be necessary to start pulling on the opposite side when it starts to get hard to bunch. 

When it’s at the right length, backstitching and a shorter stitch along the length secure the ruffles. With the ruffle complete, I hot glued ruffles to both the bakery and lemonade stands.

Bakery and Lemonade Stand Wares

A lemonade stand is dependent on some beautiful lemons!

We were making the bakery and lemonade stand just after Easter, so we went ahead with baking some Easter Sugar Cookies with icing.

Store-bought pizzelles dipped in chocolate with a smattering of sprinkles were next up on the menu list. The girls also chose to use the mini Easter desserts given to them by their grandmother.

A Quick Menu Sign

Every bakery needs a menu, so I selected this wood cut out from my stack. I used Martha Stewart Chalkboard Paint in purple and gray. 

Personalized Money

I would be remiss if I didn’t mention my love of personalized items when creating for the kids. I thought it’d be fun to give them play money to use during quarantine in liue of doing a lemonade stand at the end of the driveway. www.PrintablePlayMoney.net had free templates which were exactly what I was looking for. The girls were crazy about the idea, so away we went. A quick photo and duplication in Word gave them a stack of bills ready to hand out for us to pay for the goods.

Bakery and Lemonade Stand Open for Business

To finish this project, the girls made their own cardboard sign and offered storybooks they wrote for the waiting customers. I used cardboard and acrylic paint to create lemons, cherries, and a cupcake for extra flare. 

The girls are ready and itching to get out to the end of the driveway to put their stand to use with real customers. My ten-year-old wants to use the profits to donate to a charity cause she’s just that kind of girl. I hope you find some inspiration in our found objects project making lemons into lemonade. 

2022 Update: My girls have indeed used their stand for good since its inception. Check them out at Determined to Donate on Facebook.

*This page contains affiliate links. This means if you use one of my links to make a purchase, I will receive a small commission at no additional cost to you. Thank you for supporting Cathartic Crafting!

A Straightforward DIY Living Room Table Set just for You

While trying to decide on the direction for our new living room that wouldn’t break the bank, I was inspired by pins on Ikea furniture hacks. One, in particular, struck my fancy because of its simplicity and look. I ended up finding a discounted Hemnes white coffee table which was the start of this living room table set project. If you’re looking for a simple project that will impress your friends, then follow along with me.

Personalizing Ikea

Supplies for Ikea top:

  • 3- 1x6x8
  • 1- 1x3x6
  • 1″ Wood Screws

Supplies for Side Table:

  • 1- 1x2x6
  • 1- 2x2x8
  • 3- 1x6x8
  • Stain
  • 1 1/2″ Wood Screws 
  • Kreg jig & screws
  • Wood Glue

I assume you know how wood measurements work, but just in case, here’s a nice breakdown at Arch Toolbox. Wouldn’t it be so much easier if the name matched the actual size?! I was given some poplar boards from our builder that were perfect for the coffee table and as the main part of a coordinating side table. I used pine for the store-bought wood for it’s affordability. In general, pine is a softer wood, so choosing this option could mean finding nicks and scraps in the wood at some point. Poplar is a harder wood that will take more of a beating.  

Getting started on this Living Room Table Set

This portion of the project involved ripping the boards into 6 equal pieces at 4 3/4″ x 41 1/4″. You have two options on how to connect them side by side; doweling and pocket holes. Pocket holes are easier to do but can be tricky to ensure the boards stay completely flush. Doweling needs to be pretty precise, so it can be tedious and slightly difficult to do by yourself. I chose to go with the pocket holes route for both tables here. I also decided to sand down the corners of each board to ensure there was a distinction between the boards after they were secured together.

living room table set: ikea update

After the long middle boards were screwed together, I cut the end boards to size at 2 3/8″ and 29 1/4″. I used the Kreg jig to create the pocket holes to attach the ends. With the top together, I stained it and the sides with a white stain followed by three coats of clear polyacrylic. I wanted to keep the top white to match the table and go with the white, gray, yellow, and teal color scheme of the room.

living room table set: new top

To finish this easy table upgrade, I just needed to screw the wood top to the coffee table. This was simply done by turning the coffee table over to expose the bottom. It was best to clamp the top to the table to avoid a gap between the boards. I chose not to use glue and stick with just the screws. To make sure the wood wouldn’t splinter with the wood screws, I pre-drilled the holes.

Side Table

Cuts

  • 8 – 1″ x 4″ x 19″
  • 4 – 1″ x 4 1/2″ x 24″
  • 6 – 1″ x 2″ x 13 1/4″
  • 2 – 1″ x 2″ x 19″
  • 4 – 2″ x 2″ x 24″

The width of the legs and shelves is 14 3/4″ and the height of the side table is 24 3/4″.

The side table consisted of cutting the wood to size and using the kreg jig. I didn’t care to have to do more cuts than necessary, so my schematic limited the need for notched cuts by utilizing the 1×2’s.

living room table set: boards for side table

The poplar boards I used also needed to be ripped to size for the two shelves. I used a circular saw with a guide to cut the four boards, which works well enough. I would actually much rather have a table saw to use that would ensure an absolutely straight cut. My woodworking projects would be so much easier with a few extra tools, that’s for sure, but it just goes to show you don’t need all the special tools to complete a project. After cutting all the boards, sanding them smooth and making the pocket holes with the kreg jig was up next. 

Almost finished

Pocket holes galore. I used pocket holes to connect all the pieces together as you can see below, making sure to screw the shelf into all four legs and the 1×2’s. With all the hard work done, it was finally time to stain it. Rust-o-leum Antique White stain applied with a white rag gave it the finish I was trying to achieve. It needed three coats of stain to give it a consistent white. You generally shouldn’t need to do that many coats, but I felt it was warranted with this one. The most important point when staining is to go with the grain and not to allow it to pool in any one spot. 

And that’s all that is involved with creating a simple side table and giving an Ikea table an upgrade. If you’re looking for another easy project, check out Revamp a Composite Bookcase. It uses 1×2 pine boards just like some of this one.

living room table set top
living room table set bottom shelf

Completed Living Room Table Set Project

living room table set finished side table
living room table set: finished idea table

*This page contains affiliate links. This means if you use one of my links to make a purchase, I will receive a small commission at no additional cost to you. Thank you for supporting Cathartic Crafting!

RSS
Follow by Email
Pinterest
Pinterest
fb-share-icon
Instagram

Are you interested in getting alerts and information on all things coming out of Cathartic Crafting?! Then go ahead and submit your info below:

Verified by MonsterInsights