Tag: Sanding

The Easiest Way to Even Out a Wood Slab with Basic Tools

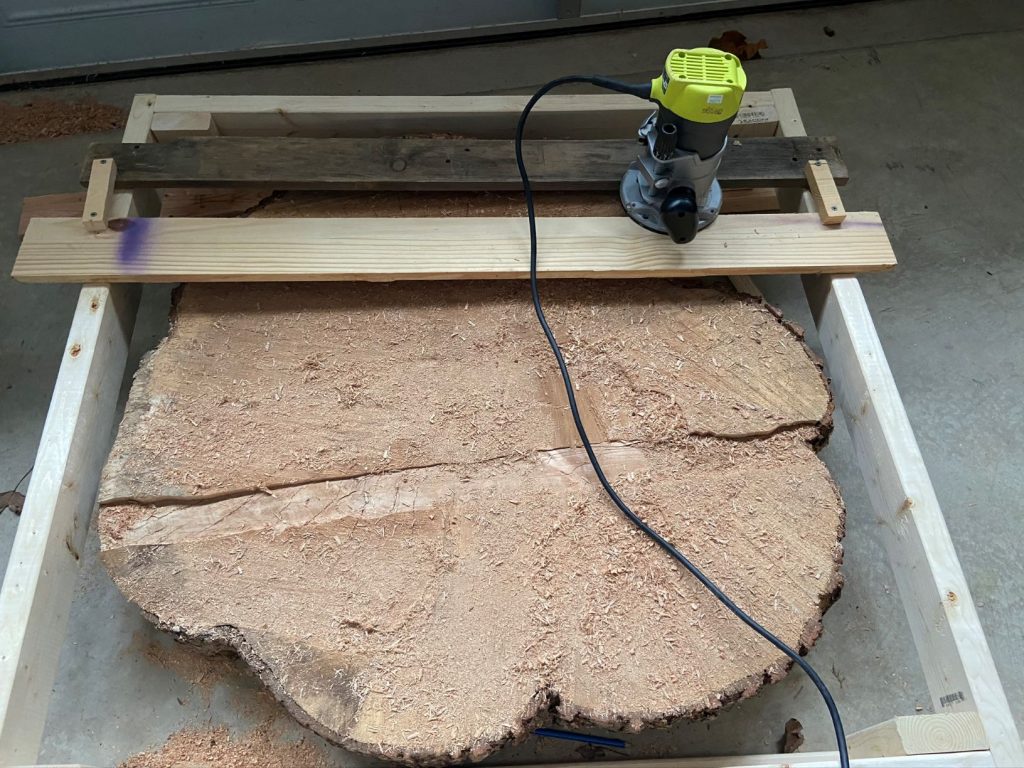
I find it a bit amazing how as life happens, you can stumble onto the opportunities for projects you have wanted to do. This project was spurred by just such an event when I went to a Christmas party hosted by my husband’s coworker. She was much like me and as she gave me a tour of her outstanding house, she explained she had a huge log she was hoping to make into a variety of things. It was quite serendipitous to say the least. I had already had thoughts about things I would make if I could get my hands on a wood slab or stump.

The above photo was the slab her husband cut for me. It was enormous and heavy. They had a lot of other log sizes, so I thought I’d grab a few other wood slabs with a smaller circumference. I hadn’t ever used a chainsaw so cautiously went into trying to cut a piece. It was super difficult, so we came to the conclusion the blade needed to be sharpened. 

The two of us lifted this huge sucker into the back of my Honda Odyssey by bending from those knees. I felt pretty powerful after that. Definitely small but mighty. 

Wood Slab Struggles

The wood slab was just too tall for what I intended. I searched around to try to find a sawmill to cut it in half. I finally found one in Pennsylvania who said they could do it. When I got there, it was too wide for their machine, so they used a chainsaw to cut it in half. It looked quite difficult and took much longer than expected. $50 later, I had two wood slabs, one that was relatively even and another in a fairly rough uneven shape. The rest of this story is about the one in rough shape. 

One side was about 2 inches higher than the other. The best side still had chainsaw divets in it as well. Even trying to use a chain saw to even the height would be quite difficult. This is when the router came into play. A router can be used for a variety of projects and it seemed to be the only option for this one. 

Materials for Evening it Out

The first task is to create a square from the 2×4’s just larger than the size of the wood slab. Then cut the legs for the stand just a smidge taller than the tallest point of the wood slab. 

Next up, creating the router sled. Initially, I used some scrap wood. The boards were not quite long enough, which made it difficult to maneuver. I can verify for you, it’s much easier if you use boards that extend well beyond the frame perimeter. From there, it’s just a matter of setting the height of the straight router bit. I used a 1/2″ straight router bit but would’ve gone with a 5/8″ bit if I had it. Then, it’s just a matter of sliding the router back and forth on the sled, which is meant to keep it level. 

SOOO MUCH SAWDUST

Sawdust is going to go everywhere with this project. Make sure to do it in a fairly clear space for easier cleanup.

Smoothing the Wood Slab

The router did a great job of leveling the whole wood slab out. It definitely kicked at times creating a few nicks. I decided to try using a handheld planer to smooth it out as a first step. It was just a matter of running the planer over the surface. I eventually paused on that to see how the sandpaper would work out instead.

The look of progress

Time to Sand

After the router, it was time to put the muscles to work to sand the wood slab with extra coarse sandpaper using the belt sander. That 36 grit coarse sandpaper was wonderful at smoothing it all out. Just be careful not to create a ton of sandpaper grooves while you are going. From there, it’s necessary to sand it with a higher grit to smooth out the coarse lines. 

Look How Smooth It Is!

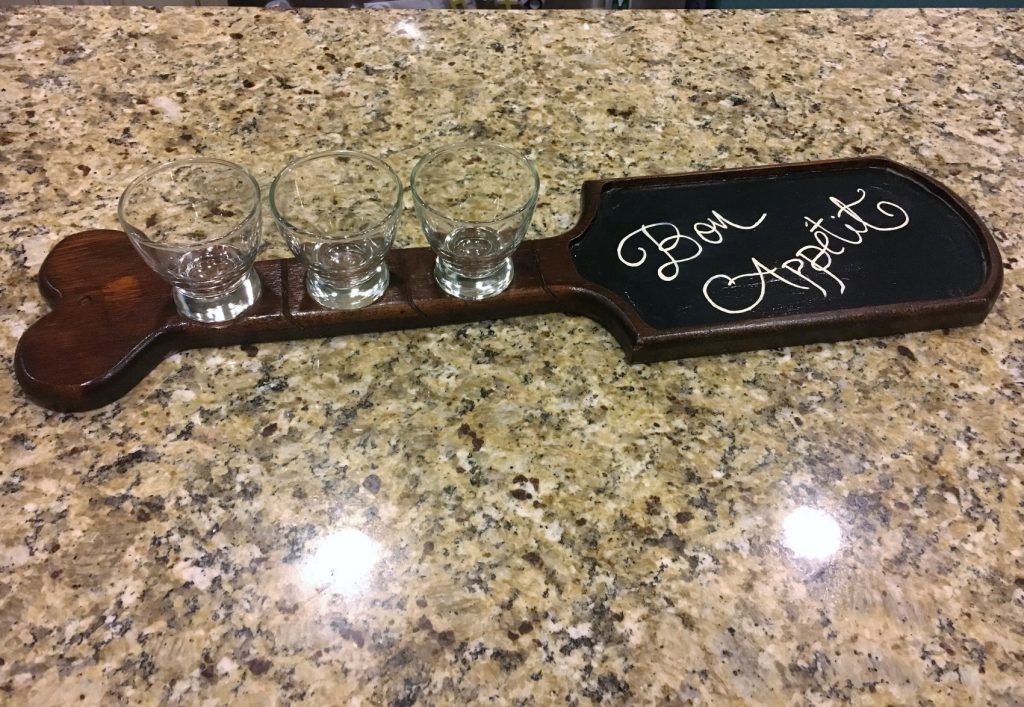
Not a ton of steps but definitely a lot of effort goes into this method. That was the reason I procrastinated so long on starting it. My back was aching after being bent over the slab for so long. When you don’t have all the special tools, it becomes necessary to find affordable ways to complete tasks using tools you may already have or would be useful in a variety of projects. I rely on this toolset quite a lot, so you can’t go wrong with purchasing at least a router, saw, drill, and belt sander. I hope this quick rundown helps you with your own wood slab project!  Check out some other wood projects you could create with a router, like a Paddle Platter.

*This page contains affiliate links. This means if you use one of my links to make a purchase, I will receive a small commission at no additional cost to you. Thank you for supporting Cathartic Crafting!

Vintage Trunk Coffee Table: From Bedraggled to Shabby Chic

I don’t know about you, but I think cruising the Facebook marketplace every now and again is a must. I’m assuming you’re like me in that you want beautiful décor at budget-friendly prices and you’re excited about the challenge of making a piece your own. I’ve found some real gems in the marketplace. When this trunk came across my feed with a $20 price tag, I was immediately sold. Follow along as I convert this bedraggled vintage trunk to a beautiful shabby chic coffee table on wheels.

Vintage Trunk: Starting Condition

In addition to peeling canvas, there were some signature cracks in the top of this trunk. It was a bit sunken in as well. 

Fixing those Cracks

I settled on using some quarter board I had on hand to solve the sunken crack issue. I cut it to size and screwed it to the top with 1/4″ long screws to level out the cracks. It worked like a charm. From there, I peeled the canvas off the outside from most spots. I left a few panels that were intact. 

I used wood filler to fill the cracks and level out some of the few remaining low lying spots. After a good bit of sanding to get it completely smooth, I was ready to paint. 

Fusion Paint for the Win

I had some Inglenook Fusion Mineral Paint from Vintage Finishes from a recent armoire project. It paired well with the wood and metal colors of this vintage trunk. Green painters tape kept them free of paint. I used a paint brush I also purchased from Vintage Finishes for the majority of the painting, but needed to use some small brushes to get the corners and spots around the locks. It was a fairly quick step. I debated doing just one coat but ended up touching it up with a second coat. 

Vintage Trunk in need of paint aging

I had thought the paint would look completely nice as is with the wood, but I ended up feeling it was missing something. It sat for a night and then I decided to use some dark wax I had to age the paint. It could have been accomplished by sanding the paint in areas but with the difference of the canvas in some spots, wood in others, and wood filler in others, I didn’t feel it was an adequate option. For this vintage trunk look, the wax gave it just the right touch.

Inside this Vintage Trunk

The inside of this trunk was not as easy to scrape clean as the outside was to peel off in long strips. I used some special cleaner purchased from door to door sales gals. This stuff has worked some magic on grease and cars. Anyway, I did my best to scrap all the loose bits off to ensure maximum sticking. It’s also important to rub off all the dirt as best you can. There can definitely be a smell, so jump on over to my other post on trunk refinishing for some other tips. 

Wallpaper time

On my previous trunk project, I used a cotton material with glue and Mod Podge. Initially, I thought I would do the same with this vintage trunk, but then, I thought about the recent project I’d done with peel and stick wallpaper. I was sold on the idea of peeling a sticking. After looking at the options, I was fairly certain I would do a flower pattern. Just as I was about to place the order, I found this mandalla like one which really spoke to me for this vintage trunk. I was sad it didn’t have the measurement lines on the back like the last wallpaper I’d used, but I was alright without it. The hardest part was that it was slightly wider and stiffer than needed, so it required some finessing. A long scraper helped with smoothing it out. I did some of this while watching Bride of Boogedy with my kids for Halloween. A childhood favorite movie I couldn’t wait to show my girls. They were annoyed with the sound of the scraping, so I had to put a pause on the progress. I’m pretty smitten with how it turned out!

Easiest Part of the Project

I did a fair bit of searching for vintage wheels that were appealing and affordable. As usual, I landed back on Amazon, where I found these vintage wheels. They came with the screws the perfect length for my project and a screwdriver. I probably could have just screwed them in without drilling a hole but I didn’t. I decided to make my life easier by drilling the holes. In case you would like a tip for this type of thing, use a pencil to mark the holes. Then, remove the wheel to drill the holes. Using a drill to screw in the screws, tighten one screw 3/4 of the way and continue with the rest to ensure they all fit into the holes. Once the screws are all in, tighten them up. Presto! The 5-minute step was done.

Vintage Trunk Ready for Display

I hope you enjoyed the fairly easy project run down. With some muscle put in scraping and some budget friendly purchases, this bedraggled vintage trunk turned into a shabby chic coffee table showcase. 

*This page contains affiliate links. This means if you use one of my links to make a purchase, I will receive a small commission at no additional cost to you. Thank you for supporting Cathartic Crafting!

Composite Bookcase Revamp into Unique Upscale Decor

Have you been hanging on to the affordable furniture you got when you were first married or moved into your first space? Is money still a bit to tight to buy nice stuff? The affordable option is to give that furniture an overhaul. In this post, I’ll show how to revamp a composite bookcase with just a few supplies. My bookcase was one of those items from good old Walmart. I’m sure I’m not the only one to have something like it. After use, these composite furniture items can even be hard to give away since many donation companies won’t take them. That leaves only a few options; the dump, a plea for someone to take it for free or to get into that happy mental space to give it a pleasing boost.

Getting to Work

First step is to give that shiny finish a really rough sanding with some low number grit sandpaper. I give a little more detail about the types of sandpaper in my wood paddle platter post as a reference. If you have an electric sander, you could use it for the outside and shelves. The inside corners will likely need hand sanding. I like the sanding blocks they sell now in stores, but in a pinch, you can use the method my dad always used. Fold the sandpaper sheet around a hand size scrap piece of wood. This makes it easier to hold and to sand. 

Supplies

  • 1/4″ plywood
  • 1×2 boards
  • Paint
  • Stencil
  • Paintbrushes
  • Wood filler
  • Wood glue

Tools

  • Nail gun and compressor (or nails and a hammer)
  • Kreg jig & screws
  • Wood glue
  • Dremel
  • Saw
  • Scraper

New Back Panel

Cardboard backs are pretty much a given with these composite bookcases, so it’s a given that it should be replaced. Cut the 1/4″ plywood to size before starting to paint. Then paint your base color. I wanted to give mine a fun feature, so I went with key stencils in the same color I chose for the outside. I was slightly disappointed about how hard it was to see. If I were to do it again, I would do the stenciling in a slightly darker shade.

Next up is to use the nail gun to attach the plywood to the back of the bookcase. To ensure it stays secure, put wood glue on before nailing the back.


Well on your way now

Composite bookcase painted interior

If you look below, you might be confused as to why it’s painted here and not painted later. That is simply because I didn’t start with the sanding part. I sadly admit to you that I take the lazy way out at times and it normally comes back to bite me in the end. You’d think I’d learn better than I do. This ended up meaning that the paint was scratching off when I started to work with it. I also needed to fill the peg holes with wood filler to create a flat surface. You should definitely do both of those things if you will be securing the shelves in place.

The Wood Frame for this Composite Bookcase

The measurements for the cuts of the 1×2’s really depends on the size of the bookcase. My cuts were:

  • 2   28″ pieces for the front horizontal bars
  • 4   31 3/4″ pieces for the vertical beams
  • 4   8 5/8″ pieces for the horizontal beams on the side

Cut them to size and drill holes with a Kreg jig. When connecting them together, you should start with creating the front square and the side rectangles. After those are together, it’s time to connect the sides with the front through the pocket holes. 

After the frame is completely built, it can be attached with glue and a nail gun. You should also attach the shelves with glue and a nail gun from the outside. There are a variety of nail guns out there. Mine is on the cheap side so doesn’t have any bells or whistles.

Even though I tried to keep the gun straight as can be, there were a few of the 1.5 inch nails that went askew. It meant they were sticking out of the shelves and needed to be cut. Talk about wanting to pull your hair out, I was completely annoyed. So be warned that it doesn’t always go smoothly. I chose to add vertical boards to support the sagging shelves, but you can leave without them if you like. Mine had experienced years of holding kids books. I used wood glue and nailed the boards from both the top and the bottom.

revamped composite bookcase with new frame
You can see here that the bottom board is not flush to the ground. That is with the intention of being flush with the bottom shelf and giving a bit of a gap with the floor. Be sure to measure where your bottom shelf falls before securing the horizontal beams to the vertical.
Composite bookcase with new frame

Time to Dremel for a Unique Touch

At the time, I hadn’t had a lot of experience with a dremel. I chose to add this touch to practice the skill. Obviously, you don’t have to go the same route, if you don’t have a dremel. If you are opting in, trace the stencil with pencil onto the wood before starting to cut it out. Take your time, go at it at a bit of an angle and you’ll be fine.

Paint

After all the cutting and drilling, it’s time to move into the home stretch with paint. I chose affordable paint from Michaels in Sea Glass. It went on easy and has held up perfectly well over the years.

For the top, cut a piece of wood or plywood that is an inch bigger on the sides and 1/4″ extra on the front than the bookcase measurements. The back of the top is flush (aka even) with the back. I used a white stain applied with a clean white rag on my piece to match more with my paint. If you don’t have much experience with stain, don’t worry. The important thing to remember is to go with the grain of the wood and not to allow large pools of stain to sit on the surface. Doing so will leave you with a spotty uneven look that can only be corrected with significant sanding. You can end it there with the stain or keep going as I did. 

DIY Rub-On Words

I came across this awesome tutorial on Pinterest on how to transfer images using wax paper and was pumped to try it with this project. If you are looking for a way to accomplish the task with materials you have at home, this is it. The hardest part is getting the printer to feed the wax paper without crumpling it. It was another one of those screaming in frustrating experiences. I found the best method was to tape the wax paper to a piece of computer paper to ensure 100% success every time.  I also had to learn how to get the words to be reversed for printing. This can be accomplished with 3-D Rotation of a text box in Microsoft Word. 

Reference below:


“Kind words are keys that fit in all locks.”

Revamped Composite Bookcase

The Final Look


It’s a bit hard to see here, but I added a white key and 2 lock stencils to the outside panels as well. 


Empty composite bookcase
I made the FAMILY hanger and placed the initials of my three girls to finish off the space.

Filled with Family:

Finished composite bookcase

That’s it! Not a terribly difficult project to take that humdrum composite bookcase to a new posh look. I hope you are happy with how yours turns out!

Flip Coffee Table Stencil Refinish

Plain black coffee table or stencil refinished coffee table?!  Which would you choose? When a neighbor posted the black coffee table as free to whoever wanted it, I jumped at the chance to give it a new unique look. Free is fabulous in my book. It was a composite wood table, so definitely not as durable nor easy to alter as real wood. This wasn’t necessarily a bad thing, because it meant I had to stick with a simple paint job. For this refinish, less was more, and perfect for anyone looking to do something new.

Start of the Stencil Refinish

I started this project by sanding down the shiny finish to give the paint a fighting chance of adhering to the surface. Sanding is not my favorite thing in the world, so it tends to be what shines through as my weak point in projects. My proof of this is to come.

Painting

To make my life easier, I bought paint from Michaels, teal and white. I try to fusion mineral paint when I can, but have found it’s hard to find it locally. You can use the website https://fusionmineralpaint.com/where-to-buy/ to find it near you or order online. instead of searching around for fusion paint. I started with painting the outside teal. Unfortunately, it didn’t adhere properly to the spots that weren’t sanded as well, so I was kicking myself a bit for that. 

I decided to take a step back and spray paint the whole thing with white primer. It was easier than sanding it all again and helped hide the black from coming through the first coat of the teal paint. 

You can plainly see the spotty finish in the top right there. Blah

After spray painting a few coats of white, I repainted the whole thing with the teal. I was happy with the final finish. I painted the cubbies and the internal storage area with white to give it a more defined look. When the solid colors dried, it was time to give it a stencil detail.

Stencil Refinish

Calculating stencil refinish

Then it was time to pull out the old pencil and paper. It’s crazy how many of my projects involve calculations. This tends to be my stuck point because of the fear of messing it up. I use the knowledge to reinforce the importance of understanding math with my three girls. For this stenciled top, I had to figure out the width of the border for the long side and short side by considering the width of the stencil and how many could fit across. This stencil was more of a challenge, because it wasn’t completely centered and square to the border. A Martha Stewart fail if you ask me.

First step Stencil Refinish

It’s a fine art

To be honest, I haven’t done a ton of stenciling. In the handful of stencil refinishing projects I’ve done, I have learned there’s a fine art to mastering it. It’s simply not easy to get it to be perfect. For instance, you have to have the exact amount of paint on your brush to keep it from seeping underneath the borders while still giving it a solid coat. I started by stamping/patting the loaded paintbrush on a paper plate to take off the excess and evenly distribute across the bristles. It’s best to start stamping the brush in the large open portion of the stencil to unload some of the paint there first before going towards the edges. 

Stencil Refinish preview
Be sure to use a square for repeating stencils to ensure everything stays even. This picture shows that the last stencil was slightly tilted to the left and was definitely visible to my OCD self.
Stencil refinish going off square
Some of the white coatings weren’t completely even and there was a bit of seepage. I decided to sand the whole top a bit to even it out and give it a very slight aged feel. This is a perfect example of how imperfect I can be and how you can hide mistakes if you think creatively.
Large Stencil in progress on refinish
After I completed the top, I finished it off with a large stencil on both ends to tie it all together.

Final Touches

Stencil Refinish almost complete

Then, I painted the cubbies and inside with white paint to finish with the painting portion of this project. I wanted to ensure the paint wouldn’t scratch or peel with frequent use so sealed it with polyurethane. Some polyurethane has a yellowish tint to it. Here’s a tip; if you use that on white paint, it will cause the white to go slightly yellow. If that’s alright with you, go for it, but if not go for a clear coating.

Major tips for patterned stenciling; Measure measure measure and a square (the tool, not the shape) will be your BFF.

The End Product:

And that’s a wrap on this Flip Coffee Table Stencil Refinish Project. Only a few supplies and a limited number of steps to a completely new look!

Stencil Coffee Table Refinish Final Product
Stencil Coffee Table Refinish in living room

DIY Wood Serving Platter for your Next Gathering

If you’re anything like me, you likely see creative possibilities all around you. Sometimes in comes in the form of more random options. For this easy woodworking project, I was inspired by an oar shape. After some brainstorming, I came up with this wood serving platter idea. 


“She believed she could so she did”

My parents both grew up in the great state of Kansas before moving to Maryland, where I was raised. During my younger years, we would make the long drive once or twice a year to visit our many relatives. I now try to get out there every few years to spend a week visiting with as many in the area as we can. We made the trek to join in the family reunion with the family from these two fabulous people below, my paternal grandparents. They are a crafter and carpenter extraordinaire among a great many other things. The line of DIYers is obviously pretty long. In 2017 when this photo was taken, they were 91 and 94 years old. I can only hope to live as long and fruitful a life as these two.

Grandparents

During this particular reunion, the family was making carpenter stools to match my grandfather’s well-used one. My grandmother was also providing instructions on how to cut a chicken down to make her fried chicken. It was quite a unique and memorable affair. My family knows how to do it right.

grandfathers carpenter stool
Family woodworking at its finest. Look at the line of constructed stools. I certainly use mine plenty now.

It wouldn’t be a trip to my aunt and uncle’s house in Missouri without an exotic animal sighting. Missouri seems to have laxer animal rules, so there’s quite a bit of animal variety in the area.

Now on to the Project

Part of this particular Kansas trip included cleaning out my parents’ old shed, which happened to have a couple of boxes of ready-made wood forms. That wood was calling my name, so I had my pick of the stock along with my younger sister. I dragged my selection back to Maryland with me and piled them up to wait for creativity to strike. Some ideas came more easily but those oar shapes nagged at me to figure out what to do. Then it hit me all of a sudden; I’d practice my raw routering skills by making a food platter. I took a trip to Goodwill, found three perfect glass cups, and to my garage I went.

Pile of projects
Pay no attention to the foot by the stack of raw wood forms.

I traced the bottom of the glass cups on the long portion of the oar and measured around the base to ensure I had an even border there. Then I used an older router to start cutting out the inside of my markings. It’s important to lock it tight when using a router. If you don’t, the blade will move deeper than you plan on it going. Unfortunately, the router I was using did not stay put and started digging in a little deeper than I’d planned. I can’t begin to describe the disgust I felt with this, so I ended up quitting it for quite a while and picking it back up when I got a handle on my frustration.

Routered oar server

Quick Fixes

Wood filler and a scraper solved the problem of evening out the spots that happened by accident. After the wood filler was dry, I sanded it down as best I could using a medium grit (80 grit) sandpaper. Medium grit (60-100) helps with smoothing the rougher areas. For more significant marks, you’d go for coarse grit (40-50). It’s typically best to sand with a fine-grit paper (120-220) to create a really smooth even surface before staining.

I’ve since started using a much better router thanks to my parents, which makes completing projects soooo much easier. This Ryobi router serves me well now. I can’t say enough about having the right tools. Many of the ones I have are hand-me-downs or are older because I can’t spend the money on better versions of everything. If I had my druthers, I’d get a bunch of new tools to speed up my projects and save my sanity. You get the benefit of seeing you can still accomplish things without all the best tools.

Oar Server with router errors fixed
The bane of this project.

Staining

After the routering was complete, I did two layers of stain with a dark stain I had on hand. I keep old cotton white shirt strips handy for staining just like my mom used to do. My parents were avid woodworkers and often built cabinets, tables, or trailers, among the list. My siblings and I helped complete many of the projects when extra hands were necessary. I’ve said many times as an adult now that although I wasn’t so keen on it as a kid, I’m thankful for the skills gained by having had to help.

Oar server with final stain
There’s a light spot on the end here where I failed to get the stickiness off from some masking tape. Before staining, it’s always important to ensure the wood is completely clean of residue or glue. Sanding is important.
Oar server before polyurethane

The stain ended up being inconsistent in the wood filler spots. I decided the oar server would look better to do chalkboard paint on the inside. If you are looking for other simple projects with chalk paint, check out this easy frame project. Then I painted “Bon Appetit” with white acrylic paint and finished it off with two coats of polyurethane to seal it for food and washing. The clear coating really gives it the finished look as well.

Oar server ready to use

I put a twine hoop on the oar server for hanging to make it a multipurpose server and decor item.

Oar Server hanging as decor

Wood Serving Platter: Putting it to Use

Around the time I was working on this, I was attending monthly moms’ dinner nights. If you haven’t participated in these, it’s best described as one mom hosting and choosing a theme to create the main dish around. The rest of the attending moms/friends bring a dish to match the theme. This particular night was Mexican-themed, so I went with homemade churros and three different dipping sauces. It all worked perfectly together as you can see below! It just goes to show that random finds can be made into something completely fun and useful. Here’s to inspiration finding you soon!

Oar server put to use at party


*This page contains affiliate links. This means if you use one of my links to make a purchase, I will receive a small commission at no additional cost to you. Thank you for supporting Cathartic Crafting!

RSS
Follow by Email
Pinterest
Pinterest
fb-share-icon
Instagram

Are you interested in getting alerts and information on all things coming out of Cathartic Crafting?! Then go ahead and submit your info below:

Verified by MonsterInsights