Tag: refinish

11 Sensational Repurposed Old Windows

Ladies craft night anyone?! A while back, I was really into hosting crafting nights. I’d already done some painting parties, so I decided to shift gears into a window upcycling party. I found a stock of old windows for a $20 steal and sent out the invite. The windows were very dirty and very chippy, requiring a good bit of elbow grease. I did all the cleanup before to make it easy. For the event, the guests were informed that I would be providing the paint and paintbrushes. If they wanted anything special, they would have to bring it for themselves. With that, we were ready to relieve our stress by letting our creativity shine through some repurposed old windows.

That party was one of the motivations for putting this list together for you all. Since that party, I’ve had the leftover windows sitting in wait in my garage. I’ve included those generally quick and easy projects below.

11 ideas to give a whirl for repurposed old windows:

1. Bakery Stand Window

This bakery stand was one of my more recent projects. My girls were in love with the end results and have used it many times to raise money for charity, Determined to Donate.

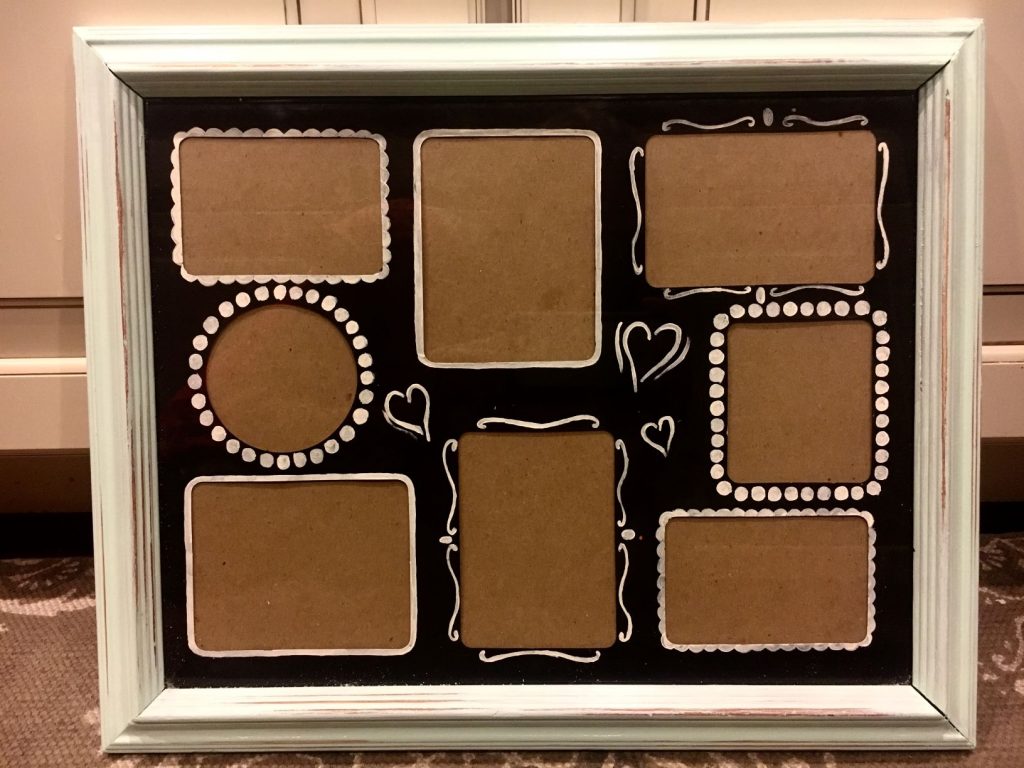
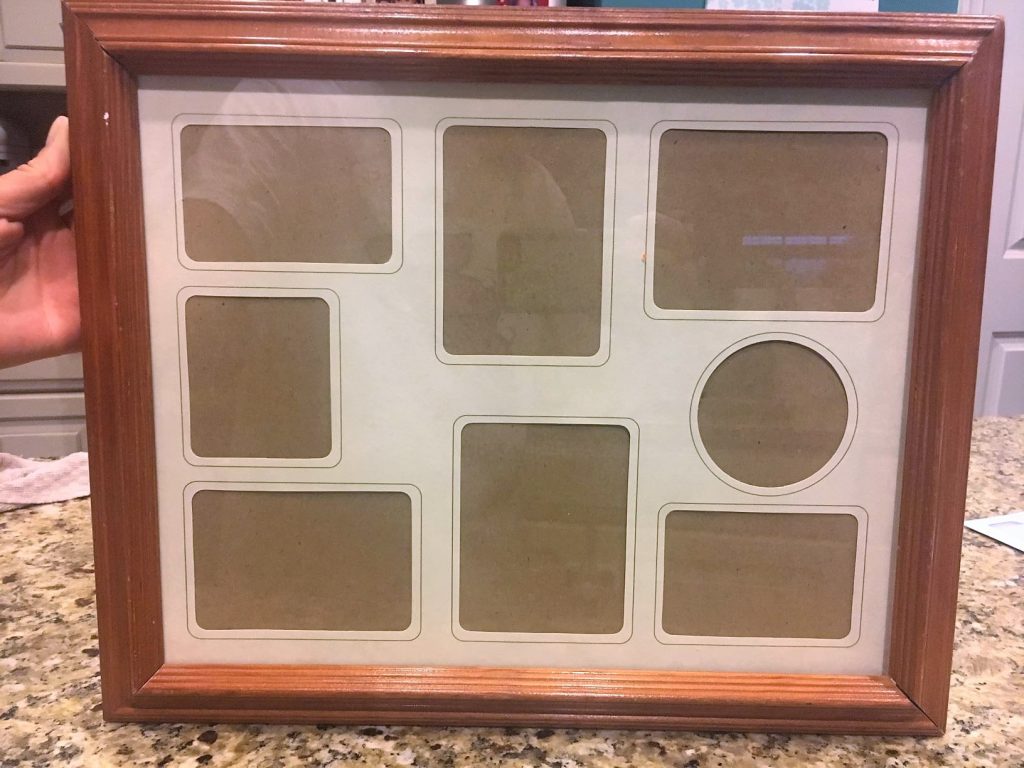
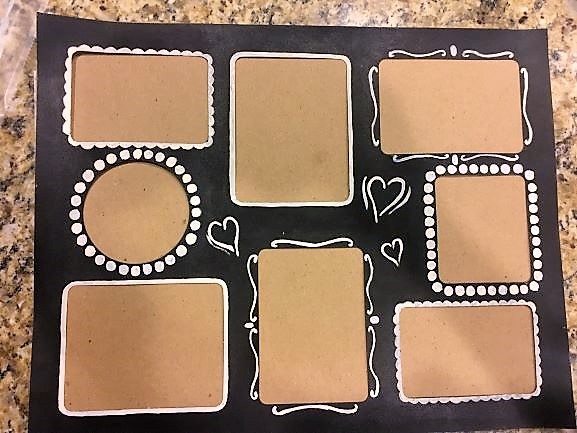
2. Shabby Chic Display (from my Paint party)

“Every Dream begins with a Wish”

3. Shelf and Picture Holder 

My 6-year-old was very excited about getting a desk in her room for Christmas. When I asked if she wanted a window shelf above it, she was all about it. She picked the color and I added shelf brackets. The little ballerinas were a cheap find from Michaels to fit with her ballerina-themed room. It was such an easy project.

4. Mantle Decor from Walnut and Vine

5. Mirrored Window by Finding Home Farms

This is a tutorial on a footboard towel rack. I love every bit of the total look from antique clocks to pink bottles. Super cute!

6.  Altered Window Frame by Little Birdie Secrets 

7. Command Center by Dwelling in Happiness

8. Window Box Cabinet by My Repurposed Life

9. Window Planter by Prodigal Pieces

10. DIY Mini Greenhouse by HgTV

I’m completely smitten with this adorable upcycle. 

The Finale

11. Bathroom Storage Window and Shutters

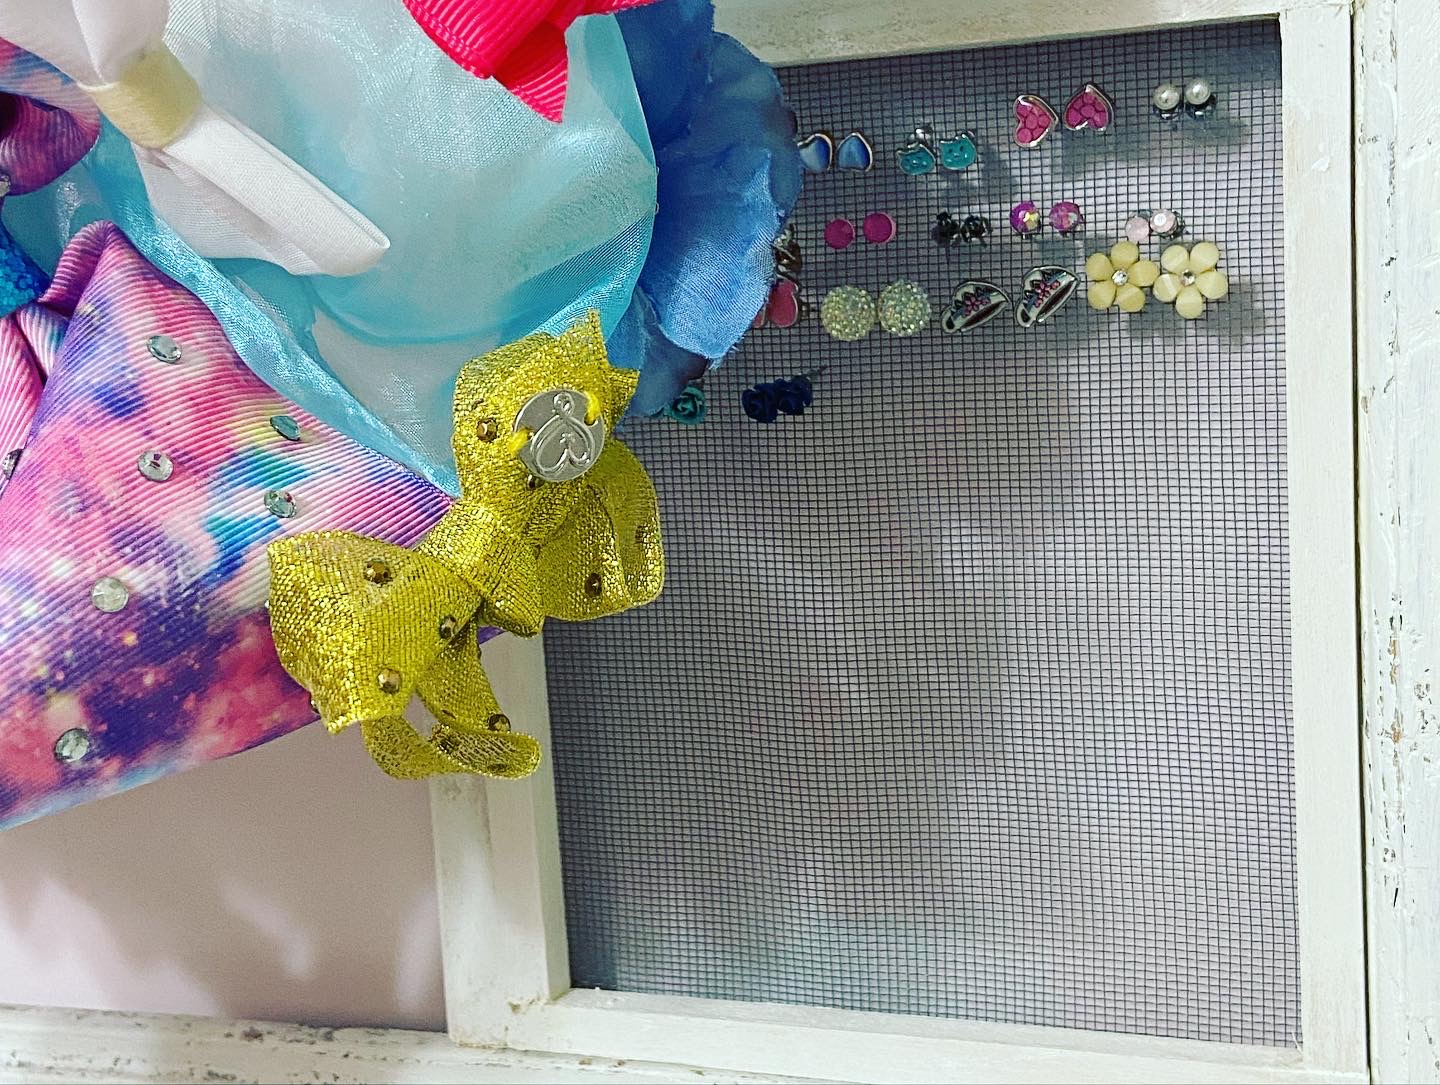
Last but not least. This was my latest project to spruce up my girls’ sad-looking bathroom. The window started out as a single pane old window without the crossbars. After an accidental slip causing the pane to break, I decided to go with a Plan B. Plan B included constructing my own crossbars with a router and making pull out metal mesh earring holders. I include a tutorial on constructing those on one of my picture frame posts.  It was definitely a win-win situation; I got a larger window and a set of shutters out of my garage stockpile and created a quick organizer for all the bows, headbands,  earrings, and misc items. My girls thought it was a hit!

Pop-Out Earring Holders:

Shutter Headband Holder:

To say it simply, my 6-year-old has A LOT of headbands. The shutter pull bar was a perfect way to hold them in place.

Towel (or Jewelry) Hooks

The builders of our new home put one long bar towel holder up in this bathroom, which sufficed for the last 5 years. I was tired of not having a place to hang multiple towels separately, so I’m really happy about the added options the double hooks provide.

The very sad looking before photo: a ribbon frame bow holder and an owl earring holder.

End of the countdown on 11 sensational ways to repurpose your old windows

I hope you enjoyed the ideas and that’s it inspired you to create some of your own!

Stunning Picture Frame Upgrade Ideas for Your Home

As I was rooting through some of the remaining boxes of stuff from our old house, I came across a few items that inspired me to do a little crafting. I found childhood picture frames in need of a facelift to get with the times and with my current decor. It was a very simple project aside from deciding what I was going to do and it’s definitely a project anyone could handle. I hope my picture frame makeovers inspire you to have a little fun with some of your own frames and you can decide on a direction to take! From drab to fab frames in no time flat.

My supplies included:

  • Craft Paint and/or Spray paint
  • Paintbrushes (a wider one for the frame and a thin one for details)
  • Sandpaper (depending on the look you are going for)
  • Scrapbook paper
  • Glue or double-sided tape
  • Razor or scissors or paper cutter
  • That’s it!
picture frame before
The Before: classic 80’s/90’s gold opening border mat and a stained oak frame.

To keep the glass clean of paint, you should definitely start off by taking the glass out and painting everything separately. I painted the frame with inexpensive craft paint from Michaels. There’s a Michaels 1.3 miles away from me, so I tend to get everything I need there.

picture frame paint

I painted a full coat, so I couldn’t see any of the wood underneath. Then since I was going for a shabby chic look, I took a piece of sandpaper and lightly rubbed randomly around some edges.

I took the mat out to paint it with cheap chalkboard paint from Michaels. It didn’t seem necessary to better paint since it wasn’t going to be used for writing. I used wax paper to paint on to save my kitchen counters.

Accents make the mat

After the paint dried, I used a thin brush to paint some white accents around the photo openings. Feel free to let your creativity come out here! When everything was dry, I put it all back together so it was ready for some pictures of loved ones. It doesn’t get much easier than that.

A close-up of some of the sanded parts.

picture frame complete
A refinished frame in half an hour (or so)

Frame 2

Before

For my second frame, I took the same concept with the frame. I painted it with a coat of paint and sanded it in a few areas. Instead of painting the mat, I tore vintage 12 x 12 scrapbook paper into pieces and glued the pieces onto the mat. I didn’t worry about cutting the paper around the ovals while gluing. After the glue was dry, I flipped it over so the back was faceup. I used a razor to cut the paper overhang around the oval and voila, another finished frame refresh.

After (aka Drab to Fab Frame )

The last frame I redid was a metal gold frame. I took the glass out of each frame and sprayed a few layers of rose spray paint. For those who haven’t had much experience with a spray can, it’s best to do multiple thin layers rather than soaking it with a thick layer that is likely to drip.

Picture Frame 3

I had printed 4×6 photos which ended up being too small for the openings. Probably a good idea to measure before you print, but as it turns out, I liked the end look better than if the picture filled the frame. I decided to make due by taping the photos to a white cardstock paper and adding a border from scrapbook paper.

I used my paper cutter to ensure I cut straight lines. There’s a range of paper cutters you can get. Mine, in particular, was pretty inexpensive and is two-sided for different types of blades. If you should not happen to have a paper cutter, a ruler to draw a straight line and scissors will do just fine.

I used the sliding blade to cut the scrapbook paper for the border.

I used double-sided tape to adhere the photo and paper to the white back paper.

The double-sided tape dispenser is shown here. I, unfortunately, found it difficult to use.

I happened upon some paper flowers at, you guessed it, Michaels, that felt like the perfect touch to add to this frameset.

Drab to fab picture frame

Final Product with my three girls to showcase it! I did a quick photoshoot in my bedroom with the girls to get this together.

Frame 4

These two oval frames came from my grandmother’s basement unused for years. It took me a bit to decide what to do with them. I ended up being inspired by some shabby chic hooks from Michaels. White spray paint, some 1/4″ board wood cut to size and scrapbooked paper gave the finished look.

That’s a wrap on these quick and easy revamps to take them from drab to fab frames. If you are anything like me, you likely already have all the materials. While you’re watching your favorite show tonight, go ahead and let your creativity out.

And if you’re looking for more ideas on how to use those frames, check out Framed Earring Holder

More Fun with Upcycled Frames

As I was rooting through some of the remaining boxes of stuff from our old house, I came across a few items that inspired me to do a little upcycling/crafting. I found childhood frames in need of a facelift to get with the times and my current decor. It was a very simple project aside from deciding what I was going to do and it’s definitely a project anyone could handle. I hope my makeovers inspire you to have a little fun with some of your own frames and you can decide on a direction to take! From drab to fab frames in no time flat try your hand at some upcycled frames.

My Upcycled Frames supplies included:

  • Craft Paint and/or Spray paint
  • Paintbrushes (a wider one for the frame and a thin one for details)
  • Sandpaper (depending on the look you are going for)
  • Scrapbook paper
  • Glue or double-sided tape
  • Razor or scissors or paper cutter
  • That’s it!
Upcycled frame 1 before
The Before: classic 80’s/90’s gold opening border mat and a stained oak frame.

To keep the glass clean of paint, you should definitely start off by taking the glass out and painting everything separately. I painted the frame with inexpensive craft paint from Michaels. There’s a Michaels 1.3 miles away from me, so I tend to get everything I need there.

upcycled frames painted

I painted a full coat, so I couldn’t see any of the wood underneath. Then since I was going for a shabby chic look, I took a piece of sandpaper and lightly rubbed randomly around some edges.

upcycled frames painted mat

I took the mat out to paint it with cheap chalkboard paint from Michaels. It didn’t seem necessary to better paint since it wasn’t going to be used for writing. I used wax paper to paint on to save my kitchen counters.

Accents make the mat

black and white upcycled frames mat

After the paint dried, I used a thin brush to paint some white accents around the photo openings. Feel free to let your creativity come out here! When everything was dry, I put it all back together so it was ready for some pictures of loved ones. It doesn’t get much easier than that.

A close up of some of the sanded parts.

A refinished frame in half an hour (or so)

Frame 2

Before

For my second frame, I took the same concept with the frame. I painted it with a coat of paint and sanded it in a few areas. Instead of painting the mat, I tore vintage 12 x 12 scrapbook paper into pieces and glued the pieces onto the mat. I didn’t worry about cutting the paper around the ovals while gluing. After the glue was dry, I flipped it over so the back was face up. I used a razor to cut the paper overhang around the oval and voila, another finished frame refresh.

After (aka Drab to Fab Frame )

The last frame I redid was a metal gold frame. I took the glass out of each frame and sprayed a few layers of rose spray paint. For those who haven’t had much experience with a spray can, it’s best to do multiple thin layers rather than soaking it with a thick layer that is likely to drip.

Frame 3

upcycled frames spray paint

I had printed 4×6 photos which ended up being too small for the openings. Probably a good idea to measure before you print, but as it turns out, I liked the end look better than if the picture filled the frame. I decided to make due by taping the photos to white cardstock paper and adding a border from scrapbook paper.

I used my paper cutter to ensure I cut straight lines. There’s a range of paper cutters you can get. Mine, in particular, was pretty inexpensive and is two-sided for different types of blades. If you should not happen to have a paper cutter, a ruler to draw a straight line and scissors will do just fine.

upcycled frames mat
I used the sliding blade to cut the scrapbook paper for the border.

I used double-sided tape to adhere the photo and paper to the white back paper.

upcycled frames supplies
The double-sided tape dispenser is shown here. I, unfortunately, found it difficult to use.

I happened upon some paper flowers at, you guessed it, Michaels, that felt like the perfect touch to add to this frameset.

Drab to fab Upcycled frames

3 slot UPcycled frames
Final Product with my three girls to showcase it! I did a quick photoshoot in my bedroom with the girls to get this together.

That’s a wrap on these quick and easy revamps to take them from drab to fab frames. If you are anything like me, you likely already have all the materials. While you’re watching your favorite show tonight, go ahead and let your creativity out.

And if you’re looking for more ideas on how to use those frames, check out Framed Earring Holder

RSS
Follow by Email
Pinterest
Pinterest
fb-share-icon
Instagram

Are you interested in getting alerts and information on all things coming out of Cathartic Crafting?! Then go ahead and submit your info below:

Verified by MonsterInsights