Tag: Mental Health

Ultimate Carnival Theme Party Ideas for Fun Lovers

With the anticipation of spring weather, it’s thankfully time to think about all the outdoor possibilities. For me, what comes to mind are ways to reconnect with people. Essentially, I’m kind of pandemic’ed’ out at this point after the last two years and all the winter spikes in cases. With outdoor being a ‘safer’ place, my mind is teeming with ways to utilize my larger outdoor space. This anticipation also reminds me of one of favorite birthday parties for my oldest daughter. So if you’re looking for an all-out fun party theme, follow along for some carnival theme party ideas.

Carnival Theme Food Ideas

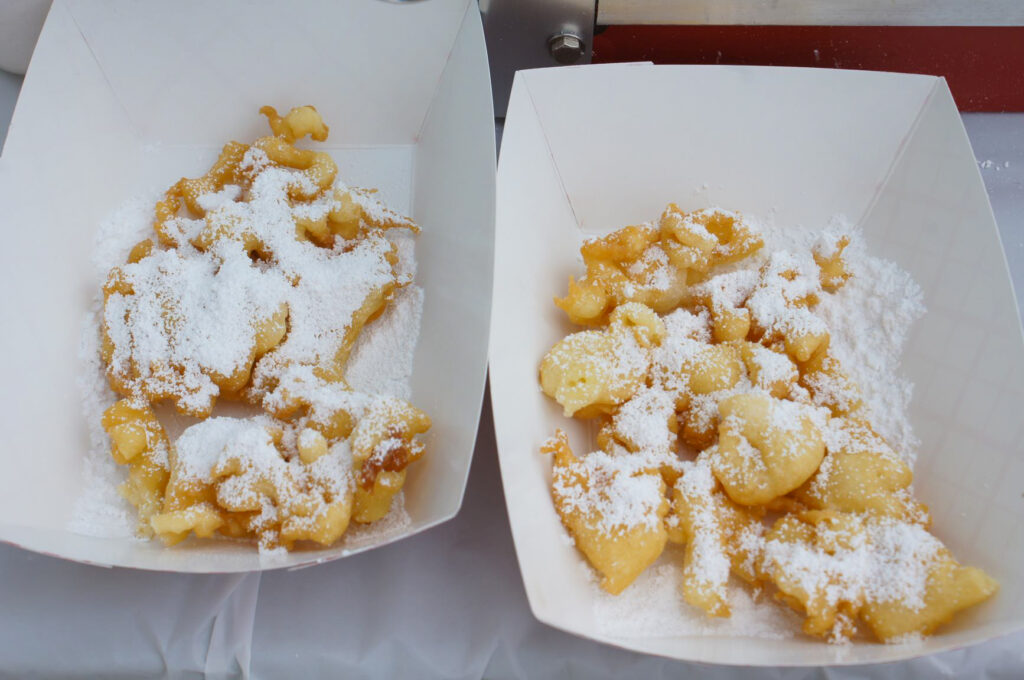
You can’t think of a carnival and not think about all the delicious food options. An at-home carnival wouldn’t be the same without it, so it’s definitely an important checklist item.

My parents helped supply this party with pretty much all the fanfare from popcorn and sno kones makers to my mom’s carefully crafted carnival games. Let’s just say they are still kids at heart and have collected all the things to share fun with others. My mom in particular was a huge help with these carnival theme party ideas.

Our snacks included:

  • Popcorn with authentic popcorn bags
  • Cotton candy in clown bags
  • Funnel cake
  • Soft pretzels
  • Carousel Cake
  • Candy!!

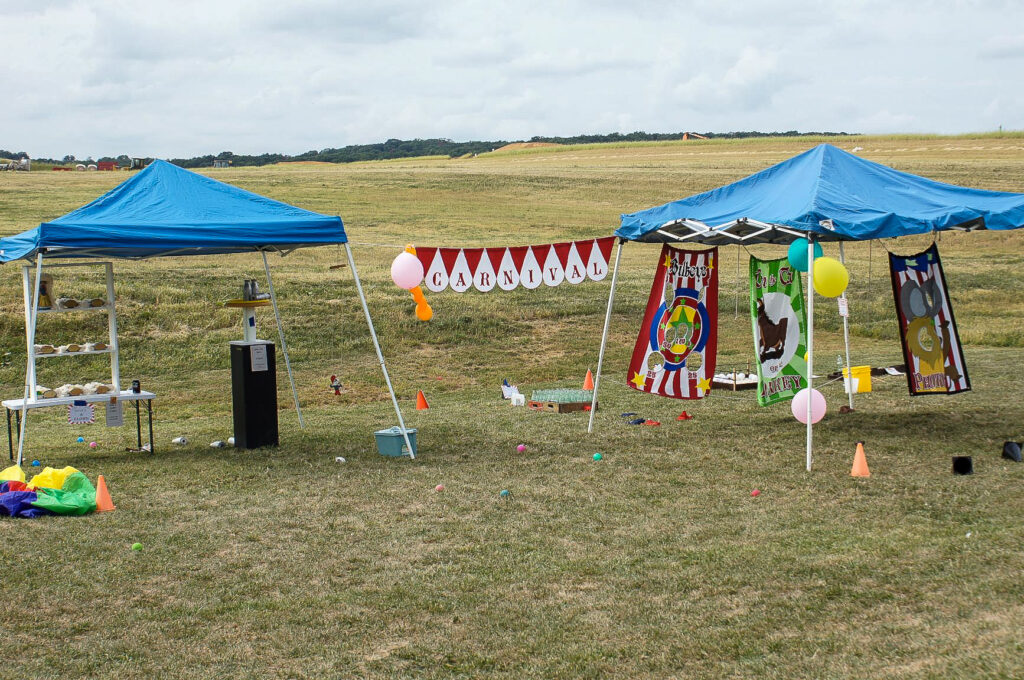
Carnival Theme Party Game Ideas

The games are a combination of purchases and crafts, which can go in either direction depending on the amount of effort desired.

Fish Bowl Toss & Lucky Duck

Baby pools are a super easy and cheap way to accomplish this game. You can find clearance pools at the end of the summer season. The prize for the fish bowl toss was a sandwich bag filled with water and a fake fish.

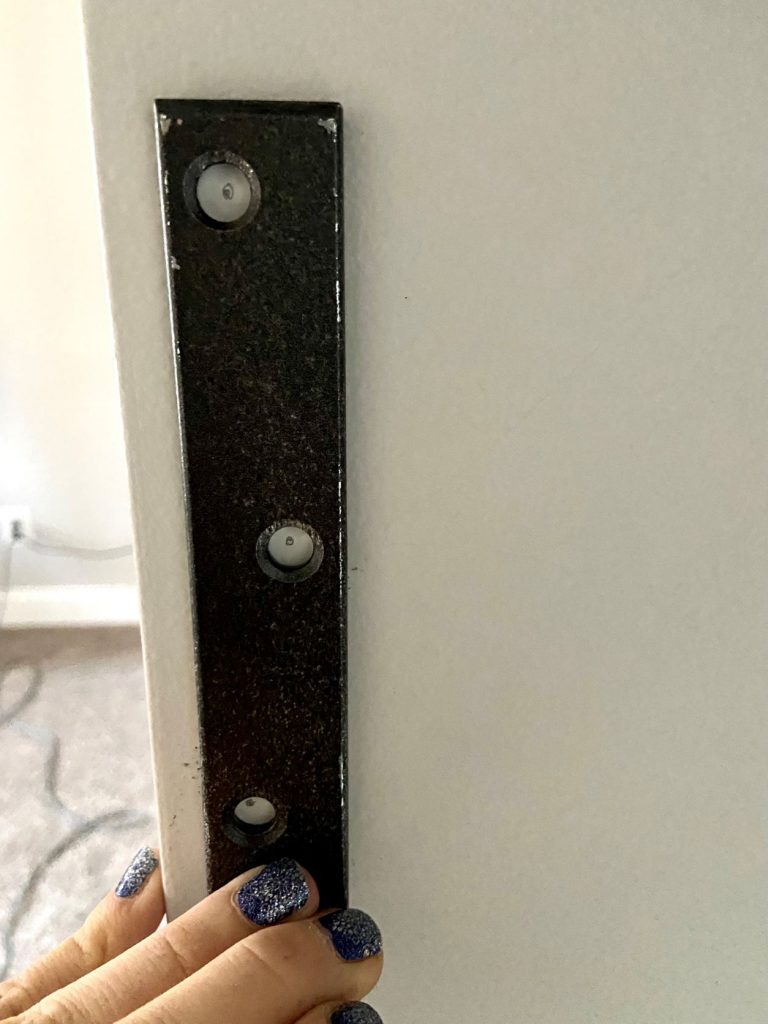
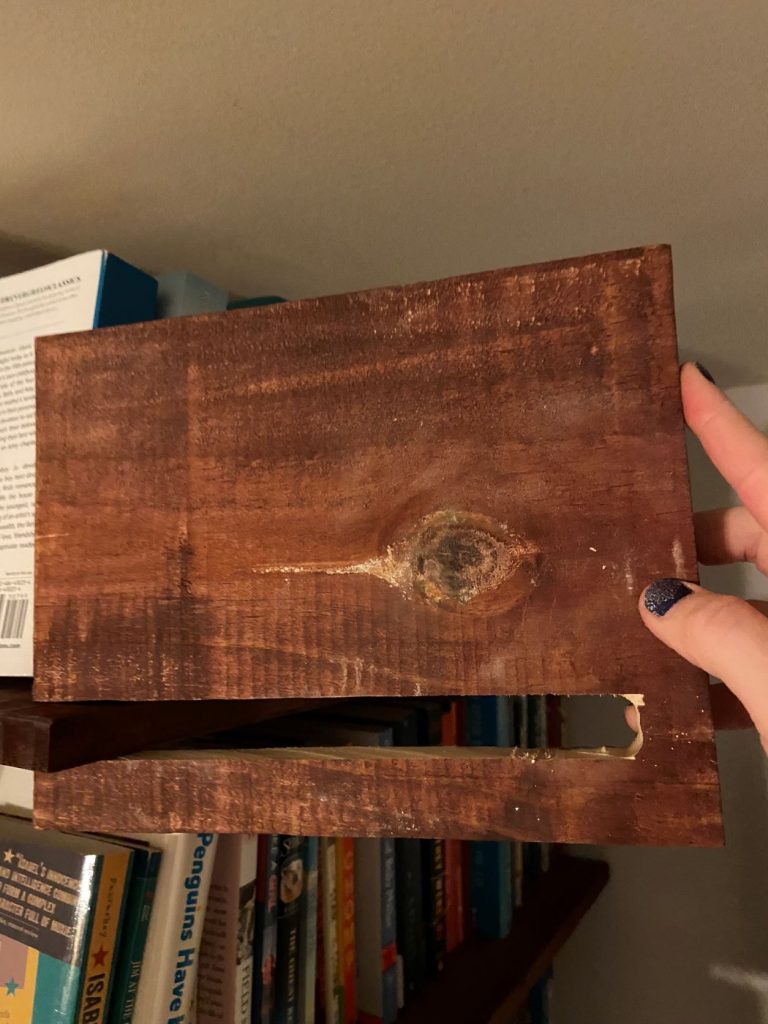
Spill the Milk and Down a Clown

Spill the milk has a wooden stand built from a 3/4″ thick board, a round wooden disk and a 4×4. The metal bottles are going to a bit hard to find. Any bottles with flat bottoms and tops will work. The Down a Clown frame is built from wood, hinges and purchased from a toy show. If you really want to be authentic, the best place to look would be antique fairs or toy shows. My mom touched these up with paint.

Ring the Bell

Now this next one isn’t going to be an easy to find item. It reiterates that my parents have it all. They also have a larger version in their backyard that doesn’t travel as well as this smaller version. It was certainly a hit with our little carnival goers!

Ring a Bottle & Bucket Toss

The Ring a Bottle game is constructed with antique bottle crates, so you may have to do a bit of searching to find that exact thing. Otherwise, some crates, and glass bottles should work okay. The bucket toss is another easy find incorporating like size buckets and ping pong balls.

Bullseye Toss, Pin the Tail on the Donkey & Raise the bottle

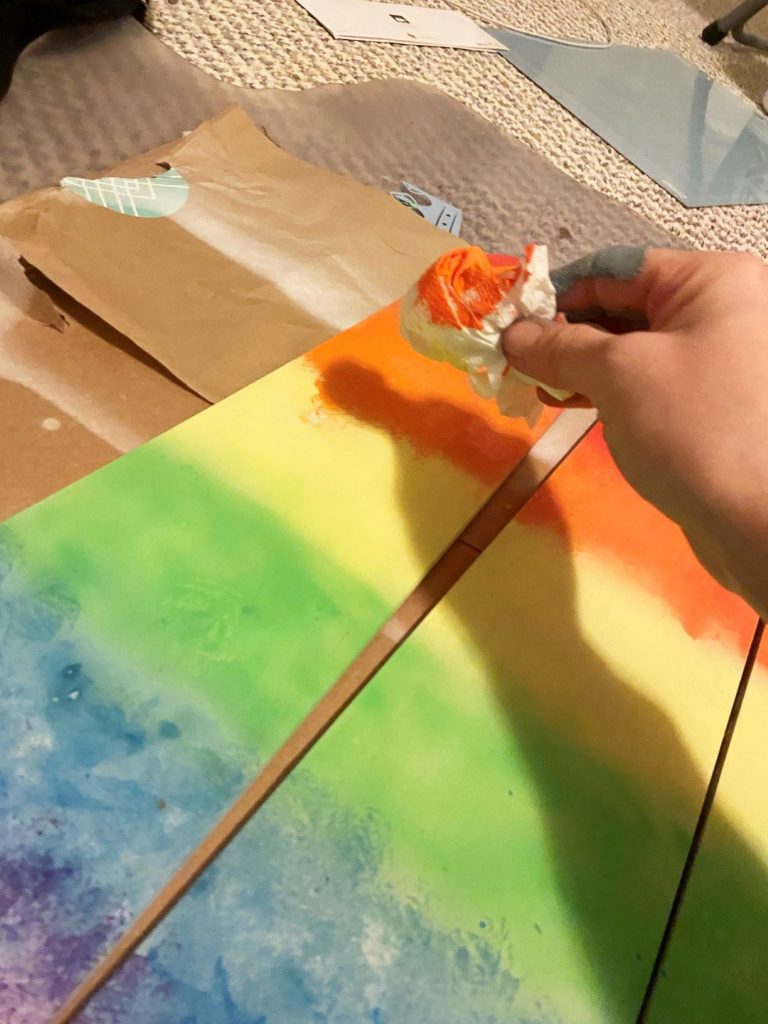
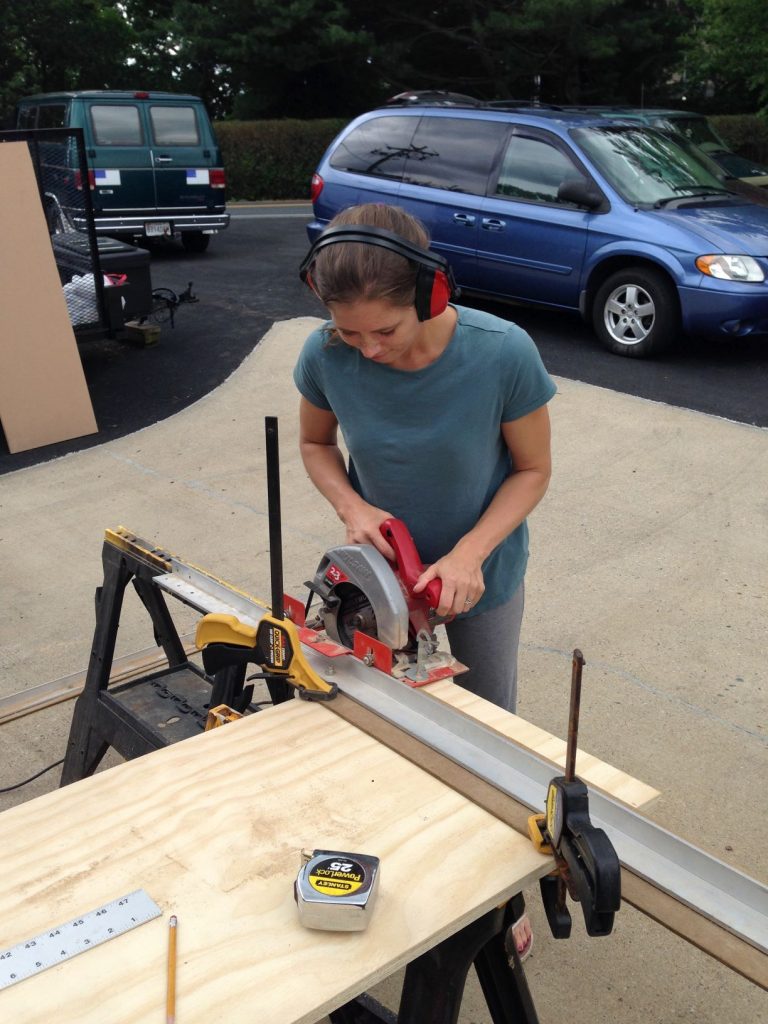
These targets were purchased but could also be made from poster board for those who enjoy the opportunity to make their own. The bottle stand is also an easy project using a 2×4 and square wood panels. One of the long sides should be shorter in height from the other side. This can be accomplished easily with a table saw or saw with a guide. Nail or screw it all together and you have the stand! The fishing rods are long dowels with a small hole drilled into the end. Then string can be tied to it without slipping off and connected to the ring.
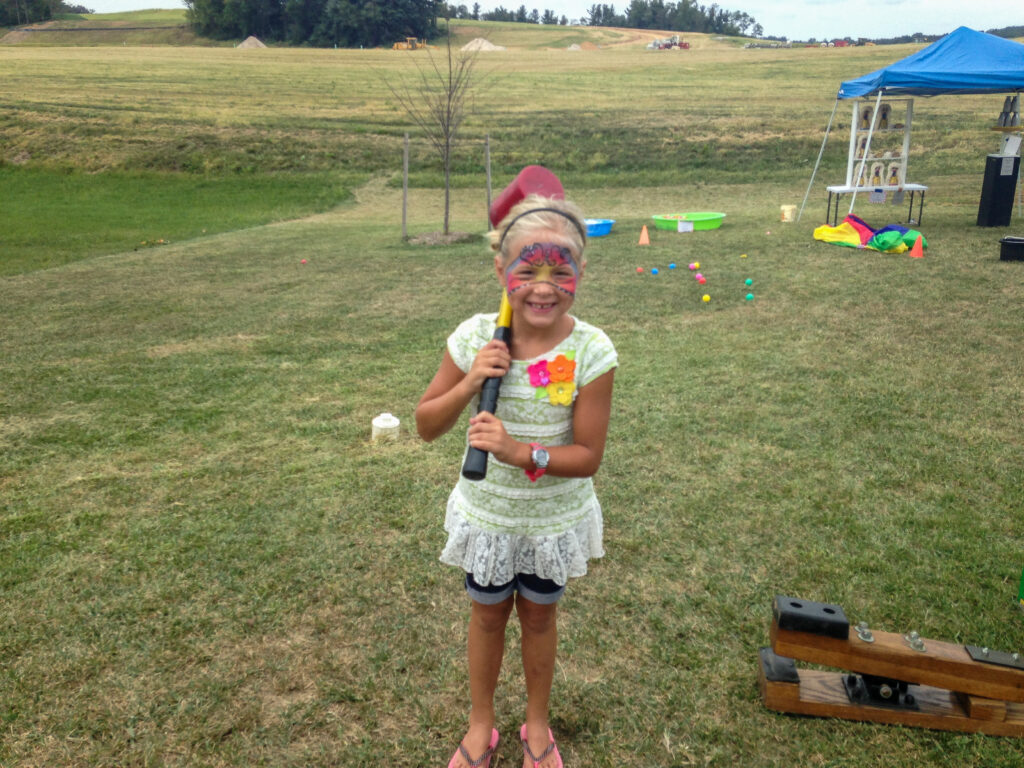
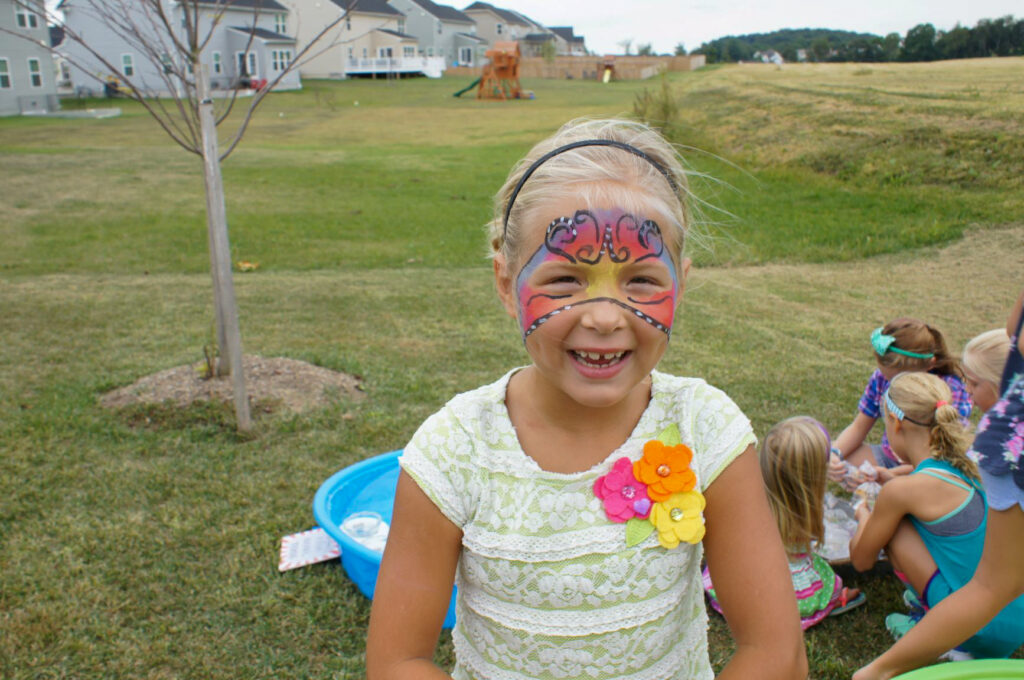
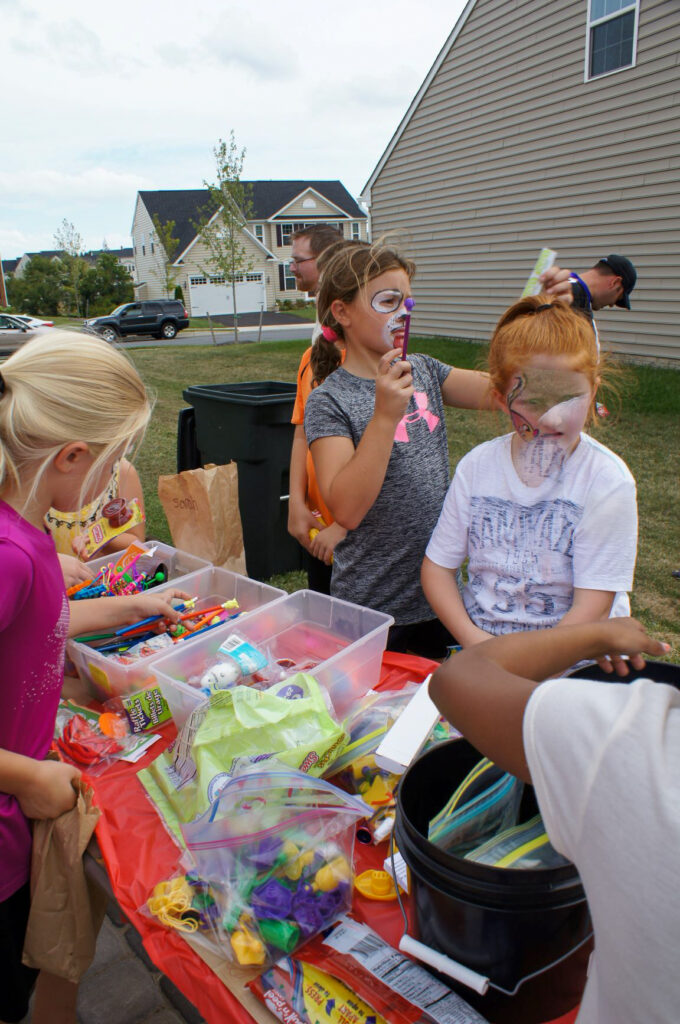
Face Painting

I personally love face painting so my carnival party wouldn’t have been complete without it. I was pretty tickled that my husband did several of the paintings. The easiest way to go about it is to have a selection of face paintings you can feasibly do for the kids to pick from.
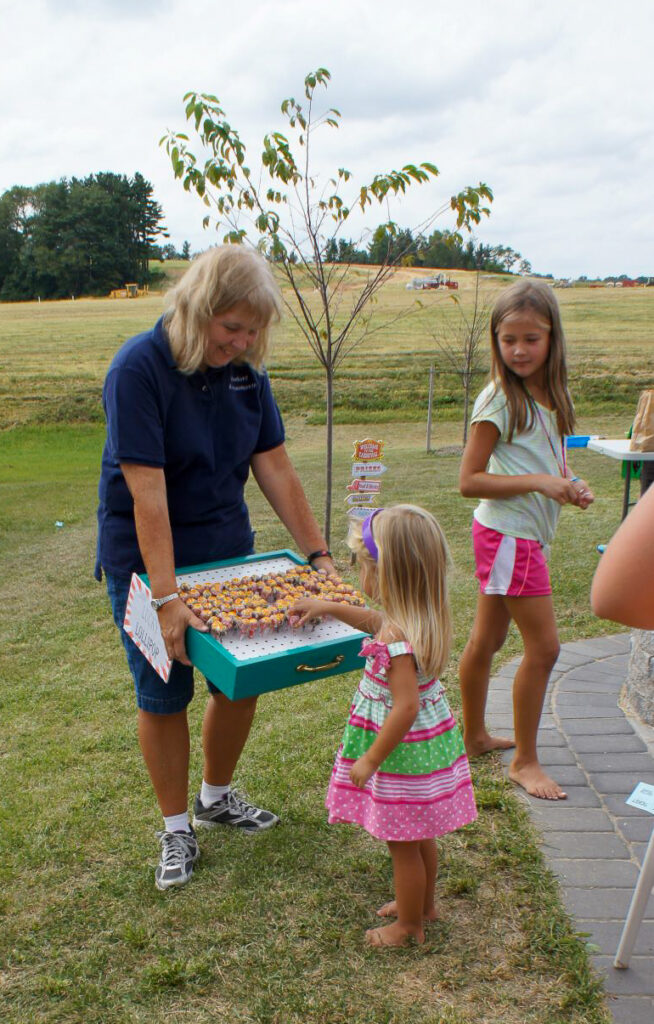
Prize Table

With each game, the carnival goers won tickets. At the end, everyone was able to cash in their tickets for prizes from the prize buckets. We had pencils, clackers, yo-yo’s, candy, etc. Party City is an excellent place to check for inexpensive prizes. All they need is a paper bag to put their prize selections into for safe keeping. Our party rounded out with lollipops from the lollipop peg box. This can be constructed with a box, peg board or wood/cardboard with holes drilled into it.

Pandemic effects on mental health

As I said at the beginning, I’m mentally exhausted from the length of the pandemic and itching to engage more with friends near and far. We were able to get together with friends last summer, but it still wasn’t the same as before. In the article Seven Ways the Pandemic is Affecting Our Mental Health, it notes,

“And, indeed, nearly 1 in 7 U.S. adults said they were often or always lonely in April 2020, up over 25 percent from 2018. But another study in the U.S., Canada, and the U.K. found that people’s feelings of connection to others didn’t change much from before to during the pandemic. When one group of researchers surveyed over 1,500 people in the U.S. from January to April, they were surprised to find “remarkable resilience.” ……”one study in the U.S. in April and May (before any restrictions were lifted) found that almost two thirds of people under 30 had high levels of loneliness, and 37 percent felt they had low support from their family.”

Seven Ways the Pandemic Is Affecting Our Mental Health

So now’s the time to find safe ways to engage with others, to take care of yourselves, and to find a way back to some normalcy. As with anything, the affects of the pandemic really depend on your outlook and resilience.

This page contains affiliate links. This means if you use one of my links to make a purchase, I will receive a small commission at no additional cost to you. Thank you for supporting Cathartic Crafting!

Time and Money Saving DIY Floating Book Shelves

Ever since I was a kid, I have loved reading and owning books. That’s why I could totally relate to my oldest daughter’s request for book shelves. In our previous house, I had built her a recessed bookcase we both loved. As this Christmas inched closer with the expectation my daughter would be gifted more books, it was time to buckle down to give her a way to organize all the book stacks she had lined up on the floor. Although, I love a recessed bookcase, I didn’t want to dive into wall cutting and shelf building while caring for a newborn. That’s how I came to constructing easier and time effective floating book shelves. If you’re looking for a way to organize your own stacks, follow along below!

Floating Book Shelf Basics

Many of the floating shelves out there are quite thick for the elevated look of it and/or the hardware that is likely needed to support the shelf. Generally, I like the look of those shelves more than a thin wood shelf. As I was looking at examples of floating book shelves on Pinterest, I saw a post about L brackets, which really sparked for me. While considering how many shelves were desired in combination with the height of the wall and the cost, I ended up using a 1 in width instead of 2 in. After purchasing 1″ boards from Lowes, I was slightly concerned the boards would bow from the weight. After doing a quick test of the board strength by sitting on it while propped on two saw horses, I was confident the board would be fine. 

The other decision I had to make was the size of the brackets to get. L brackets are definitely cheaper than a decorative shelf bracket, which was part of the draw for me. I wanted to be sure the shelf had enough support while keeping cost down, so I ended up choosing the 6″ x 6″ brackets. 

Supply List

I determined the amount of length I would need for 9 shelves would be three 8′ boards or two 10′ boards. Lowes apparently doesn’t sell 10′ boards as a 1″ x 8″, so I had to get three 8′ boards. Then, I cut the boards the same width as the wall space, roughly 29″.  A word to the wise, it’s worth measuring the wall space several times. This is my second project using wall space to find that they weren’t exactly square. This meant the width at the top of the wall was 1/4 in wider than the bottom of the wall. 

The prep steps for this project were quite minimal, spray painting and staining. I used Rust-oleum Oil Rubbed Bronze I had from my Live Edge coffee table project. The screws should likely be sprayed as well to match. I should have sprayed them at the same time but didn’t. I ended up leaving the screws silver, because my daughter was hard pressed to get the shelves up. 

From there, it was just a matter of staining the shelves. I used a stain I already had on hand, Minwax Chestnut. I tend to like the darker colors better for most of my projects. When it comes to staining, you can use either a clean rag or a foam brush. I learned long ago from my mom to save disgarded white t-shirts for staining projects. Free is always fabulous. After many a stained hand, I have decided it’s worth buying a box of gloves for easier clean up. 

Shelf Attachment

The shelves were hardly dry before my daughter was carting them to her room for me to attach to the wall. This made for a very pungent upstairs since the smell lasts for days. I toggled between attached the brackets to the shelf first or to the wall first. I ended up attaching to the wall first with the thought I wouldn’t be able to screw in the bottom screw with the shelf attached. The easiest method, is to place the bracket against the wall, then draw the holes onto the wall. With the bracket off the wall, drill a hole into the stud. I didn’t necessary want to put the brackets at the end of the boards, but that’s where the studs were in the wall. Using anchors in the drywall wouldn’t be a good way to support the amount of weight books would create. 

After the first bracket was secured to the wall, it was important to level the shelf to ensure the right bracket would be in the correct spot. For me, the right bracket was so close to the connecting wall that the inner screw hole was just outside of the stud. Given I had two screws secured into the stud, I felt okay about one of them going into a drywall anchor. 

With the brackets secured to the wall, it was just a matter of screwing in the shelves. Wood screws are self drilling, which means you usually don’t have to pre-drill the hole. I didn’t want to risk creating a crack so close to the end of the board, so I opted to drill a hole prior to placing the screw. 

While I finished up the last of the shelves, my oldest and youngest daughters, shared some bonding time on the bed. How adorable are they?!

A Floating Book Shelves Must: Book ends

I would venture to say that floating shelves aren’t the first choice for books simply because there’s nothing to keep them from falling off the end. With this being the case, you either buy some book ends or you can go the cheap route of using the extra wood to make sliding book ends. I cut into the wood with the radial saw to knotch out a 13/16″ width. Then using a router, I cleaned up the cut, leaving about and inch or so at the end.

That’s all it took to keep the books from falling off the shelves.

Final Product

That’s all there is to creating your very own Floating Book Shelves! Go ahead and give it a try this weekend! It’s a given you will feel great for accomplishing a project and creating a way to organize your space. As noted in Can organizing impact your mental health?, “Your disorganization, unfinished projects, and piles of “to-dos” may be contributing to your stress and depression. As you work hard to clear away the piles and never-ending projects, your brain will rest easy and make it easier for you to feel relaxed and happy.” For this particular organization, you may also enjoy the chance to organize the books in a particular way. My daughter was excited to organize her books by author’s last name. Whatever floats your boat!

*This page contains affiliate links. This means if you use one of my links to make a purchase, I will receive a small commission at no additional cost to you. Thank you for supporting Cathartic Crafting!

Affordable DIY Halloween Witch Cauldron

Bubble bubble toiling trouble. Holidays always get me excited for decorating. I think Halloween provides the best opportunity to try something new. This past Halloween, my mind was in over drive thinking about decorations I wanted to make. I really loved the bubbling cauldron look, so was excited to put my own spin on it. Follow along with this witch cauldron tutorial to make your own! 

Materials

Witch Cauldron

To save on the amount of spray foam needed, I cut a piece of cardboard to fit the inside rim of the cauldron. I usually have a stock of cardboard (supported by the increase in online purchases, thanks to the pandemic). As can be seen in the photo, small gaps are okay. I had to bend the cardboard in the middle a bit to get it into the inner rim. 

Paper Mache

My element of uniqueness was to hand a hand reaching out of the potion, which was scaling it back from the thought of using a styrofoam head sticking out as well. My first step was to create the hand using handy dandy paper mache. You are free to use whatever paper mache recipe floats your boat for this. I tend to go the easiest and cheapest route with a flour and water mixture. It admittedly isn’t quite as strong as a glue-based mix, but it certainly does the job. I used this same technique for my Candyland Lollipops for Christmas. Ultimate Paper Mache‘s site is a great source for recipes. There are five recipes here from which you can choose. After making the paste, cut or tear the newspaper into 1-inch strips.

If you have a willing volunteer, I’d definitely recommend using a hand that is not your own. I completed this on my left hand, so only had my right hand to do the work. Anyway, using the paper strips, dip them into the paper mache mixture and scrape off the excess. Wrap the paper mache strips around each finger and the rest of the hand. I recommend putting a solid layer all over.

It may be necessary to stuff it a bit to keep the shape while it dries.

Bubbling Potion

After using this “Great Stuff”, I definitely agree it’s great stuff. It could also be called “Super Easy” or “Crafting Gold”.  My 10 and 7 year olds enjoyed giving it a try. I started with spraying the base and spilling it over the sides. 

My little soccer player helped me out by holding the hand in place to look like it was reaching out of the cauldron. An argument could be made for the odd proportions, but I wasn’t worried about it. I guess I could have easily used one of my daughters’ hands. Live and learn. I sprayed the foam around the hand to get it to hold in place. With that, the bubbling was complete. 

Weather Protection

I was worried about the paper mache standing up to the weather outside, so I decided to use clay I made for another craft. To be honest, I shouldn’t have used this diy clay recipe and should have shifted to store bought clay. It was definitely a bit mistake on my part. It was too wet and loose, so it ended up making the paper mache hand soggy and saggy. I had to prop it up and use more clay than desired to give the saggy hand more shape. So, if anything, learn from my mistake and opt for the better store bought clay or maybe just a better recipe than I used that doesn’t included ingredients like baby oil. 

Using my airbrush, I painted the bubbling potion a lime green and gave it a second coat with darker green. I used my dremel to give the hand a more realistic look. Then, painted the hand and called it a day. To make this project even easier, you could quite honestly use a store bought Halloween hand. The path is yours to choose as far as how much DIY you want to do. 

Can Mistakes Be a Threat to Your Mental Health?

“Most people don’t like to make mistakes, but some people are more sensitive to errors than others, and that can make them more prone to anxiety…”

Greg Hajcak Proudfit, associate professor of psychology at Stony Brook University

I’m like anyone else and don’t care for making mistakes, especially when it effects my end results. I was kicking myself when I used the clay that I already had concerns. Sometimes, apathy and laziness get the best of me when I just want to knock things off my too long list of to dos. Apparently, there’s a region of the brain called the anterior cingulate cortex that is stimulated by the recognition of mistakes and when it’s stimulated, the increase in activity is called error-related negativity (ERN). I found this particular paragraph from When Mistakes Are a Threat to Mental Health pretty interesting, 

“What makes some people prone to higher ERNs and therefore anxiety? The ERN is somewhat heritable; for instance, healthy individuals who have immediate family members with anxiety and obsessive compulsive disorder tend to have a larger ERN. But situational factors also affect ERN. In lab studies, Proudfit has shown that it’s possible to induce a higher ERN by “punishing” participants for errors, for example by playing a very loud and aggravating sound after the participant makes a mistake.”

I think it’s definitely something to keep in mind when considering how you respond to your own mistakes and the mistakes of others, particularly children. As the article goes on to describe, hostile responses to mistakes can increase the ERN tendency, which will lead to higher anxiety levels. Give yourself and others grace for those mistakes. If they can be overcome, then there’s always a lesson to use for the next time. 

*This page contains affiliate links. This means if you use one of my links to make a purchase, I will receive a small commission at no additional cost to you. Thank you for supporting Cathartic Crafting!

Unique Rainbow Ceiling Fan Revamp for your Color Loving Kids

My daughter’s love of rainbows started when she was 2 years old. One of our favorite videos of her entails her proclaiming, “This is the most beautiful cake in the world, mom!!” as she looked at a rainbow cake in a board book. I couldn’t get out of that particular weekend without making her a replica of that rainbow cake. For her 10th birthday, I gave her a rainbow room makeover. After our recent move, we had another opportunity to go on a rainbow room adventure. We started with an easy rainbow ceiling fan.

Her fan is the same one in my parents’ kitchen. It has reversible fan blades, so I didn’t feel so bad about devoting this side to the rainbow update. 

Spray Paint Base

I knew that I was going to try spray painting, so I started with giving the brown a coat of white spray paint. I think any kind of spray paint would do.

After a quick-drying session, it was time to use the airbrush for a cheap win. If an airbrush isn’t at the ready in your craft space, a paintbrush will certainly do. I liked the prospect of a lighter and even color. 

I used watered-down acrylic paints for my airbrush. Given airbrushing is pretty new to me, I haven’t quite perfected my airbrush technique. Things when alright until I got to yellow. I don’t think I made the yellow thin enough because it started to get difficult to spray. What should have been a quick task, ended up being a frustrating one. And such is life. 

To touch up a little of the splatter spots, I used a paper towel dipped in the watered-down acrylic paint. With a bit of blotting, it was ready to go back on the ceiling. I do the watered-down paint as a cost-saving method but I think I may opt to see the difference in purchased airbrush paints. 

Rainbow Ceiling Fan

The fantastic thing about the rainbow fan blades is that when it’s spinning, the circular rainbow really comes together. My rainbow lover was thrilled with the end result! Having physical spaces that you love definitely helps your mental space. When your stressed by your physical space, it’s going to be difficult to keep your mental space right.

Mental Health Awareness

It’s not just adults who suffer from mental health issues, children can struggle with it in much the same ways. It’s important to check in and keep a pulse on how they are doing and handling all the “new” ways of life.  On Our Sleeves is a Movement for Children’s Mental Health. It provides evidence-based resources to help kids cope during this challenging time, provided by the experts at Nationwide Children’s Hospital in Columbus, OH. 

A rainbow is often a sign of hope, the beauty after the storm, a pot of gold and good fortune at the rainbow’s end. For many, a rainbow carries a personal symbolic meaning–representing inclusivity and diversity, an all-embracing image of love and friendship.

For others, a rainbow might not mean good fortune and beauty, but something far off. The pot of gold isn’t there, or the love and friendship is there for others but not for them. Somewhere over the rainbow is far, far away. What does the rainbow mean to you? Share using #OnOurSleeves.

On Our Sleeves

For other creative activities to expand your mind and relationships, check out Crafting a Calming Corner to Assuage Parent and Child, How to Throw a Magical Harry Potter Party, Budget-Friendly DIY Monster Book of Monsters from Harry Potter or The Ultimate Cardboard Gingerbread House for Christmas Crazed Kids.

*This page contains affiliate links. This means if you use one of my links to make a purchase, I will receive a small commission at no additional cost to you. Thank you for supporting Cathartic Crafting!

Imagination Closet for a Child’s In House Getaway

A new house means new opportunities and ideas. While we were planning for our coming move, my youngest put forward two ideas for her new room. One of them was a galaxy with black paint. I loved her creativity but wasn’t ready to go full-on black painted room. Thankfully, the closet in her new room was soo much bigger than what we had at our Westminster house. That fact translated really well into shifting the idea into a galaxy-inspired imagination closet for her to use as a hideaway. With more time being spent at home during this pandemic, it’s definitely an opportune time to provide more creative spaces for play and mental benefits. For us, it was also a way to get my youngest to be excited about the move.

If you know a thing or two about play therapy, you know the beneficial effects that come with allowing a child to express themselves through pretend situations. Children who play pretend can come up with their worlds and characters, through which they emulate some of the social skills they’ve observed in the real world and figure out how they apply to any given situation.

Betterhelp.com

Paint Choice

I didn’t do much analysis on which paint to use. I went with the easiest to get. This Krylon paint had great coverage, so it only needed a few touch-ups after the first coat. With a lot of projects to complete, this was a must.

We took the weekend to paint several rooms in the new house. My oldest felt more comfortable helping with the hidden closet than painting rooms.

Bringing out the Stars

Using what spray paints I had on hand, I started on the details of this imagination closet. Colors included lavender, purple, teal, blue, gold, and white. Short bursts of color worked to bring out the galaxy. I did a quick google search of different galaxy pictures, as is my usual practice. I admittedly am not great at painting and drawing without a visual. Lightly pushing on the white paint spray tip was the way to get speckles of stars in this galaxy. It took me about 10 minutes to finish the spray painting of the out of this world imagination closet.

Time to make it glow!

After several nights of unpacking at the new abode, it was finally time to paint the closet with glow in the dark paint. It was definitely maddening to have such a long list of tasks while working my normal job during the day. I’d grabbed a bottle of glow in the dark paint at Michael’s for a different Halloween project but didn’t end up using it. It was a new paint type for me. It didn’t take much to put it on for it to glow. I was quite surprised by how well it showed for a cheap paint! We painted in the dark with a black light which was also a first. My youngest was thrilled by the activity and a great time for us to spend together in creative activity. 

My daughter commented on how her painting was terrible compared to my glow in the dark painting. I can’t say whether this self-deprecation and lack of confidence is a common difficulty with other young kids but mine definitely exhibit it frequently. When I have to help squash their self-doubt, it pushes me to reflect on my own mentalities and lack of confidence. I know I think similar things to myself so it’s really no wonder I hear it coming from them. I am thankful these creative activities present opportunities for discussion between us and chances for growth within us all. It’s a chance to combat those doubts and build confidence in different venues and skill development. 

Personal Benefits from this Imagination Closet Project

I am thankful this small project has provided a place to escape and be imaginative, and it continues to develop the relationships with my girls and my mental space. Even as adults, I believe we should all participate in a bit of imagination. It can’t hurt to escape from reality every now and again, especially when it becomes a bit overwhelming.

 Creative activities and imaginative games with others give us the opportunity to recharge our brains, take a much-needed break from our daily stressors, and help us connect with those around us.

Betterhelp.com

For other creative activities to expand your mind and relationships, check out Crafting a Calming Corner to Assuage Parent and Child, How to Throw a Magical Harry Potter Party, Budget-Friendly DIY Monster Book of Monsters from Harry Potter or The Ultimate Cardboard Gingerbread House for Christmas Crazed Kids.

*This page contains affiliate links. This means if you use one of my links to make a purchase, I will receive a small commission at no additional cost to you. Thank you for supporting Cathartic Crafting!

Crafting a Calming Corner to Assuage Parent and Child

Anyone out there have perfect emotionally balanced children? I’m definitely not raising my hand to that one. In fact, we have nicknamed my daughter’s alter ego as “the hulk” because, while she’s normally such a docile sweet child, you better watch out when something gets to her. When she gets angry, you can hear the stomping and huffing from the other side of the house. Given my human service field, I’ve always talked to my girls about their emotions. Even so, my little hulk really struggled with controlling herself when she became escalated. There came a day when she actually asked if we could create a calming corner for her to fight off her anger. I was all for it because it would be a great way to help her learn the important skill of self-regulation.

Calming Corner Benefits

Self-Awareness and Self-Management: Calm down corners help children to practice identifying feelings and emotions to better manage stress, self-regulate and control their impulses. Having a space designed to support them emotionally and physically helps them feel safe and comfortable, allowing them to let down their guard to process different feelings.

Relationship Skills: Learning how to communicate one’s feelings and emotions can be difficult, but calming spaces such as this help children practice mindfulness and develop skills they need to identify their emotions and communicate them when necessary. Stronger communication skills help them form stronger relationships with others and develop skills in empathy.

Action for Healthy Kids

Calming Corner Seating Choice

First things first, seating. You could obviously choose a regular chair if that’s what you have on hand. I think a calming corner needs something soft and cushioning. I opted to knock out three birds with this one stone. We had stuffed animals galore and were running out of space, so it was a perfect time to use a Pinterest pin I’d saved long ago. I used Googie Momma’s via Thread Riding Hood pattern for a stuffed animal chair. I’m a true lover of budget-friendly projects, so I chose to use material from some curtains I’d made for our previous house. (This is exactly why I find it so hard to get rid of anything, you never know when you might come up with a way to repurpose it.)

I was able to dive into my creative mental space (check out Crafting my Mental Health Regimen), make a stuffed animal storage space saver, and a chair for the calming corner all in one go! I couldn’t believe how many stuffed animals this chair housed. Such a win!

Other DIY Options

Here are some other easy DIY Bean bag chairs to try: 

DIY: Sew a Kids Bean Bag Chair in 30 Minutes

DIY Bean Bag Chair

Child Size Bean Bag Chair -DIY Video Tutorial


Curtain to Limit Stimulation

I happened to have a bed curtain, so I used it as the curtain for this space. I considered making one (of course), but my daughter said she liked this see-through one.

There are other ways to make a private space. Here’s one from She Builds Her Home using a curved shower curtain rod.


Stocking Your Calming Corner

A calming corner isn’t much of a space with out something to distract them from the emotional overload. Thankfully, with all the recent trends, we had a good stock of fidgets, squishies, spinners, etc. to stock her little shelf of distractions. She also put a whiteboard and marker for drawing. Check out Mindful Amazing for some great printables to stock in the calming corner. A weighted blanket or weighted stuffed animal would be a great add as well. How about some simple craft kits?! 

We didn’t go much beyond that but depending on the child, you might consider all the other senses. Noise-canceling headphones or a soothing sound machine for the child who tends to overload on auditory stimulation. A visual distraction, like a light machine or glitter bottle, would be another great option. For olfactory, an oil diffuser or scented lotions would work. There are really so many possibilities. To garner buy-in from a resistant child, let them decide what to put there.

Creating the calming corner together doesn’t mean they are automatically going to choose to go there when it becomes necessary, so be prepared to reinforce using it when needed. My hulk was super resistant when using the corner was necessary. Take one tantrum at a time to stay sane. 

For more resources on self-regulation, check out Child Mind Institute’s “How Can We Help Kids with Self-Regulation?

Crafting my Mental Health Regimen

“How much longer are you going to be?”, “Why are you starting another project when you haven’t finished the other one?”, “When do you think you will be able to clean up your tools?”, and the list goes on of the questions I’m asked when I’m doing my crafting thing. Until more recently, I found it very difficult to just sit without purpose. While watching tv with the hubby after a long day, I wanted to multitask that time by planning a birthday party, making a cardboard mailbox, pinning a sewing project, drawing up a woodworking plan or scrapbooking. Anything to keep my mind engaged in that way. On occasion, I also acknowledge I might switch from one project to another midstream because another idea inserted itself into my mental focus. I didn’t realize this could be related to my mental health maintenance.

Baking for my mental health

The Creative Mind

When an idea enters my mind, it lingers there and nags at me. Some of those eventually dissipate into memory and some hang on for dear life until I make them a reality. Those are the ones that plague and prod me to action even when I don’t have the time. I admittedly considered myself to be pretty poor at practicing self-care. I’m not one of those moms or women who do much shopping for myself and very rarely get my hair done or get a massage. I don’t frequent the nail salon and actually went a solid 2 or 3 years without going into one. For a time, I hadn’t read a book for years, because I didn’t think I had the time for it. I tried to purposefully take care of my physical and mental health, but often focused more on my family’s needs.

The Overactive Mind

When we moved into our new house 5 years ago, my mission to produce went into hyperdrive. A newly built blank slate. A DIYers dream. We didn’t paint for the first year to allow for the builders to fix all the nail pops and such. It was downright painful for me to abide. By the third year, almost everything was as we wanted. Our kids’ schedules were then taking over the calendar between travel soccer, travel softball, dance, play rehearsal, basketball, lacrosse, band, gymnastics, etc, etc. This ended up meaning there were periods where I wasn’t able to create anything. During those times, you would have instead heard me telling my husband, “I just don’t feel like myself”. My mental health was suffering.

Tools for my mental health

I was drawn to work on projects when I had a few seconds between making lunch and doing dishes. I would find myself sneaking away to get another coat of polyurethane on the antique hutch while the kids were playing. It wasn’t just for the purpose of getting it to the finish line but also to focus my mind; to sort through my mental mess. It was my catharsis.

Woodworking for my mental health

One day, I decided to do a quick Google search. I came across this article which ended up being my lightbulb moment. Having been in the mental and behavioral field for over a decade, I was surprised at how late the realization hit me as to why I was drawn to it. I knew of the many benefits of art therapy but had never applied it to my own mental health.

The Benefits of Sewing and Crafting for Mental Health

“Crafting, sewing or woodworking help you reduce negative emotions and stress by allowing you to create unique pieces of art. For example, woodworking is one of the most effective form of art therapy in the world, because it combines strategies for planning, , getting the supplies, planning your cut list, measuring, cutting, painting.”….and that explains my addiction


Self Care

So whereas I believed myself to be inadequate at self-care, it seemed I was doing it in the best way I knew how. I realized my me-time was hiding away with my thoughts and a paintbrush in my hand. There’s a sort of peace in concentrating on something you enjoy. There’s also fulfillment in seeing your own ability to create something that maybe only you will love. (Although, I always shoot for others liking it too.)

I also like to share the end products of my me time to inspire. I want to show others really anything is possible if you put your mind to it. I’m frequently asked if I sleep, to which I answer, “Definitely. I can’t go without it.” Now that doesn’t mean I don’t have episodes of insomnia that provide me with a bit of extra time to squeeze in some tasks, but generally, I just make time for the things that matter to me.

How Do You Spend Your Free Time?

We all have choices to make on how we use our time and energy. Some have more abundant energy than others or are selective in what they put the energy towards. Maybe I innately have more energy than some others. Or maybe I choose to put it first towards my family, towards my full-time job and then to the things I see as valuable. I see value in activating my mind in creating.

I had been considering starting a blog for some time and got a bit stuck on the name. After this little revelation, I settled on a name that fits the way creating helps me de-stress and stay sane and reinforces the importance of keeping tabs on the status of your mental health. So go forth and craft to benefit your mental health! Try something simple like refinishing frames.

RSS
Follow by Email
Pinterest
Pinterest
fb-share-icon
Instagram

Are you interested in getting alerts and information on all things coming out of Cathartic Crafting?! Then go ahead and submit your info below:

Verified by MonsterInsights