My 14-year-old seems to have an affinity for planning things with her friends that involve me purchasing something, usually last minute. Last week, she told me she and her friends were getting together to make bikini boxes and she had to supply the mini wood crates for the project. We looked around Michaels, took a peek at the Home Depot website, and searched Amazon for affordable and appropriately sized mini wooden crates. Michaels only had the typical-sized crates at $19.99, which are perfect for a great many projects. It was a bit bigger than my daughter was wanting. I also wasn’t on board with spending $20 for each friend and supplying a snack and paint. Same issues with the crates at Home Depot/Lowes.
We only had a day left so Amazon also wasn’t a great option. After doing a quick Google search, it looked like Dollar Tree might have little crates, so it was off to the nearest Dollar Tree to kick off these Must Make DIY Bikini Boxes.

I’ve been down the Dollar Tree craft aisle before for a specific item or just a quick run-through. I didn’t recall being wowed by the wood options. In searching for these small crates, my eyes were open to all the goodies. I was amazed at all the options. The two daughters with me were also enamored with the varied crafting supplies jammed packed into the shelves. My 10-year-old decided to pick a variety of items to craft into a masterpiece of her own. My two-year-old happily picked items off the shelves to throw into the cart, which we deftly removed without notice.
Crafting Options

There were a variety of options. There were long boards about 11 inches long, 1/4 inch thick, and 5.5″ wide. A square half the length of the long board, and narrow boards 12″x 2″. Given the square was a great option for the sides, an 11″ long board for the bottom and the 2″ wide pieces would work for sides, I was almost at my plan finish line.

Then it occurred to me, I’d be paying twice as much to get the squares than buying one 11″ board and cutting it in half myself. Instead of buying six 2″ boards for the side that I’d have to cut down the length on anyway, I could again use one long board for each side. Rather than buy 9 boards at $1.25 a pop for one crate, I could instead buy 4 and cut them exactly how I needed them!
Off to the Garage!
After I finally got my toddler to bed, it was time to start the quick construction of these mini wood crates just before 10pm on a worknight. I’d been dreading having to go out to the hot garage to do it. I dragged my requesting daughter out with me to help. Having a helper is a rare but preferred scenario.
Supplies
- 4- 11″x5.5″ from Dollar Tree
- Wood glue (possibly from Dollar Tree)
- Long staples
- Staple gun
- Clamps
- Saw
- Hammer


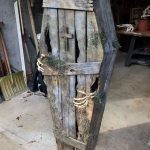
Cutting the Boards to Size
First step, cut a 11″ board in half. I was glad to have been gifted my sister’s table saw for easy measuring and cutting. Given the saw blade removes 1/8″ out of the board, I lined up the midpoint with the middle of the blade to ensure the halves would be equal. I turned the table on and away it went.
I have also figured out why my sister’s husband may not have wanted the table….The wood was getting stuck at the point where the blade cover mount was parallel to the alignment bar was due to the bar not really being straight. Such fun at 10 pm at night. There seems to be something like this in every project to make you want to scream. After switching the alignment bar to the other side, it was quick work to cut all the boards.

Next up! Time to saw two 5 1/2″ wide boards into three sections each. Oh the fun of uneven math in length measurement. It divides out to 1 5/6″ or 1.83″ wide sections. This obviously doesn’t align with an inch that is broken down into 16ths, 8ths, 4ths, and 2nds. The easiest way for my brain to handle it was to calculate that 83% of 16 millimeters is a smidge more than 13/16. So I marked the measurement at 1 13/16″ from both sides. Not completely equal, but as they used to say at my last job, “Good enough press on”. At least when my girls question why they need to take math classes, I can tell them that it can actually come in handy.

Final Steps
After all the pieces were cut to size, it was time to glue and staple. I used the longest staples I had on hand, which were 1/2″ staples. It would have been better to have a slightly longer staple, because there were a few boards that popped up when the mini wooden crate was moved before the glue dried. I made sure to hammer all the nails in as far as they could go to keep the boards in place.


I used some scrap wood to put on the outside of each side of the mini wood crates before clamping the long sides to sit overnight. Glue, compression, and time is always the best combo to make sure the glue has plenty of time to fully dry into the wood as securely as possible.

Final Product! Mini Wood Crates Success


Mini Wood Crates turned Bikini Boxes
With the construction part finished, my daughter took them to her friend’s house for part two; bikini box time. I’ll be the first to say I didn’t know what she had meant by bikini box. The simple explanation was a summer-themed painted box ready to transport summer wares. The girls sketched out their design and then used acrylic paint to finish it off.
- Pencil
- Acrylic Paint
- Paint brushes


The construction part took me about 30 mins. The drawing and painting fun took them hours. According to my daughter, it was so much fun. So my recommendation is not to delay and get this mother/daughter/friend crafting activity started today!
This page contains affiliate links. This means if you use one of my links to make a purchase, I will receive a small commission at no additional cost to you. Thank you for supporting Cathartic Crafting!


 We are currently preparing to move 45 minutes south in a month, so it was perfect timing to use these old pool noodles for a new project. It’s so much better than throwing them out!