When the baby grows out of the crib, it’s time to find renewed purpose for the crib parts only the dump seems to take. After three babies, it was time for me to dismantle our hand me down crib. With all the new regulations, you literally can’t get rid of cribs that have lived through a growing family. My recycling and repurposing side wouldn’t allow me to just trash anything but the mattress support. From there, it was just a matter of deciding what to do with the crib rail that sat in wait in the garage for years.
I ended up being inspired by the numerous throw blankets and mermaid tails that remained a fixture in my 6 year old’s room. Her room was the smallest in the house and she was the least organized. Those blankets always seemed to be strewn around the floor. It was time to give her a throw blanket ladder!


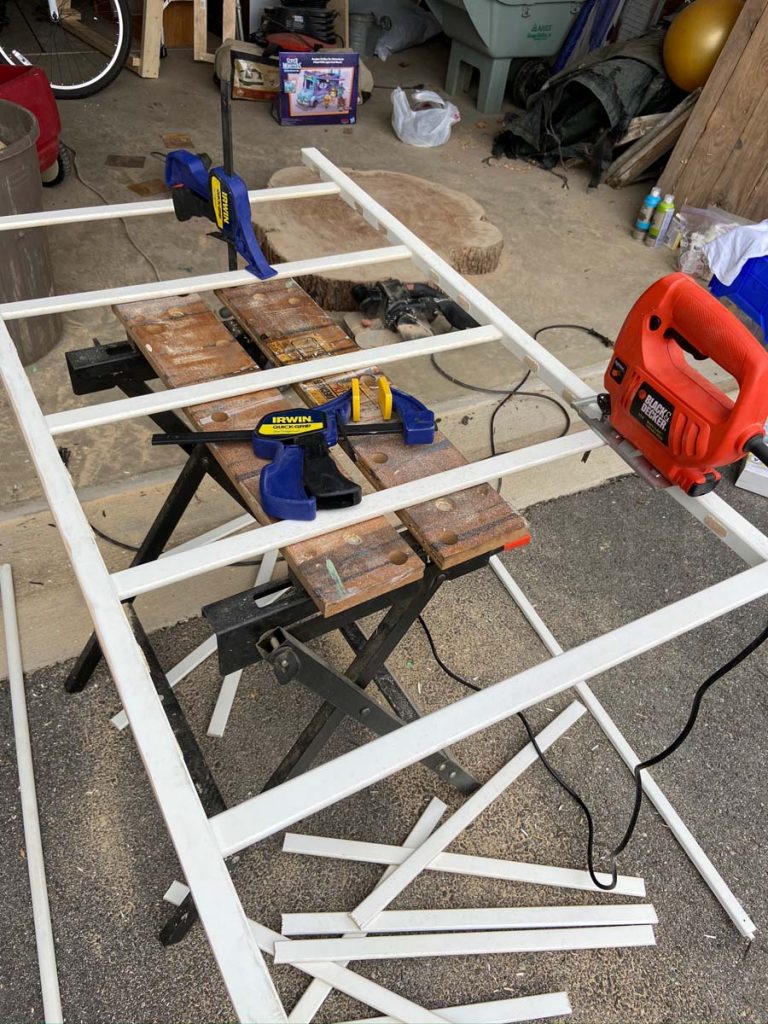
Tool List
- Circular Saw
- Jigsaw
- Router and bit
- Wood glue
- Clamps
6 Steps to a Crib Rail Ladder
Step 1
This particular crib rail had a rounded top bar. Given that it didn’t match the bottom bar, I had to cut off the rounded end. While cutting it off, I also wanted to avoid chipping away the finish of the remaining edge. The best way to do that was to cover it in painter’s tape before starting to saw it off. With the tape in place, I used a circular saw to cut off the curve at the top. Thankfully, there was an indentation that I could use as my cutting guide. It was also helpful to use an attachable saw guide to keep me completely straight while I went. Admittedly, I am not the best at sawing straight so I’ve come to rely heavily on guides to keep me on the mark. I’m crossing my fingers that refined skill will come with time and practice.


Step 2
For step 2, a jigsaw was my best friend. It was time to cut off the extra rails so there would be enough space for the blankets. Using the jigsaw, I cut both sides of the bar as close to the top and bottom rail as I could. For your own project, you could certainly just leave as is at this point, if you don’t mind the extra width. I thought it was too much and wanted it to be narrower. So on to step 3 I went!

Step 3
This step was really quite simple. I used the jigsaw to cut the remaining bars from one side. The other side of the bars remained attached to the bottom of the crib rail. Then, it was just a matter of also cutting down the length of the bars to the width I wanted.

Step 4
For such a small project, I certainly used a variety of tools. I pulled out my handy dandy Ryobi router for this step. It was important that the board stay in place while I routered the bar, so I put it in my clamp sawhorse. I used a keyhole bit that was the exact width of my bars to cut placement slots. It was pretty easy since I could use the previous spots as the guides.


Step 5
Using a miter saw, I cut the bottom of the post pieces at an angle so they would rest flat on the floor while leaning against the wall.
Step 6
The final step was to use some wood glue in each slot before clamping it together to dry. Then it’s really up to you whether you paint it or not. I opted for gray for my crib rail blanket ladder.

Completed Crib Rail Blanket Ladder


I would say that since the crib rail blanket ladder was put in her room, the blankets have been kept tidy….for the most part. I hope this quick run-through helped you make one of your own and you find it just as cathartic as I do to find renewed purpose in washed-up items! If you’re in need of other organization crafts (aka me time), check out Successfully Controlling Stuffed Animal Clutter with a Craft or 20 Brilliant Ideas for Decorating with Wooden Crates.
- Crafty Candy Container for Any Occasion
- Must Make DIY Mini Wood Crates for Bikini Boxes
- The Ultimate Cake Wars Birthday Party for Your Itty Bitty Baker
- Furniture Refinishing to Fit Your Unique Style
- Ultimate Carnival Theme Party Ideas for Fun Lovers


Woah! I’m really digging the template/theme of this website. It’s simple, yet effective. A lot of times it’s tough to get that “perfect balance” between user friendliness and visual appearance. I must say you have done a great job with this. Additionally, the blog loads super fast for me on Firefox. Outstanding Blog!