Plain black coffee table or stencil refinished coffee table?! Which would you choose? When a neighbor posted the black coffee table as free to whoever wanted it, I jumped at the chance to give it a new unique look. Free is fabulous in my book. It was a composite wood table, so definitely not as durable nor easy to alter as real wood. This wasn’t necessarily a bad thing, because it meant I had to stick with a simple paint job. For this refinish, less was more, and perfect for anyone looking to do something new.

Start of the Stencil Refinish
I started this project by sanding down the shiny finish to give the paint a fighting chance of adhering to the surface. Sanding is not my favorite thing in the world, so it tends to be what shines through as my weak point in projects. My proof of this is to come.


Painting
To make my life easier, I bought paint from Michaels, teal and white. I try to fusion mineral paint when I can, but have found it’s hard to find it locally. You can use the website https://fusionmineralpaint.com/where-to-buy/ to find it near you or order online. instead of searching around for fusion paint. I started with painting the outside teal. Unfortunately, it didn’t adhere properly to the spots that weren’t sanded as well, so I was kicking myself a bit for that.
I decided to take a step back and spray paint the whole thing with white primer. It was easier than sanding it all again and helped hide the black from coming through the first coat of the teal paint.


After spray painting a few coats of white, I repainted the whole thing with the teal. I was happy with the final finish. I painted the cubbies and the internal storage area with white to give it a more defined look. When the solid colors dried, it was time to give it a stencil detail.

Stencil Refinish

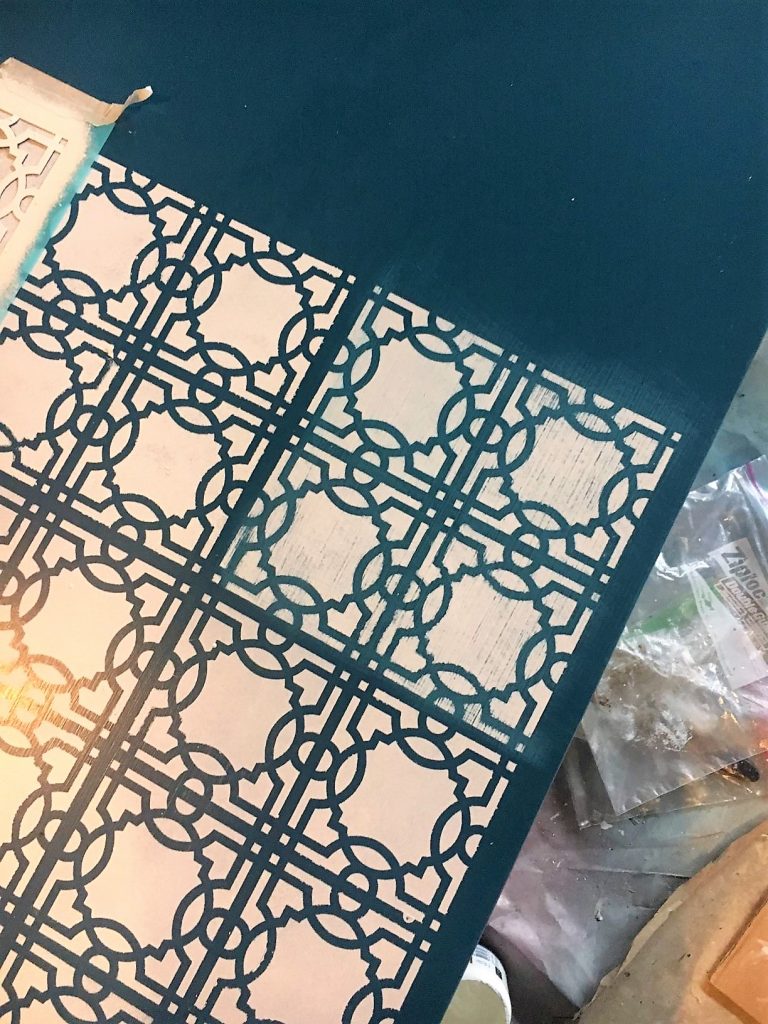
Then it was time to pull out the old pencil and paper. It’s crazy how many of my projects involve calculations. This tends to be my stuck point because of the fear of messing it up. I use the knowledge to reinforce the importance of understanding math with my three girls. For this stenciled top, I had to figure out the width of the border for the long side and short side by considering the width of the stencil and how many could fit across. This stencil was more of a challenge, because it wasn’t completely centered and square to the border. A Martha Stewart fail if you ask me.

It’s a fine art
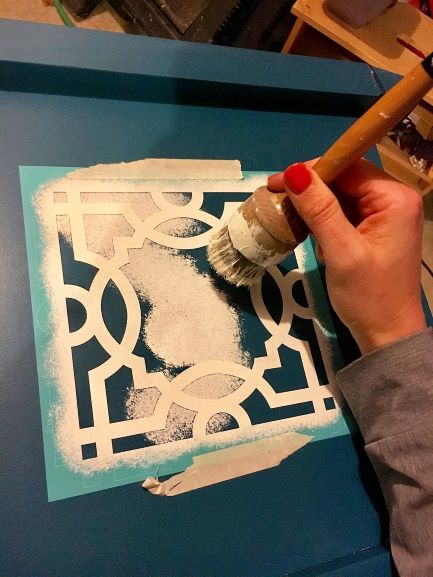
To be honest, I haven’t done a ton of stenciling. In the handful of stencil refinishing projects I’ve done, I have learned there’s a fine art to mastering it. It’s simply not easy to get it to be perfect. For instance, you have to have the exact amount of paint on your brush to keep it from seeping underneath the borders while still giving it a solid coat. I started by stamping/patting the loaded paintbrush on a paper plate to take off the excess and evenly distribute across the bristles. It’s best to start stamping the brush in the large open portion of the stencil to unload some of the paint there first before going towards the edges.

Final Touches
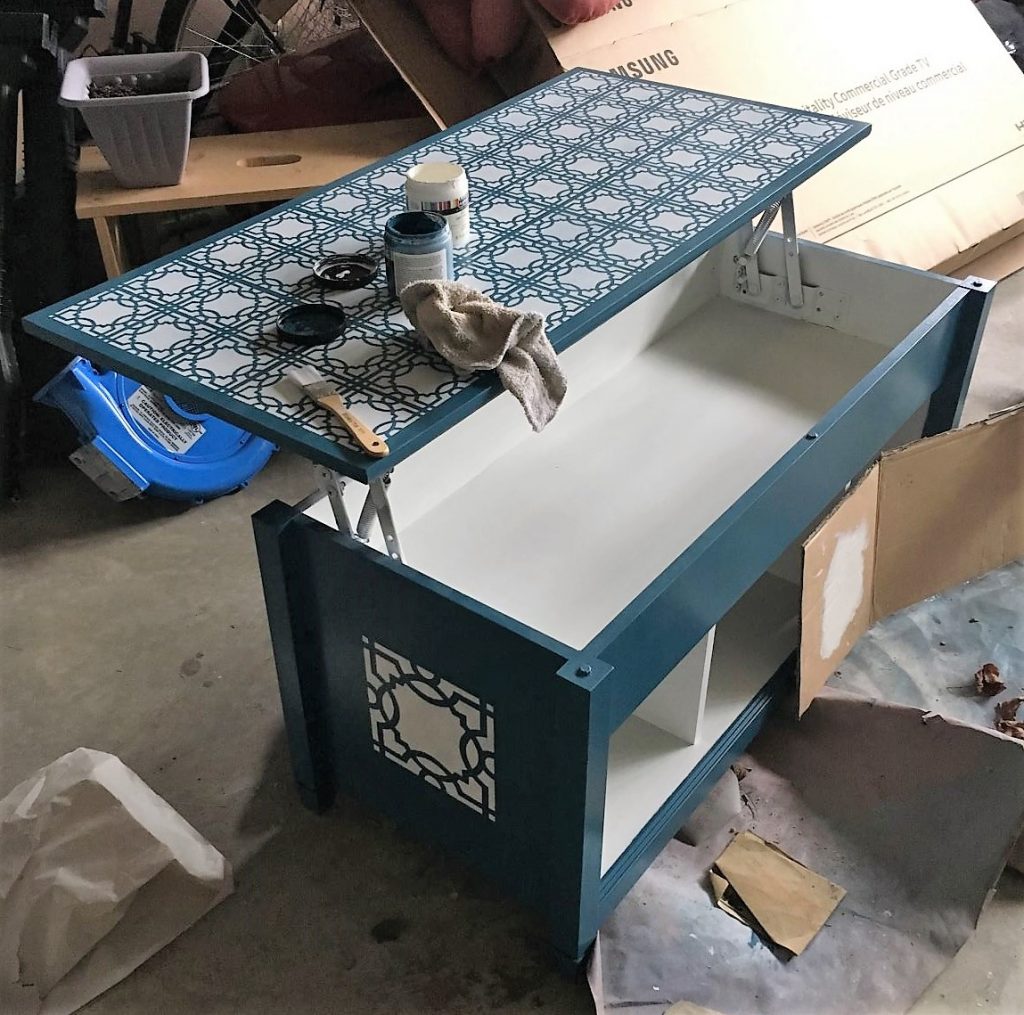
Then, I painted the cubbies and inside with white paint to finish with the painting portion of this project. I wanted to ensure the paint wouldn’t scratch or peel with frequent use so sealed it with polyurethane. Some polyurethane has a yellowish tint to it. Here’s a tip; if you use that on white paint, it will cause the white to go slightly yellow. If that’s alright with you, go for it, but if not go for a clear coating.
Major tips for patterned stenciling; Measure measure measure and a square (the tool, not the shape) will be your BFF.
The End Product:
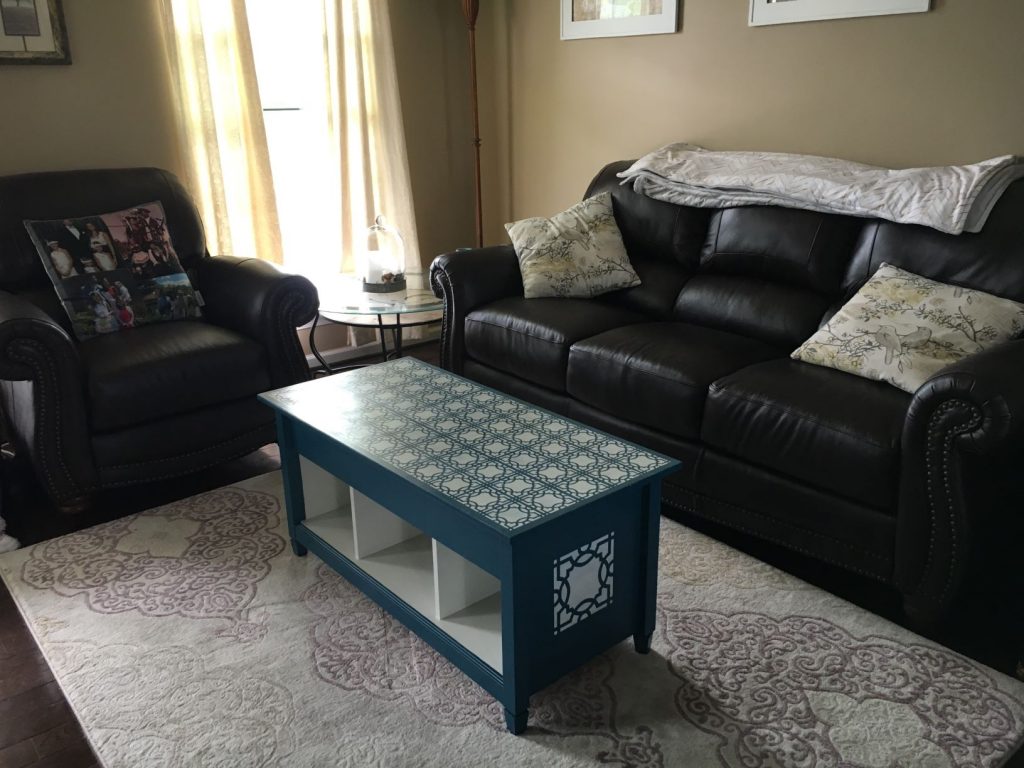
And that’s a wrap on this Flip Coffee Table Stencil Refinish Project. Only a few supplies and a limited number of steps to a completely new look!


Where did you get the stencil? Looks fab