Tag: Refinishing

Furniture Refinishing to Fit Your Unique Style

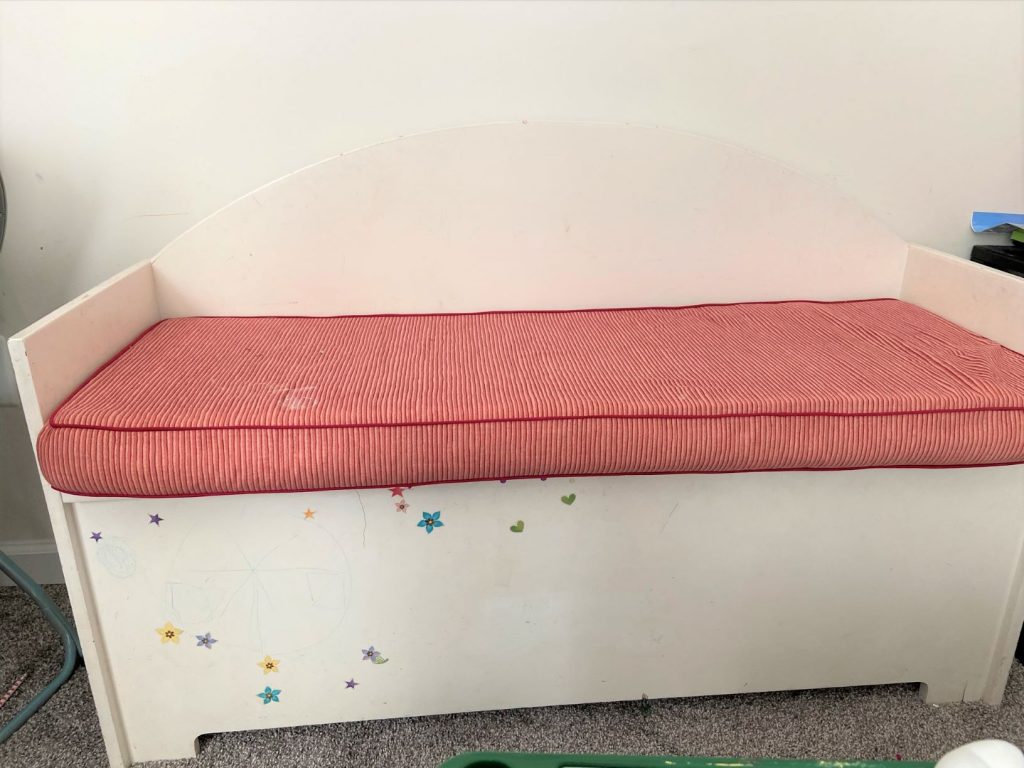
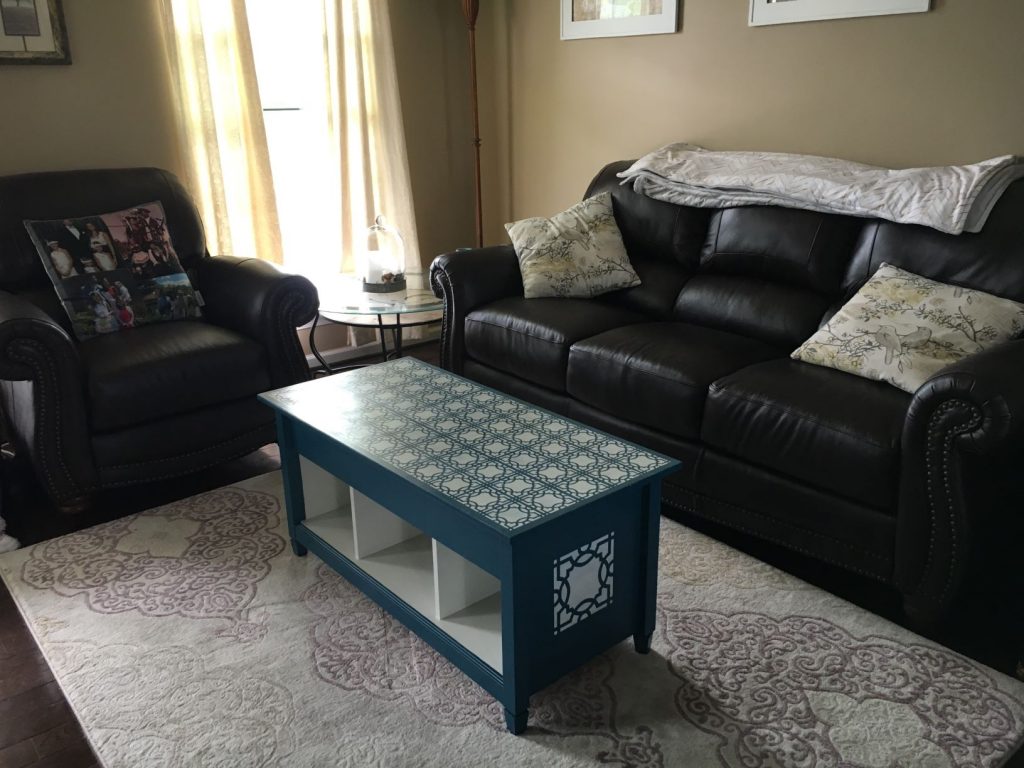
When my neighbor asked if I wanted an armoire her daughter didn’t want anymore, I jumped at the offer. It’s hard to pass up free, especially when my crafting space was in need of additional storage. I was heavy into furniture refinishing at that point in time. Over the previous year, I’d completed the antique dresser, stencil coffee table, shutter buffet, and bookcase projects among other dresser refinishes. The armoire was in much better shape than most of my other projects so didn’t require any structural updates. Sometimes, a more simplistic project can be a nice change of pace, especially if time and energy are in short supply. With that in mind, it was up to my creativity to decide what direction to take this piece.

Furniture Refinishing Paint Options

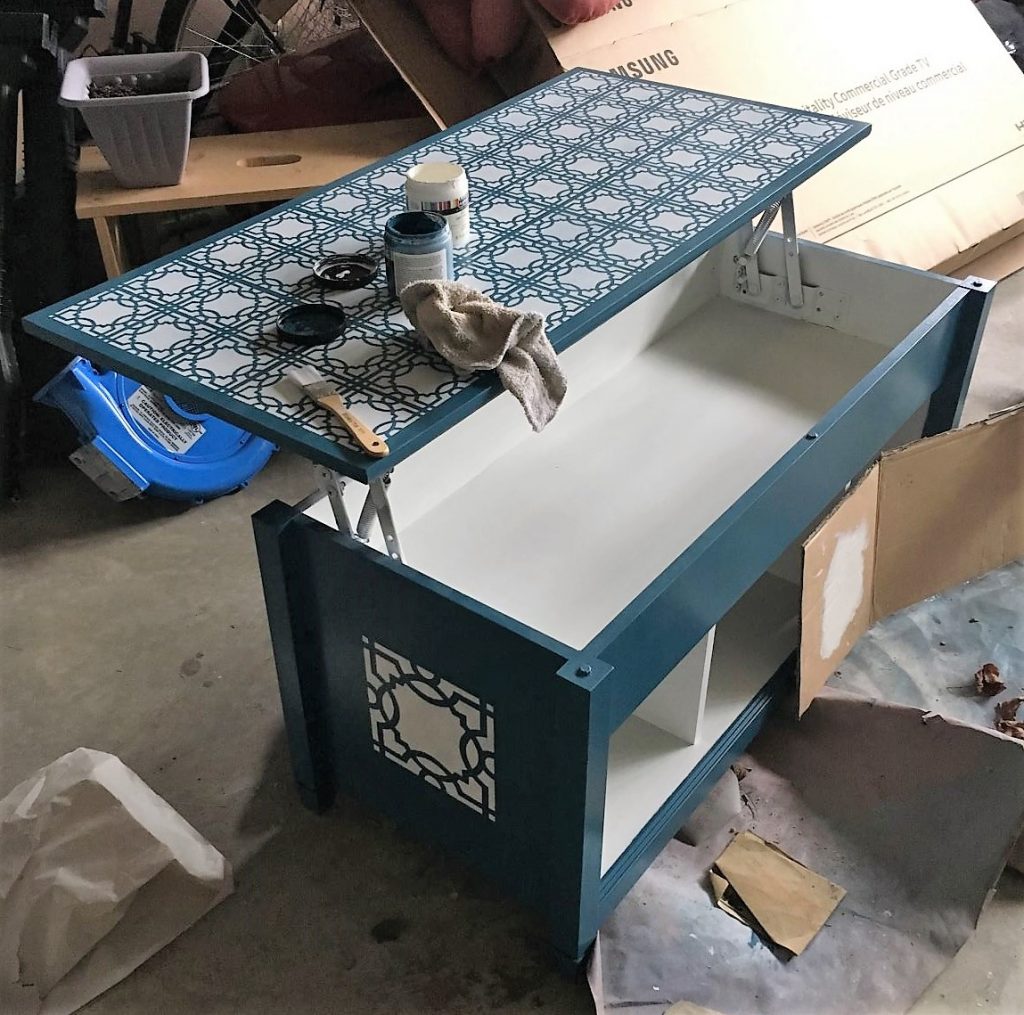
The options for furniture paint seem endless. I’ve tried a fair few at this point from Annie Sloane to Martha Stewart. One of my favorite brands for furniture refinishing is Fusion Mineral paint for its coverage and ability to smooth out as it dries. I decided to use Inglenook, because I’d already used it for a bench refinish and had a lot left. You can search for local shops who sell in store on the Fusion website or you can order it online like I did for this color. Something to keep in mind with Fusion paint is the color changes a bit as it dries, in comparison to how it looks the days you put it on.

Fusion Mineral Paint - 500ml - Inglenook

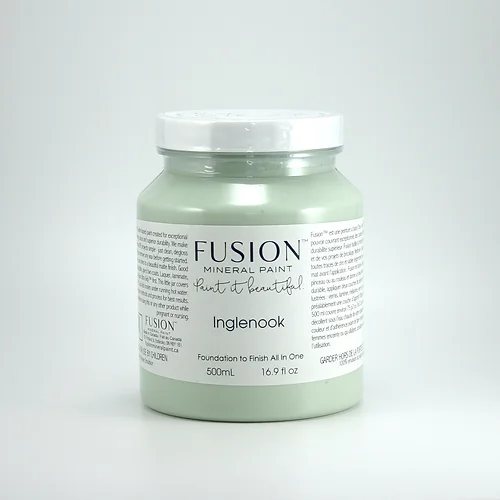
Inglenook by Fusion Mineral Paint.

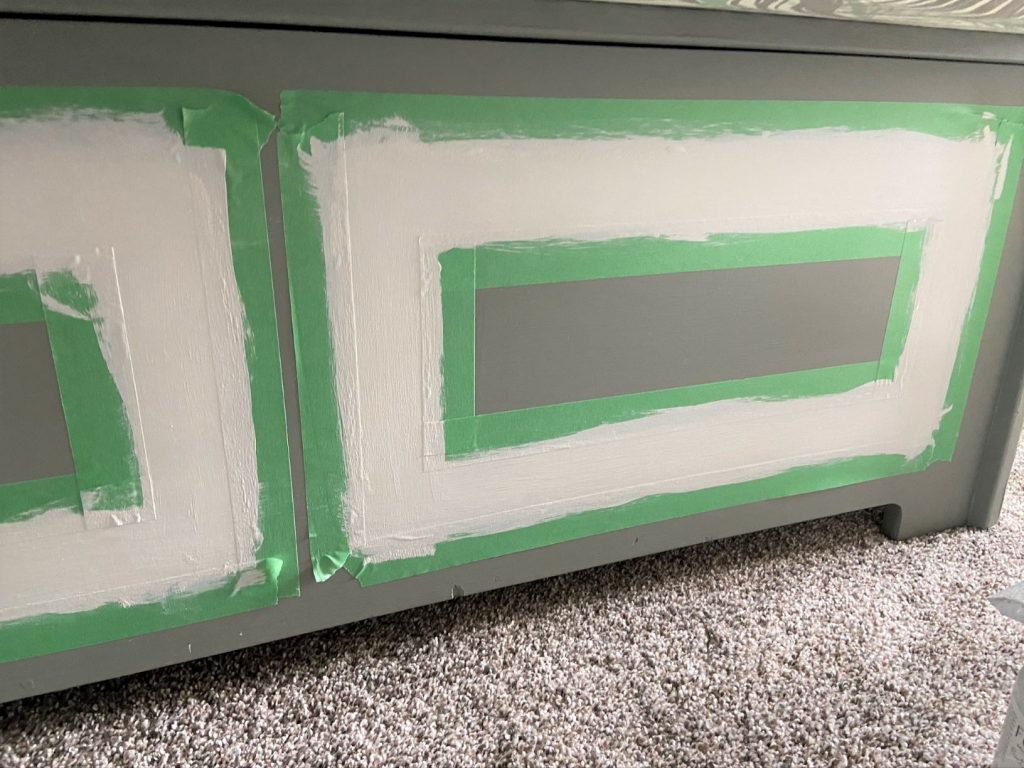
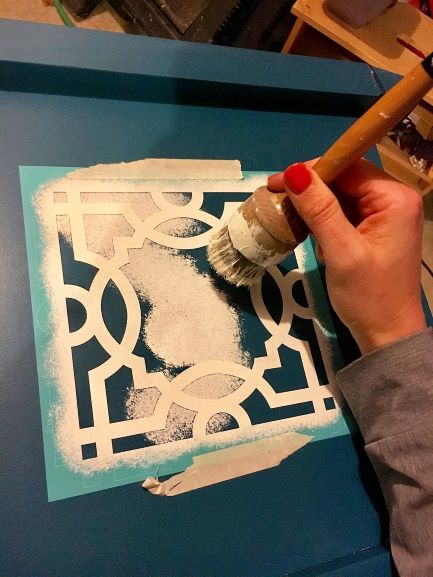
As with all furniture refinishing paint jobs, it’s important you either sand the surface to give the paint some grit to adhere to for longevity or use a deglosser. I’ve used the deglosser on several projects and found pretty good results. The deglosser is quite simple and quick. After cleaning the piece, rub the degloser all over the surface with a cloth. Voila!

Trying Something New

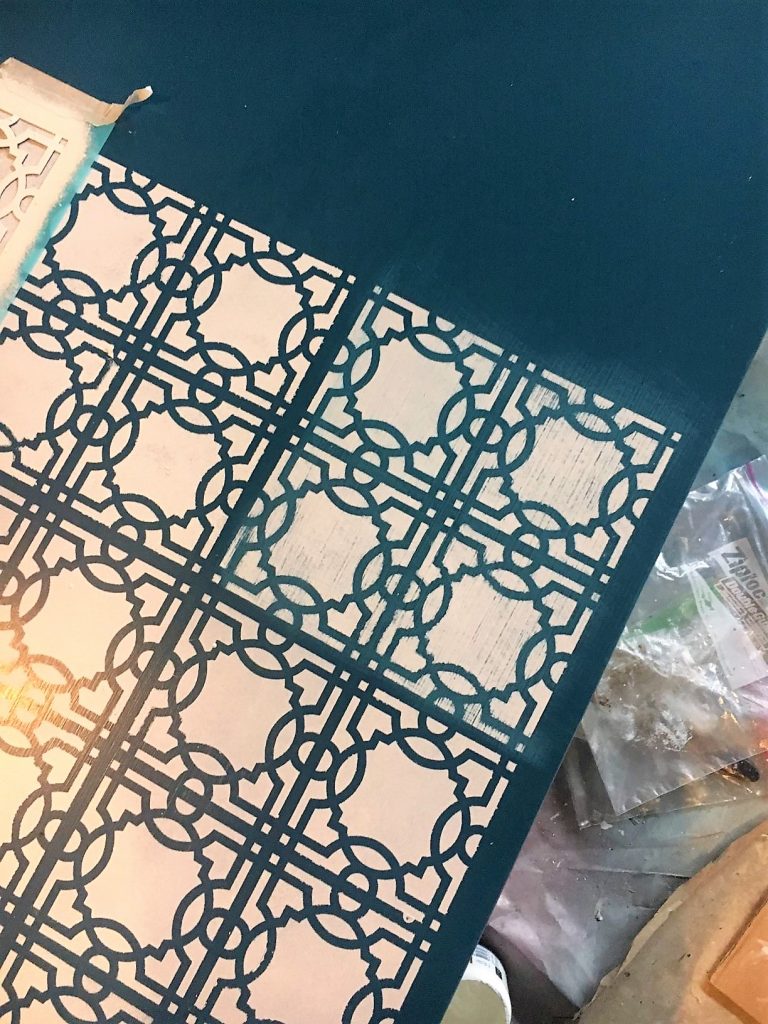
In many of the previous furniture refinishing projects, I used stencils to spruce up the paint. It was definitely my obsession for a bit. To pull away a bit from that obsession, I decided to do something different with this armoire. I opted to give adhesive wallpaper a try. After searching Amazon for a good while, an antique bike wallpaper sparked my interest. It was completely affordable and a nice pairing with the color. When the wallpaper came, I was glad to see it indeed matched well with the Inglenook paint.

I love the measurements on the back of peel and stick wallpapers. This one had a ton of language blurbs, so the lines weren’t there to cut along as much as I’ve seen on other peel and stick products. The best way to go about adhering it to the surface is to peel the top edge and place it along the edge. From there, you need to gently pull the backing while smoothly the surface as you go. This allows you to go as fast or slow as you want. I used my hand because it was easiest but a ruler or other straight object could be needed. It was super easy to put it on the two drawer fronts and the inside backing despite being a half inch to short for the width.

The Final Touch

One of my favorite things to do is to cruise through the clearance sections at stores for crafting finds. On one such trip through Walmart, I found some dark wax. It sat with the rest of my finds until this project, which felt like the perfect pairing with the antique bike wallpaper. In general, regardless of the durability of the paint, doing a top coating will serve the furniture and your work best. A sealing wax (light or dark) is one of the options. Dark wax would be a bit much over the whole surface so is usually meant to give the piece an antique look. I put a clear wax over all the surfaces and then opened up the new can of wax. (You just said worms in your head, didn’t you, ha.)

Given this was my first dark wax attempt, I went at it with what I assumed you should do. I was slightly taken aback by how dark the wax actually was on the surface. It was a quick realization I would need to spread it quickly and wipe off the excess. Some spots showed as being a little heavy handed. I stuck to darkening the corners and creases of the door, drawers, top, and bottom frames.

I was definitely winging it and was a bit indecisive on all locations or look, but I think I did an okay job to start. After the wax dried, I thought some of the heavy handed spots needed a bit more fading. Applying the clear wax over it allowed me to lighten those areas.

Furniture Refinishing Completion

With the paint dry, the wallpaper affixed, and the wax applied, this piece was ready to be stocked with crafting supplies. Hopefully, it inspires you on your next project!

*This page contains affiliate links. This means if you use one of my links to make a purchase, I will receive a small commission at no additional cost to you. Thank you for supporting Cathartic Crafting!

From Crib Rail to Blanket Ladder in 6 Easy Steps

When the baby grows out of the crib, it’s time to find renewed purpose for the crib parts only the dump seems to take. After three babies, it was time for me to dismantle our hand me down crib. With all the new regulations, you literally can’t get rid of cribs that have lived through a growing family.  My recycling and repurposing side wouldn’t allow me to just trash anything but the mattress support. From there, it was just a matter of deciding what to do with the crib rail that sat in wait in the garage for years. 

I ended up being inspired by the numerous throw blankets and mermaid tails that remained a fixture in my 6 year old’s room. Her room was the smallest in the house and she was the least organized. Those blankets always seemed to be strewn around the floor. It was time to give her a throw blanket ladder!

Tool List

  • Circular Saw
  • Jigsaw
  • Router and bit
  • Wood glue
  • Clamps

6 Steps to a Crib Rail Ladder

Step 1

This particular crib rail had a rounded top bar. Given that it didn’t match the bottom bar, I had to cut off the rounded end. While cutting it off, I also wanted to avoid chipping away the finish of the remaining edge. The best way to do that was to cover it in painter’s tape before starting to saw it off. With the tape in place, I used a circular saw to cut off the curve at the top. Thankfully, there was an indentation that I could use as my cutting guide.  It was also helpful to use an attachable saw guide to keep me completely straight while I went. Admittedly, I am not the best at sawing straight so I’ve come to rely heavily on guides to keep me on the mark. I’m crossing my fingers that refined skill will come with time and practice. 

crib rail start

Step 2

For step 2, a jigsaw was my best friend. It was time to cut off the extra rails so there would be enough space for the blankets. Using the jigsaw, I cut both sides of the bar as close to the top and bottom rail as I could. For your own project, you could certainly just leave as is at this point, if you don’t mind the extra width. I thought it was too much and wanted it to be narrower. So on to step 3 I went!

Step 3

This step was really quite simple. I used the jigsaw to cut the remaining bars from one side. The other side of the bars remained attached to the bottom of the crib rail. Then, it was just a matter of also cutting down the length of the bars to the width I wanted. 

Step 4

For such a small project, I certainly used a variety of tools. I pulled out my handy dandy Ryobi router for this step. It was important that the board stay in place while I routered the bar, so I put it in my clamp sawhorse. I used a keyhole bit that was the exact width of my bars to cut placement slots. It was pretty easy since I could use the previous spots as the guides.

Step 5

Using a miter saw, I cut the bottom of the post pieces at an angle so they would rest flat on the floor while leaning against the wall. 

Step 6

The final step was to use some wood glue in each slot before clamping it together to dry. Then it’s really up to you whether you paint it or not. I opted for gray for my crib rail blanket ladder.

Crib rail glued
One of my little helpers. With the constant calls for “mom”, it’s easy enough to get them to stick around to help for a few minutes.

Completed Crib Rail Blanket Ladder

Crib Rail Blanket Ladder in place

I would say that since the crib rail blanket ladder was put in her room, the blankets have been kept tidy….for the most part. I hope this quick run-through helped you make one of your own and you find it just as cathartic as I do to find renewed purpose in washed-up items! If you’re in need of other organization crafts (aka me time), check out Successfully Controlling Stuffed Animal Clutter with a Craft or 20 Brilliant Ideas for Decorating with Wooden Crates.

A Window and Shutter Refinishing Combo Must Do

With three girls in my house, the bows and headbands were getting out of control in their shared bathroom. Previously, I made some headband holders and bow holders. They were overloaded and a bit unsightly. I had several windows and shutters in my garage waiting for a good project idea to hit me. With the desire to spruce up their bathroom, I came up with the idea to use a window and shutter to create an organizer for their hair paraphernalia. I was super excited by the idea as it served as cute décor with purpose. It was definitely a win-win situation; I got a larger window and a set of shutters out of my garage stockpile and created a quick organizer for all the bows, headbands,  earrings, and misc items. My girls thought it was a hit, so I hope you enjoy it as well!

The very sad looking before photo: a ribbon frame bow holder and an owl earring holder.

Bathroom Window and Shutter 411

The window started out as a single pane old window without the crossbars. My initial plan was to use a Cricut to cut a message to stick on the window. After an accidental slip causing the pane to break, I decided to go with a Plan B for the glass area. Plan B included constructing my own crossbars using a router and glue. More on that later…

This is what I was working with at the start.
Incidentally, this is around where it slipped off the bench and cracked the glass. It was a happy accident.

Easy Refinishing Step: Painting

The shutters were in need of a color correction from the cherry red. After separating the shutters into two pieces, I spray painted them with gray. Then, the window frame needed some refreshing with some white chalk paint.

Attaching the Shutters

Then, I attached the shutters to the window frame by attaching one side with the remaining hinges and the other shutter with pocket holes. (FYI: pocket holes are created with a Kreg jig. (If you need more info check out some of my other posts: Shutter Buffet, Living Room Set)

It was after this picture that the windowpane broke. After that mishap, it was on to plan B. I used 1/2″ square dowels and a router to cut out notches for the cross beams to fit together. Essentially, you are notching a 1/4 inch into the dowels in the spots you want the dowels to fit into each other. When they are pieced together, they should remain at 1/2″ width glued together. Four dowels and 8 notches. This requires starting with a square and tape measure to ensure your notches are going to line up correctly. 

Shelves:

Using 1/4″ board scraps, I made some framed shelves for the bottom of the shutters. I thought of them like window flower boxes. Then, I used a metal screen to cover the openings of the shelves. It was easy to cut them to size and hot glue them onto the inside of the 1/4″ wood. Wood, glue, and screws attached the shelves to the shutters.

Pop-out Earring Holders:

With plan B in play, I was inspired to utilize the empty space for additional purposes. I decided to replace the hanging owl earring holder with an earring holder window square. The same square dowels were used for the frames as for the crossbars. In case you are interested, I include a tutorial on constructing an earring holder with a frame and metal screening on my picture frame post


Shutter Headband Holder:

To say it simply, my 6-year-old has A LOT of headbands. The shutter pull bar was a perfect way to hold them in place.

Towel Hooks to Finish it Off:

The builders of our home put one long bar towel holder in this bathroom, which sufficed for the last 5 years. I was tired of not having a place to hang multiple towels separately. With that notion in mind, I decided to put up towel hooks on the bottom of the window frame. I’m really happy about the added options the double hooks now provide.

Bathroom Window and Shutter Finishing Touch

Using a fairly thick wire I had on hand and some fabric, I made a wreath for the window and shutter decor. I used the wire to “sew” (aka poke holes) into the material. 

Then, the bows could then be easily clipped around the wreath. 

With the placement of the headbands, bows, towels, and earrings, this window and shutter bathroom organizer was complete. After all the work was said and done, it was so much more beautiful than the previous version. Thankfully, my daughters corroborated that belief.

*This page contains affiliate links. This means if you use one of my links to make a purchase, I will receive a small commission at no additional cost to you. Thank you for supporting Cathartic Crafting!

An Inspiring Way to Refinish an Antique Dresser

If you’re anything like me, you peruse the Facebook marketplace every now and again for some “window shopping”. I was on just such a trip when I spotted an antique dresser being unloaded by the previous would-be refinisher. It was a steal! I jumped on that as quick as I could type “interested!”. From there, it was just a matter of my mind diving into identifying just the right direction. Follow along with me on my antique dresser refinish. I really hope it inspires you on your own journey!

Structure Fixes

The top was in the roughest shape. Since much of it was peeling off, there wasn’t much I could do to salvage it. I scraped off the chipping wood and sanded down the top. I considered adding a 1/4″ thick board to the top to replicate the upper layer but made the wise decision to leave it as it was. 

The rest of the dresser was in really good shape. The existing finish was a matte finish so all that was necessary was to clean it. Paint would adhere very well without needing to sand it. In my world, that is the best kind of piece!

The top middle drawer was stuck in there without having a handle to pull it out. I was able to get it out by wedging a tool into the hole and the edges to shimmy it out. 

Breaking out the Paintbrush

I went the budget friendly route on this paint choice and used my favorite 40% off coupons at Michaels to get three colors: Light gray, dark gray, and white. Typically, I try to avoid having to use blue tape (I just don’t like spending the time doing it), but it was definitely necessary for this paint job to create straight lines. I chose to use white as the dominant color and light and dark gray as the border and stencil color.  

Stencils!

My stencil phase was really kicking into gear at the point of this project, so it was a given I was going to do something utilizing the technique. (Check out my other stencil projects: Stenciled Coffee Table and feathered bench.) I again used a Michael’s coupon to get a damask stencil. From there, it was just a matter of letting my imagination go free to determine what I wanted it to look like. When doing the stencil, I did a combination of the light and dark grays to create more dimension. It, of course, would have been fine to do all one shade, but I didn’t want to overwhelm with the dark paint or for it to be harder to see with the light gray. I coated the entire dresser in clear wax to finish it off. The final results are below!

Drawer Liner

Given that the inside of the drawers would be covered with clothes, you may not find it important to use a liner. I liked the fun of the pop of pattern, so I opted to spend a few more bucks to get the drawer liner. I found this liner at Walmart. It has the handle grid on the back for cutting. All it took was to measure the inside of the drawer space, cut the paper to size with the grid, peel, and stick. It can be a bit hard to get completed smooth, but if you continue to rub the bumps, it gets the job done.

Finishing Touch

The dresser just needed some knobs to call it complete. I searched around for a good bit. Home Goods and Hobby Lobby sell knobs in the stores but the selection wasn’t great to match what I was searching to get. I found these knobs on Amazon:

I loved the look of them and the coloring was perfect. After having used several other knob types, I can verify for you that while these knobs may come loose with use, the screw will not pull out of the knob. The screw can be seen at the front of the knob and goes all the through as opposed to being glued into the knob. It’s much more secure that way. 

Putting the Antique Dresser into Place

The plain jane white dresser was swapped out for the refinished antique dresser.

The canopy bed was one my parents made for me as a child. I made the curtains to appease my little one.

I hope you enjoyed the quick and easy journey. Refinishing doesn’t have to be scary. If you can find one like this that doesn’t need a lot of structure fixing, then you are basically only left to the confines of your creativity. While we are on the topic, check out the benefits of creativity:

Turns out, tapping in to that creative energy can actually improve your overall health. It might sound too good to be true, but simply engaging in creative behaviors (even just coloring in those trendy adult coloring books) improves brain function, mental health, and physical health.

Forbes
5 benefits of Being Creative:
  1. Increases happiness
  2. Reduces dementia
  3. Improves mental health
  4. Boosts your immune system
  5. Makes you smarter

With this benefits, there’s no reason not to let unlock that creativity today! Happy Crafting!

*This page contains affiliate links. This means if you use one of my links to make a purchase, I will receive a small commission at no additional cost to you. Thank you for supporting Cathartic Crafting!

Vintage Trunk Coffee Table: From Bedraggled to Shabby Chic

I don’t know about you, but I think cruising the Facebook marketplace every now and again is a must. I’m assuming you’re like me in that you want beautiful décor at budget-friendly prices and you’re excited about the challenge of making a piece your own. I’ve found some real gems in the marketplace. When this trunk came across my feed with a $20 price tag, I was immediately sold. Follow along as I convert this bedraggled vintage trunk to a beautiful shabby chic coffee table on wheels.

Vintage Trunk: Starting Condition

In addition to peeling canvas, there were some signature cracks in the top of this trunk. It was a bit sunken in as well. 

Fixing those Cracks

I settled on using some quarter board I had on hand to solve the sunken crack issue. I cut it to size and screwed it to the top with 1/4″ long screws to level out the cracks. It worked like a charm. From there, I peeled the canvas off the outside from most spots. I left a few panels that were intact. 

I used wood filler to fill the cracks and level out some of the few remaining low lying spots. After a good bit of sanding to get it completely smooth, I was ready to paint. 

Fusion Paint for the Win

I had some Inglenook Fusion Mineral Paint from Vintage Finishes from a recent armoire project. It paired well with the wood and metal colors of this vintage trunk. Green painters tape kept them free of paint. I used a paint brush I also purchased from Vintage Finishes for the majority of the painting, but needed to use some small brushes to get the corners and spots around the locks. It was a fairly quick step. I debated doing just one coat but ended up touching it up with a second coat. 

Vintage Trunk in need of paint aging

I had thought the paint would look completely nice as is with the wood, but I ended up feeling it was missing something. It sat for a night and then I decided to use some dark wax I had to age the paint. It could have been accomplished by sanding the paint in areas but with the difference of the canvas in some spots, wood in others, and wood filler in others, I didn’t feel it was an adequate option. For this vintage trunk look, the wax gave it just the right touch.

Inside this Vintage Trunk

The inside of this trunk was not as easy to scrape clean as the outside was to peel off in long strips. I used some special cleaner purchased from door to door sales gals. This stuff has worked some magic on grease and cars. Anyway, I did my best to scrap all the loose bits off to ensure maximum sticking. It’s also important to rub off all the dirt as best you can. There can definitely be a smell, so jump on over to my other post on trunk refinishing for some other tips. 

Wallpaper time

On my previous trunk project, I used a cotton material with glue and Mod Podge. Initially, I thought I would do the same with this vintage trunk, but then, I thought about the recent project I’d done with peel and stick wallpaper. I was sold on the idea of peeling a sticking. After looking at the options, I was fairly certain I would do a flower pattern. Just as I was about to place the order, I found this mandalla like one which really spoke to me for this vintage trunk. I was sad it didn’t have the measurement lines on the back like the last wallpaper I’d used, but I was alright without it. The hardest part was that it was slightly wider and stiffer than needed, so it required some finessing. A long scraper helped with smoothing it out. I did some of this while watching Bride of Boogedy with my kids for Halloween. A childhood favorite movie I couldn’t wait to show my girls. They were annoyed with the sound of the scraping, so I had to put a pause on the progress. I’m pretty smitten with how it turned out!

Easiest Part of the Project

I did a fair bit of searching for vintage wheels that were appealing and affordable. As usual, I landed back on Amazon, where I found these vintage wheels. They came with the screws the perfect length for my project and a screwdriver. I probably could have just screwed them in without drilling a hole but I didn’t. I decided to make my life easier by drilling the holes. In case you would like a tip for this type of thing, use a pencil to mark the holes. Then, remove the wheel to drill the holes. Using a drill to screw in the screws, tighten one screw 3/4 of the way and continue with the rest to ensure they all fit into the holes. Once the screws are all in, tighten them up. Presto! The 5-minute step was done.

Vintage Trunk Ready for Display

I hope you enjoyed the fairly easy project run down. With some muscle put in scraping and some budget friendly purchases, this bedraggled vintage trunk turned into a shabby chic coffee table showcase. 

*This page contains affiliate links. This means if you use one of my links to make a purchase, I will receive a small commission at no additional cost to you. Thank you for supporting Cathartic Crafting!

11 Sensational Repurposed Old Windows

Ladies craft night anyone?! A while back, I was really into hosting crafting nights. I’d already done some painting parties, so I decided to shift gears into a window upcycling party. I found a stock of old windows for a $20 steal and sent out the invite. The windows were very dirty and very chippy, requiring a good bit of elbow grease. I did all the cleanup before to make it easy. For the event, the guests were informed that I would be providing the paint and paintbrushes. If they wanted anything special, they would have to bring it for themselves. With that, we were ready to relieve our stress by letting our creativity shine through some repurposed old windows.

That party was one of the motivations for putting this list together for you all. Since that party, I’ve had the leftover windows sitting in wait in my garage. I’ve included those generally quick and easy projects below.

11 ideas to give a whirl for repurposed old windows:

1. Bakery Stand Window

This bakery stand was one of my more recent projects. My girls were in love with the end results and have used it many times to raise money for charity, Determined to Donate.

2. Shabby Chic Display (from my Paint party)

“Every Dream begins with a Wish”

3. Shelf and Picture Holder 

My 6-year-old was very excited about getting a desk in her room for Christmas. When I asked if she wanted a window shelf above it, she was all about it. She picked the color and I added shelf brackets. The little ballerinas were a cheap find from Michaels to fit with her ballerina-themed room. It was such an easy project.

4. Mantle Decor from Walnut and Vine

5. Mirrored Window by Finding Home Farms

This is a tutorial on a footboard towel rack. I love every bit of the total look from antique clocks to pink bottles. Super cute!

6.  Altered Window Frame by Little Birdie Secrets 

7. Command Center by Dwelling in Happiness

8. Window Box Cabinet by My Repurposed Life

9. Window Planter by Prodigal Pieces

10. DIY Mini Greenhouse by HgTV

I’m completely smitten with this adorable upcycle. 

The Finale

11. Bathroom Storage Window and Shutters

Last but not least. This was my latest project to spruce up my girls’ sad-looking bathroom. The window started out as a single pane old window without the crossbars. After an accidental slip causing the pane to break, I decided to go with a Plan B. Plan B included constructing my own crossbars with a router and making pull out metal mesh earring holders. I include a tutorial on constructing those on one of my picture frame posts.  It was definitely a win-win situation; I got a larger window and a set of shutters out of my garage stockpile and created a quick organizer for all the bows, headbands,  earrings, and misc items. My girls thought it was a hit!

Pop-Out Earring Holders:

Shutter Headband Holder:

To say it simply, my 6-year-old has A LOT of headbands. The shutter pull bar was a perfect way to hold them in place.

Towel (or Jewelry) Hooks

The builders of our new home put one long bar towel holder up in this bathroom, which sufficed for the last 5 years. I was tired of not having a place to hang multiple towels separately, so I’m really happy about the added options the double hooks provide.

The very sad looking before photo: a ribbon frame bow holder and an owl earring holder.

End of the countdown on 11 sensational ways to repurpose your old windows

I hope you enjoyed the ideas and that’s it inspired you to create some of your own!

DIY Bakery and Lemonade Stand Charm for Entrepreneurial Kids

While under stay-at-home orders in Maryland, my two younger daughters took hold of a bakery and lemonade stand idea. They knew they wouldn’t be able to sell the goods at that time but were completely smitten with the idea of it. It just happened that while redoing my oldest’s daughter’s room, she had decided she no longer wanted this large composite bookcase. Inspiration hit after the initial request for the stand, so away we went with the creation of it. 

When life gives you lemons, make lemonade.

Materials & Tools

Quite thankfully for our budget, I didn’t have to buy any materials for this project. I used items already sitting in wait for re-purposing. 

Materials

  • Composite Bookcase
  • Old Window
  • Scrapwood
  • Spraypaint
  • Screws
  • Cotton Material
  • Drawer liner

Tools

  • Square
  • Drill
  • Saw
  • Kreg Jig
  • Clamp

Getting to Work


I wanted this project to be as easy as possible. The easiest way I figured we could accomplish it was to cut the bookcase just above the secured shelf. This would allow for a small lip of the soon-to-be counter space. Rather than just drawing a cutting line, I used a square as my guide by clamping it on.


Safety Announcement!

Protect your hearing!! My girls have come to use their earmuffs to help quiet the noise of my saws. They also lovingly remind me to wear my safety ear muffs when they see I’m not wearing mine. I know from family experience that protecting your hearing now is important for the years to come. Be sure to wear those ear muffs when using any loud tools. I bought a pair of ear protectors for my garage visitors.


The girls in their PJ’s inspecting my work.

Here comes the Color!!!

This project was a great opportunity for the girls to join in the refinishing fun. Obviously, the blond wood color wouldn’t do for their personal bakery and lemonade stand.  They picked from my assortment of spray paint cans and got to work. I let them do what they could and filled in the light spots later.

Old Window Repurposing

Awhile back, I bought a stock of old windows for $20 and hosted a Window repurposing party. I had a few who weren’t able to make it so have been storing the windows every since and using them for as ideas spark. The girls set to work cleaning one of the windows. They cleaned the glass and scraped off some of the old paint before painting it white.

The width was just about perfect while the height was off by 3 or 4 inches. I found a spare board that worked to fill some of the difference. Using my handy Kreg jig, I attached the board to the window and made pocket holes around the window to attach it to the bookcase. 

With the window on, it was just about complete. Drawer liner from my Antique Hutch Project served to spruce up the shelves. As you can see from the above, the girls were pleased with the results. All that remained for the bakery side of things was to hide that gap. 

Time to Bring Out the Sewing Machine

The girls picked out material from my stash to make a ruffle. I can still remember my mom teaching me how to make a ruffle as a kid. You need to cut a piece of material that is almost twice as long as what is needed and start by finishing off your edges. I’m not an expert sewer, so I’d recommend checking out some other great sites, like Treasurie, for how to best do that.

To make the bunching, you sew a loose straight stitch along the whole length without backstitching. 

Then pull one of the threads while pulling the material in the opposite direction. It may be necessary to start pulling on the opposite side when it starts to get hard to bunch. 

When it’s at the right length, backstitching and a shorter stitch along the length secure the ruffles. With the ruffle complete, I hot glued ruffles to both the bakery and lemonade stands.

Bakery and Lemonade Stand Wares

A lemonade stand is dependent on some beautiful lemons!

We were making the bakery and lemonade stand just after Easter, so we went ahead with baking some Easter Sugar Cookies with icing.

Store-bought pizzelles dipped in chocolate with a smattering of sprinkles were next up on the menu list. The girls also chose to use the mini Easter desserts given to them by their grandmother.

A Quick Menu Sign

Every bakery needs a menu, so I selected this wood cut out from my stack. I used Martha Stewart Chalkboard Paint in purple and gray. 

Personalized Money

I would be remiss if I didn’t mention my love of personalized items when creating for the kids. I thought it’d be fun to give them play money to use during quarantine in liue of doing a lemonade stand at the end of the driveway. www.PrintablePlayMoney.net had free templates which were exactly what I was looking for. The girls were crazy about the idea, so away we went. A quick photo and duplication in Word gave them a stack of bills ready to hand out for us to pay for the goods.

Bakery and Lemonade Stand Open for Business

To finish this project, the girls made their own cardboard sign and offered storybooks they wrote for the waiting customers. I used cardboard and acrylic paint to create lemons, cherries, and a cupcake for extra flare. 

The girls are ready and itching to get out to the end of the driveway to put their stand to use with real customers. My ten-year-old wants to use the profits to donate to a charity cause she’s just that kind of girl. I hope you find some inspiration in our found objects project making lemons into lemonade. 

2022 Update: My girls have indeed used their stand for good since its inception. Check them out at Determined to Donate on Facebook.

*This page contains affiliate links. This means if you use one of my links to make a purchase, I will receive a small commission at no additional cost to you. Thank you for supporting Cathartic Crafting!

Easy Storage Bench Refinish from Drab to Fabulously Feathered

Sometimes when we grow tired of furniture, we decide to replace it with something new. Why not save the money by giving the piece a new look? For this storage bench, it wasn’t at all that I’d rather buy a new one, it was more, “I’m going to give it a more sophisticated look so my husband accepts it being in the hallway” scenario. My daughter no longer wanted it in her small room, so I decided the bench and the toys it stored might be a fit for the empty space in our upper landing. And thus starts the story of this storage bench refinish. 

Bench Refinish First Steps

In all of my other refinishing posts thus far (Stenciled Coffee Table and Revamping a Bookcase) I’ve made it a point to reinforce sanding the surface before painting. I’ve also noted it’s not on my list of favorite things to do. With that being that case, I opted to grab this deglosser off the shelf during a shopping trip at Lowe’s. I figured if it saved me 30 minutes of sanding, it was worth the $8.

Basic instructions include putting the deglosser on a clean cloth and rubbing in a circular motion over all glossy surfaces. If you like easy, this is it. This bench definitely had a glossy surface despite all the years of use, which would definitely have been a paint chipping risk if I didn’t do something to it. I liked that using the deglosser didn’t involve full paint removal or scraping. Definitely, a thumbs down if trying to work in an arm workout (those who sand know what I mean) but a thumbs up for the mental state. Yet to tell is how effective it will be for keeping the paint in place.

Refinishing Paint Choice of the Day

In a few of my other refinishing projects, I’ve noted my choice for paints that fit a tight budget. This time, with some birthday money burning a hole in my pocket, I opted to get one of my favorite paints: Fusion Mineral Paint. Since all the stores within acceptable driving distance had closed, I decided to place an order with Vintique Finishes. I picked out two of the available colors and a new brush (brushes sadly don’t tend to last long with me) and was giddy with anticipation for the package arrival. 

You can really see how thick the paint is here. I did two coats which is recommended for durability.

Gold had to go, so a few sprays of spray paint gave them a new look.

Quick Shopping Trip

I don’t normally shop for fabric online because it’s hard to get a feel for scale. Not knowing what I wanted to get for the bench pad, I decided to do it this time as it seemed much easier to look at the little squares of options. This ended up being a wise choice. I found this feathered home decor fabric at Joann’s that ended up matching perfectly with the Sacred Sage fusion paint. After placing my order, I picked it up the next day before swinging by Hobby Lobby on a stencil search. I found two options as seen below. One was a silkscreen stencil, which I hadn’t tried before.

Sewing Time

I admittedly wing my sewing projects since I’m not an expert sewer. Contemplation is the name of the game. I tend to contemplate the best method to go at it for a bit and then push myself to start. Doing a box cut would be easier to do to have all the seams on the corner, but I just didn’t feel like doing all that cutting and sewing if I could achieve it by keeping the material completely intact. Here’s a video by Peg Baker on how to achieve the box cut pattern. I bought a 22-inch invisible zipper (that’s the longest they had in stock) and went to work. Given that the zipper wouldn’t haven’t been long enough for the back, I decided to put it on the end. This was a bit trickier than if I’d have gone with the long back seam.

It’s always important to pin the zipper securely in place.
My Greater Swiss Mountain dog, Skye, was really enjoying the soft cushion.

Bench Refinish Stencil Mania

Silk Screen Stencils

Like I said, I hadn’t used silkscreen stencils. I wasn’t even sure what the difference would be between them and traditional stencils. After seeing what made them unique, I’m in love.

The magic of this is their sticker-like quality. Stick them in place and use a fair amount of paint applied with a sponge brush. No tap tap tapping is needed here. I loved that fact alone.


My daughters watched intently while I worked on my project. All the while telling me I use stencils for too many things. It’s not far from the truth. I have come to use stencils in many of my projects as a preferred way to add a unique flair. I suppose I’ll refrain from stencils on my next refinish to avoid becoming a one-trick pony. Anyway, I initially did 5 feathers.  After sleeping on thinking it was a bit blah, I decided to go for a feather frenzy. I was glad I did by the end.

Final touch

I had thought I was finished but just wasn’t quite as happy with the transformation. The bottom portion was missing something but I was afraid of adding another explosion of feathers there. I opted to give it a faux cut out look by painting rectangles.

Out came the squares, painter’s tape, and measuring tape. I used the width of the small square for tracing to make my life easy. I did a bit of math to ensure the rectangles would be spaced equally apart and from the outside edge. Then I used some Lamp White fusion paint I had leftover from another project. After peeling off the paint, I called it complete.

The Before and After

What do you think? My youngest preferred the white and was a bit upset by the change. My 10-year-old on the other hand felt it was an awesome transformation. To each her own I suppose when it comes to refinishing. I hope you enjoyed this storage bench refinish and it gave you some ideas for your own projects. If you’re looking for more, take a look at Furniture Refinishing

*This page contains affiliate links. This means if you use one of my links to make a purchase, I will receive a small commission at no additional cost to you. Thank you for supporting Cathartic Crafting!

Antique Hutch Refinish For an Outstanding Shabby Chic Focal Point

In a random search of the Facebook marketplace, I found this antique kitchen piece for less than $50. I LOVED IT! I find it truly exciting to find these kinds of things, even when I don’t need anything for my own house. Have you found any antique steals yourself?!  This kitchen hutch (as I deemed it) was located near my sister’s house, so after confirming she could pick it up for me, I snatched it up. Then, she lovingly dropped it off at my house for me. I was ready to take on this antique hutch refinish job. 

To do’s for this project:

  • Painting the wood 
  • Buy wood and new drawer handles
  • Cutting new shelves
  • Staining the shelves and the top
  • Cleaning the rust off the metal drawer bin
  • Replacing the metal 
  • Fixing the broken wood

Expenses

  • Annie Sloan paint: $12 for 4 oz
  • Fusion Paint: ~$22 for 16.9 fl oz
  • Pine board $16
  • 5 drawer handles, $15 
  • Metal sheet, $22
  • Wood Filler $7
  • Drawer/shelf liner (bought for a previous dresser refinish)
  • Time…priceless

Total $84

After having used Fusion paint on several projects, I wanted to give Annie Sloan paint a try with this project to be able to compare the two. I had found an Annie Sloan paint seller nearby at an antique barn sale, so I had gotten a 4 oz bottle of teal (named Provence and number B8100620). The bottle says “Absolutely anyone can use my paint. It’s easy.”

Normally, I’d say you need to sand or strip the wood before painting, but with this one, it wasn’t necessary. I had to fix a few pieces of wood that were loose or broken before painting. After those fixes, I did a single coat of teal on the back and a double coat of white fusion paint on everything else. This was likely the easiest paint refinish I’ve done to date. The single coat of teal was enough coverage to give it more of a rustic look. Of the 4 oz canister I bought, there was about a quarter of it left. I’d say that’s pretty good coverage for that small amount. It also went on smoothly without any brush marks. It was definitely a positive to have an easier paint job for this project given the other tasks needed. Annie Sloan got a thumbs up from me.

A Little Bit of Metal Work

With the top and the legs painted, it was time to start on the metal bins. I’d been told they were used to store flour, but I really couldn’t find any information on the internet to verify that. I would guess they were used to store onions and potatoes but that’s purely based on what I think would make sense to put in there. 

One of the bins was only slightly rusted, but the other side had a hole in it from all the rust. In order to fix this, it was easiest to replace it altogether. I bought a sheet of aluminum from Home Depot to cut to size. In order to get the old metal off, I had to remove the nails holding it in place. It took me quite a bit to push myself to start this task because I thought it was going to be quite difficult. Procrastination really gets me on some projects. It ended up being easier than I had thought, which was fantastic! Be warned that sometimes our fears end up falling flat. 

A little motivation for you…

“Take time to deliberate; but when the time for action arrives, stop thinking and go in.”

Napoleon Bonaparte

“If you put off everything until you are sure of it, you will never get anything done.”

Norman Vincent Peale

“The greatest amount of wasted time is the time not getting started.”

Dawson Trotman

Adding a friend to the mix

While I was working on the bins, my friend was working on her own dresser refinish with me in my garage. It was cold in there! I was helping her learn the refinishing ropes. Having a buddy definitely makes a project much more socially fun. 

Clean metal bins

Although part of what I love about crafting and woodworking is the solitary nature of it, sometimes it’s really nice to have company. You can still get lost in your own thoughts and mentally working through your own problems, but you also have the opportunity to get feedback on those thoughts. Normally, I do have social engagement even in my garage solitude due to the constant need for ‘mom’. For example, while trying to write this post, I’ve been interrupted no less than a million times from the three kids and husband. 

Anyway, back to business…

I placed the new sheet in place and then nailed it into place with some 1/2 in nails. After it was set in place, I pressed the edge down over the wood and used a hammer to flatten it as flush as possible against the wood. It was complete after that!

Rust, Rust, and more Rust

I used this same tool I had used to cut the metal. It had several different tips and this bristle brush was FANTASTIC at scrubbing off the rust. Since I hadn’t done anything like this before, I was really impressed with how well it worked.

Wood Fixes and Staining

This antique hutch refinish was well on it’s way to being complete. I ended up buying some pine to cut into two shelves because the hutch hadn’t come with all the shelves. The hutch had a removable cutting board that was in need of repair. I used wood filler to fill in the gaps. I did one round of it, let it dry, and then did another layer. If you put too thick of a layer on, it doesn’t seem to dry as well as it should. I’ve learned this from personal experience. I’m glad to fail to help you stay on a successful track on your journey. (Definitely not happy when it happens, but after the moment passes, I can be.)

Shelves cut, stained and ready for placement.

After the wood filler dried, I sanded it and the top smooth to be ready for staining. I employed the services of my oldest to help with applying the dark stain. I used the same stain as for my Paddle Platter

Look at how much she appears to love helping with this…Not at all. After the stain, came the three coats of polyurethane to protect the surface from frequent use. 

Antique Hutch Refinish Final Product

And after all that work and time, it was finally finished and ready for staging. If I had the space, I would love to keep it. Sadly, I don’t, so this beauty is ready for a new owner. 

Hard to see in this photo but there was nice detail on the top border.

I hope you enjoyed the run down of this antique hutch refinish and find it inspiring as you start on your own journey. Happy crafting!

Flip Coffee Table Stencil Refinish

Plain black coffee table or stencil refinished coffee table?!  Which would you choose? When a neighbor posted the black coffee table as free to whoever wanted it, I jumped at the chance to give it a new unique look. Free is fabulous in my book. It was a composite wood table, so definitely not as durable nor easy to alter as real wood. This wasn’t necessarily a bad thing, because it meant I had to stick with a simple paint job. For this refinish, less was more, and perfect for anyone looking to do something new.

Start of the Stencil Refinish

I started this project by sanding down the shiny finish to give the paint a fighting chance of adhering to the surface. Sanding is not my favorite thing in the world, so it tends to be what shines through as my weak point in projects. My proof of this is to come.

Painting

To make my life easier, I bought paint from Michaels, teal and white. I try to fusion mineral paint when I can, but have found it’s hard to find it locally. You can use the website https://fusionmineralpaint.com/where-to-buy/ to find it near you or order online. instead of searching around for fusion paint. I started with painting the outside teal. Unfortunately, it didn’t adhere properly to the spots that weren’t sanded as well, so I was kicking myself a bit for that. 

I decided to take a step back and spray paint the whole thing with white primer. It was easier than sanding it all again and helped hide the black from coming through the first coat of the teal paint. 

You can plainly see the spotty finish in the top right there. Blah

After spray painting a few coats of white, I repainted the whole thing with the teal. I was happy with the final finish. I painted the cubbies and the internal storage area with white to give it a more defined look. When the solid colors dried, it was time to give it a stencil detail.

Stencil Refinish

Calculating stencil refinish

Then it was time to pull out the old pencil and paper. It’s crazy how many of my projects involve calculations. This tends to be my stuck point because of the fear of messing it up. I use the knowledge to reinforce the importance of understanding math with my three girls. For this stenciled top, I had to figure out the width of the border for the long side and short side by considering the width of the stencil and how many could fit across. This stencil was more of a challenge, because it wasn’t completely centered and square to the border. A Martha Stewart fail if you ask me.

First step Stencil Refinish

It’s a fine art

To be honest, I haven’t done a ton of stenciling. In the handful of stencil refinishing projects I’ve done, I have learned there’s a fine art to mastering it. It’s simply not easy to get it to be perfect. For instance, you have to have the exact amount of paint on your brush to keep it from seeping underneath the borders while still giving it a solid coat. I started by stamping/patting the loaded paintbrush on a paper plate to take off the excess and evenly distribute across the bristles. It’s best to start stamping the brush in the large open portion of the stencil to unload some of the paint there first before going towards the edges. 

Stencil Refinish preview
Be sure to use a square for repeating stencils to ensure everything stays even. This picture shows that the last stencil was slightly tilted to the left and was definitely visible to my OCD self.
Stencil refinish going off square
Some of the white coatings weren’t completely even and there was a bit of seepage. I decided to sand the whole top a bit to even it out and give it a very slight aged feel. This is a perfect example of how imperfect I can be and how you can hide mistakes if you think creatively.
Large Stencil in progress on refinish
After I completed the top, I finished it off with a large stencil on both ends to tie it all together.

Final Touches

Stencil Refinish almost complete

Then, I painted the cubbies and inside with white paint to finish with the painting portion of this project. I wanted to ensure the paint wouldn’t scratch or peel with frequent use so sealed it with polyurethane. Some polyurethane has a yellowish tint to it. Here’s a tip; if you use that on white paint, it will cause the white to go slightly yellow. If that’s alright with you, go for it, but if not go for a clear coating.

Major tips for patterned stenciling; Measure measure measure and a square (the tool, not the shape) will be your BFF.

The End Product:

And that’s a wrap on this Flip Coffee Table Stencil Refinish Project. Only a few supplies and a limited number of steps to a completely new look!

Stencil Coffee Table Refinish Final Product
Stencil Coffee Table Refinish in living room

RSS
Follow by Email
Pinterest
Pinterest
fb-share-icon
Instagram

Are you interested in getting alerts and information on all things coming out of Cathartic Crafting?! Then go ahead and submit your info below:

Verified by MonsterInsights