Have you been hanging on to the affordable furniture you got when you were first married or moved into your first space? Is money still a bit to tight to buy nice stuff? The affordable option is to give that furniture an overhaul. In this post, I’ll show how to revamp a composite bookcase with just a few supplies. My bookcase was one of those items from good old Walmart. I’m sure I’m not the only one to have something like it. After use, these composite furniture items can even be hard to give away since many donation companies won’t take them. That leaves only a few options; the dump, a plea for someone to take it for free or to get into that happy mental space to give it a pleasing boost.
Getting to Work


First step is to give that shiny finish a really rough sanding with some low number grit sandpaper. I give a little more detail about the types of sandpaper in my wood paddle platter post as a reference. If you have an electric sander, you could use it for the outside and shelves. The inside corners will likely need hand sanding. I like the sanding blocks they sell now in stores, but in a pinch, you can use the method my dad always used. Fold the sandpaper sheet around a hand size scrap piece of wood. This makes it easier to hold and to sand.
Supplies
- 1/4″ plywood
- 1×2 boards
- Paint
- Stencil
- Paintbrushes
- Wood filler
- Wood glue
Tools
- Nail gun and compressor (or nails and a hammer)
- Kreg jig & screws
- Wood glue
- Dremel
- Saw
- Scraper
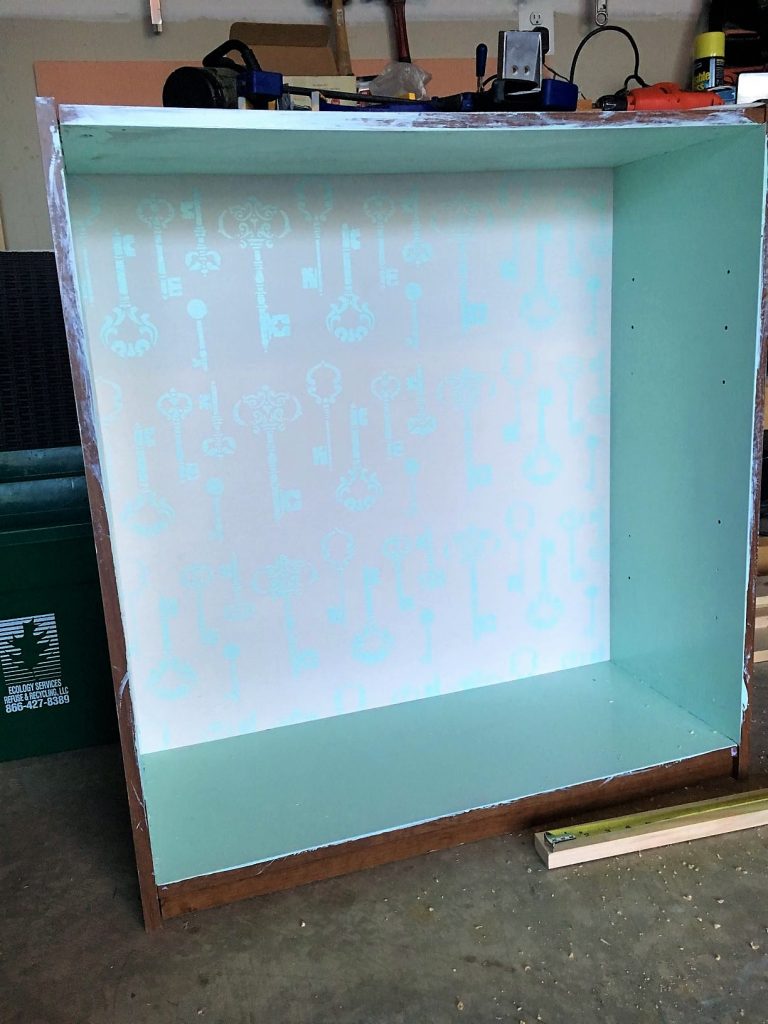
New Back Panel
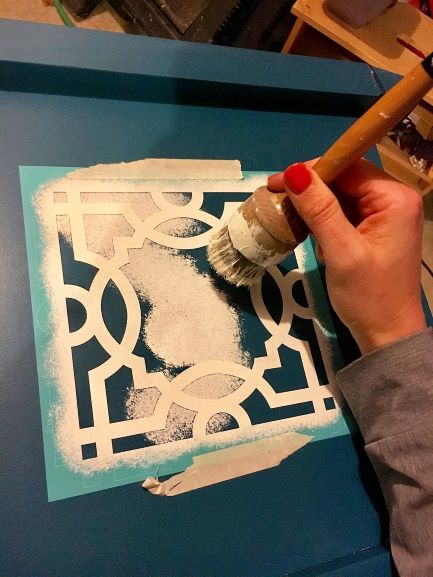
Cardboard backs are pretty much a given with these composite bookcases, so it’s a given that it should be replaced. Cut the 1/4″ plywood to size before starting to paint. Then paint your base color. I wanted to give mine a fun feature, so I went with key stencils in the same color I chose for the outside. I was slightly disappointed about how hard it was to see. If I were to do it again, I would do the stenciling in a slightly darker shade.
Next up is to use the nail gun to attach the plywood to the back of the bookcase. To ensure it stays secure, put wood glue on before nailing the back.


Well on your way now
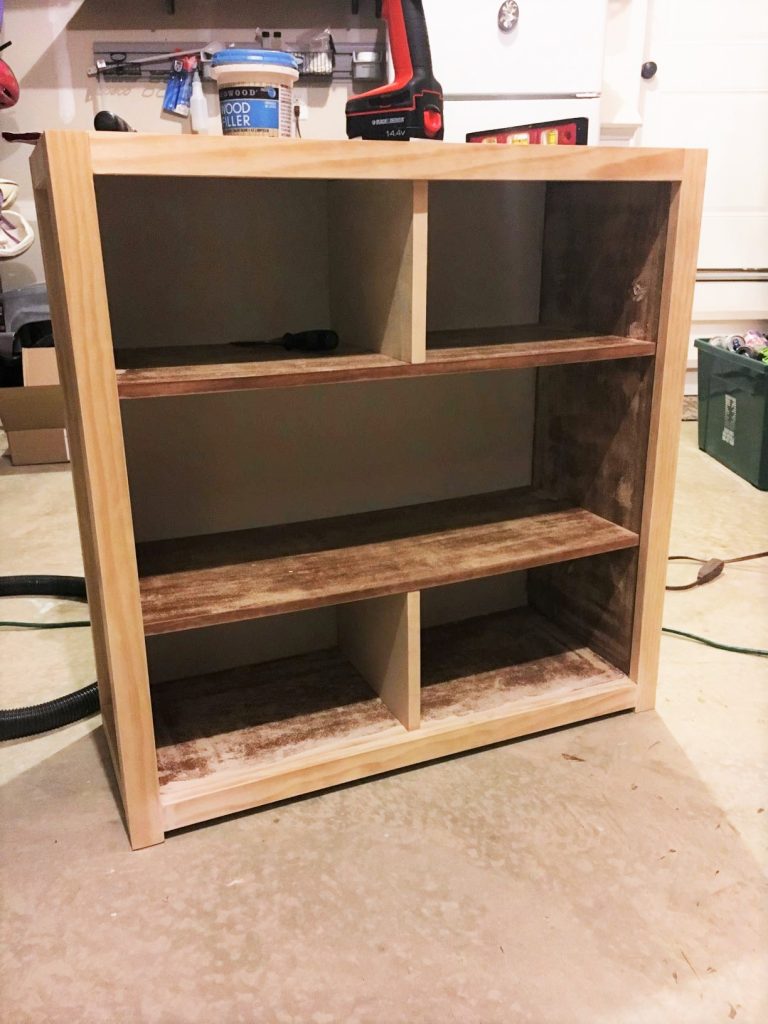
If you look below, you might be confused as to why it’s painted here and not painted later. That is simply because I didn’t start with the sanding part. I sadly admit to you that I take the lazy way out at times and it normally comes back to bite me in the end. You’d think I’d learn better than I do. This ended up meaning that the paint was scratching off when I started to work with it. I also needed to fill the peg holes with wood filler to create a flat surface. You should definitely do both of those things if you will be securing the shelves in place.
The Wood Frame for this Composite Bookcase
The measurements for the cuts of the 1×2’s really depends on the size of the bookcase. My cuts were:
- 2 28″ pieces for the front horizontal bars
- 4 31 3/4″ pieces for the vertical beams
- 4 8 5/8″ pieces for the horizontal beams on the side
Cut them to size and drill holes with a Kreg jig. When connecting them together, you should start with creating the front square and the side rectangles. After those are together, it’s time to connect the sides with the front through the pocket holes.


After the frame is completely built, it can be attached with glue and a nail gun. You should also attach the shelves with glue and a nail gun from the outside. There are a variety of nail guns out there. Mine is on the cheap side so doesn’t have any bells or whistles.
Even though I tried to keep the gun straight as can be, there were a few of the 1.5 inch nails that went askew. It meant they were sticking out of the shelves and needed to be cut. Talk about wanting to pull your hair out, I was completely annoyed. So be warned that it doesn’t always go smoothly. I chose to add vertical boards to support the sagging shelves, but you can leave without them if you like. Mine had experienced years of holding kids books. I used wood glue and nailed the boards from both the top and the bottom.

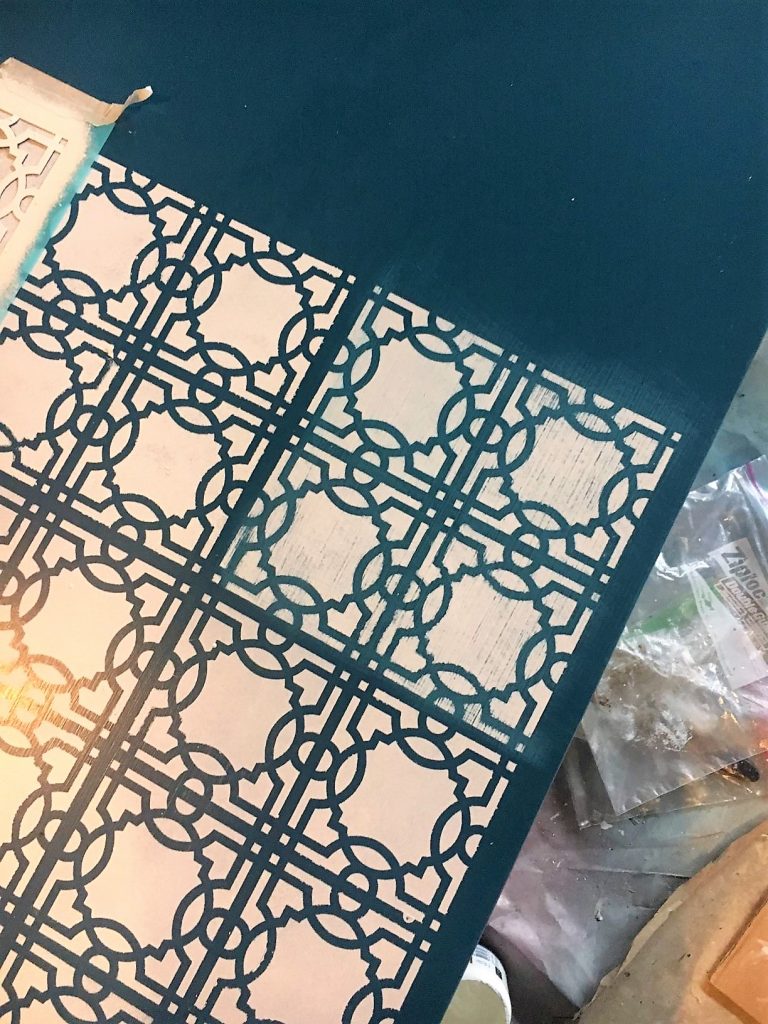
Time to Dremel for a Unique Touch
At the time, I hadn’t had a lot of experience with a dremel. I chose to add this touch to practice the skill. Obviously, you don’t have to go the same route, if you don’t have a dremel. If you are opting in, trace the stencil with pencil onto the wood before starting to cut it out. Take your time, go at it at a bit of an angle and you’ll be fine.


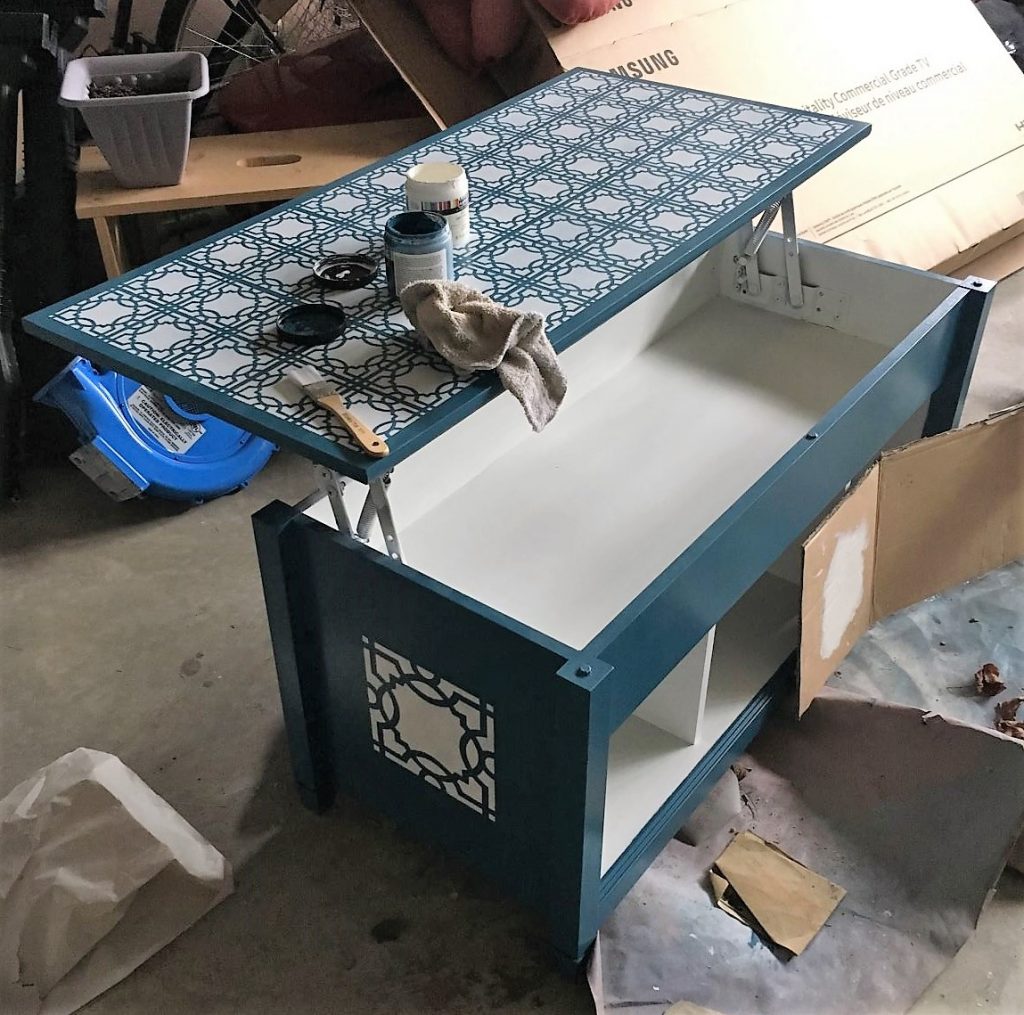
Paint
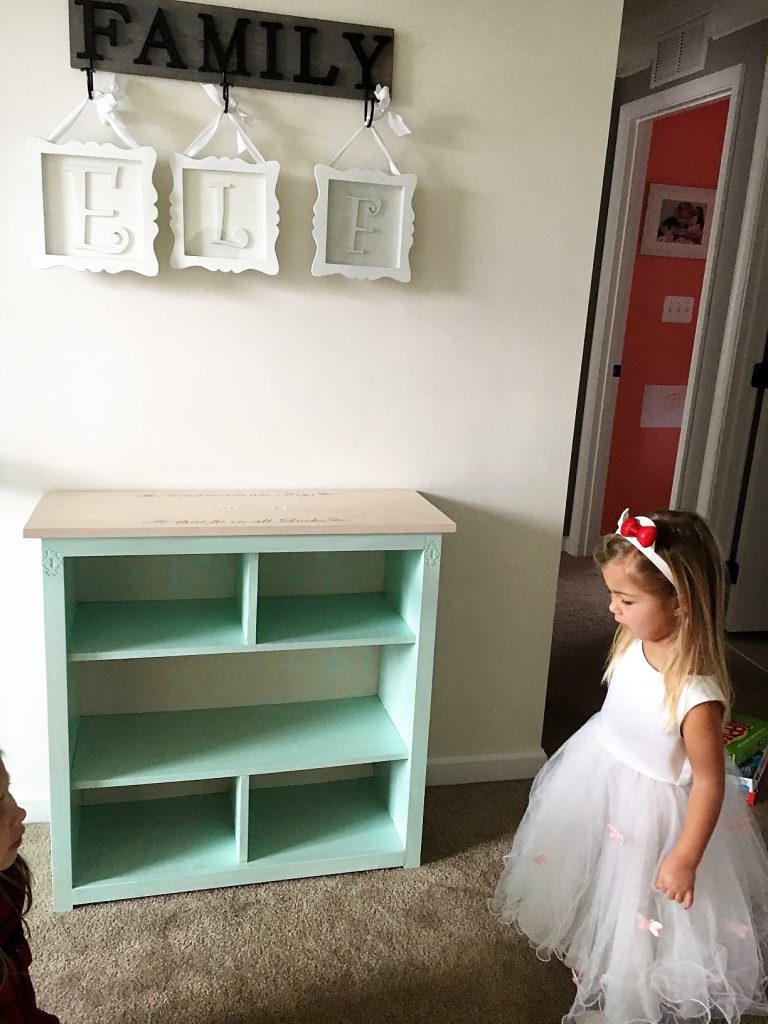
After all the cutting and drilling, it’s time to move into the home stretch with paint. I chose affordable paint from Michaels in Sea Glass. It went on easy and has held up perfectly well over the years.

For the top, cut a piece of wood or plywood that is an inch bigger on the sides and 1/4″ extra on the front than the bookcase measurements. The back of the top is flush (aka even) with the back. I used a white stain applied with a clean white rag on my piece to match more with my paint. If you don’t have much experience with stain, don’t worry. The important thing to remember is to go with the grain of the wood and not to allow large pools of stain to sit on the surface. Doing so will leave you with a spotty uneven look that can only be corrected with significant sanding. You can end it there with the stain or keep going as I did.
DIY Rub-On Words
I came across this awesome tutorial on Pinterest on how to transfer images using wax paper and was pumped to try it with this project. If you are looking for a way to accomplish the task with materials you have at home, this is it. The hardest part is getting the printer to feed the wax paper without crumpling it. It was another one of those screaming in frustrating experiences. I found the best method was to tape the wax paper to a piece of computer paper to ensure 100% success every time. I also had to learn how to get the words to be reversed for printing. This can be accomplished with 3-D Rotation of a text box in Microsoft Word.
Reference below:


“Kind words are keys that fit in all locks.”


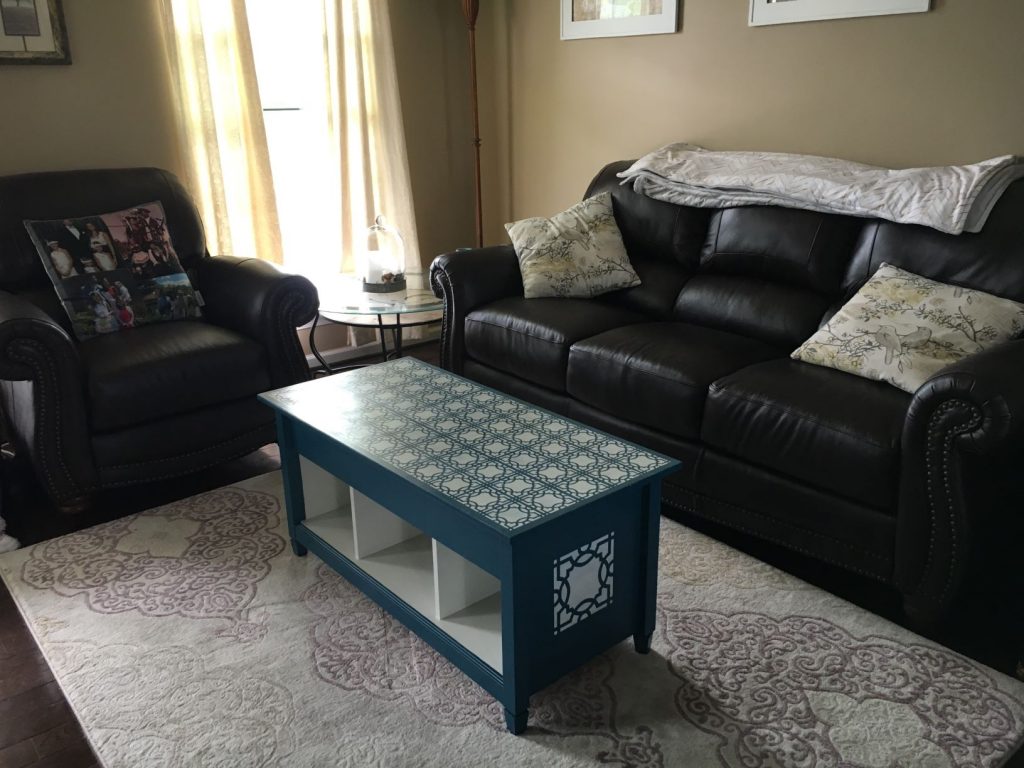
Revamped Composite Bookcase
The Final Look


It’s a bit hard to see here, but I added a white key and 2 lock stencils to the outside panels as well.

Filled with Family:
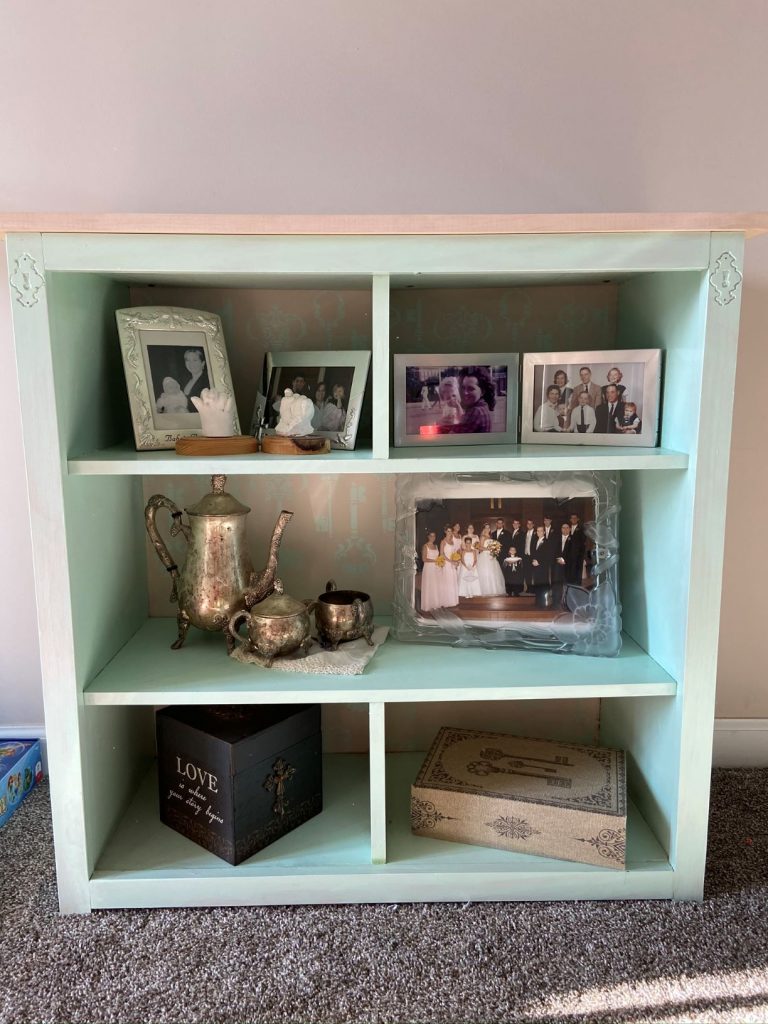
That’s it! Not a terribly difficult project to take that humdrum composite bookcase to a new posh look. I hope you are happy with how yours turns out!