Tag: Scrapbooking paper

Fantastically Colorful DIY Rainbow Shelves

Rainbow Shelves

Dare to love yourself as if you were a rainbow with gold at both ends.
― Aberjhani, Journey through the Power of the Rainbow

In 2015, we moved our family of five from a three-bedroom house to a five-bedroom house with loads of extra space. It was glorious for all of us, especially for the 7 and 4-year-old sisters who were previously sharing a room. The oldest liked sleeping with the door open, with music and lights on while the younger one preferred sleeping with the door closed in the quiet and with the lights off. Besides being able to control their own space, they also got to choose their room themes. The then 4-year-old unwaveringly went for

R A I N B O W

as her theme of choice. Curtains and sheets were easy to find. Shelves, on the other hand, weren’t something I could find in any nearby stores. The obvious choice was a mommy/daughter project to craft our own.

Supplies: 

  • Wood Cubes
  • Small Wood Screws
  • Wood Glue
  • Paint
  • Scrapbook Paper
  • Mod Podge
  • Paint Brush

I came across a nine square set of nesting cubes and decided to make them into a fun shelving unit for my rainbow lover’s room.

Each cube had a bracket to hang each individually. I thought it’d be easier to have them connected to each other. This would mean I’d have fewer nail holes in the wall. I used tiny wood screws to secure the cubes to each other in the fashioning of our design. Something to keep in mind when screwing into any wood is the likelihood of splintering or cracking when drilling the screw without predrilled holes. If there’s a chance it’ll crack or you’re unsure, it’s best to drill a hole prior to screwing in the screw. Be sure to use a drill bit no bigger than the width of the screw core to prevent the hole from being bigger than the screw.

After the cubes were secured to each other, my middle child and I started with the painting. Her motto is ‘you can never have too much rainbow in your life’. I love when I can infuse mommy-daughter time with crafting (so long as it’s more fun than frustrating). Generally, it’s a double bonus for me to have girls who enjoy doing some of the same things as me. As an adult, I have come to realize as a child I learned so much by simply watching and helping. I hope my girls learn as much from me on how to be handy and self-sufficient as I learned from my parents.

A fun Rainbow Pop with Patterns

We could have kept it simple by painting all the surfaces, but I thought it’d be fun to give it a pop of pattern to the cubes, in addition to the pops of color. It was more likely to see the ceiling of each cube when hung on the wall. This pushed my decision to use scrapbook paper to spruce up the ceiling of each cube. (Scrapbook paper really has so many uses.)

I cut colored and patterned paper to the size of the corresponding cube. Using my favorite Mod Podge, I glued them to the wood surface. I’m sure you can read the Mod podge instructions for yourself, but I’ll explain it here for you as well. Use a paintbrush to paint it onto the surface first. Then paint the back of the paper and smooth the paper onto the surface to remove any bubbles. This isn’t necessarily as easy as it sounds. Those pesky bubbles and wrinkles can be a pain to get smoothed out. Finish it up by painting the final top coating to protect the surface.

I have had the same bottle of mod podge for years. It’s lasted me through many projects. Check out some other projects you can use with mod podge.

Once the paint and glue were dry, hanging and filling the shelves were the only tasks left. My little Lily was excited to get her things in there.

Rainbow Shelf #2

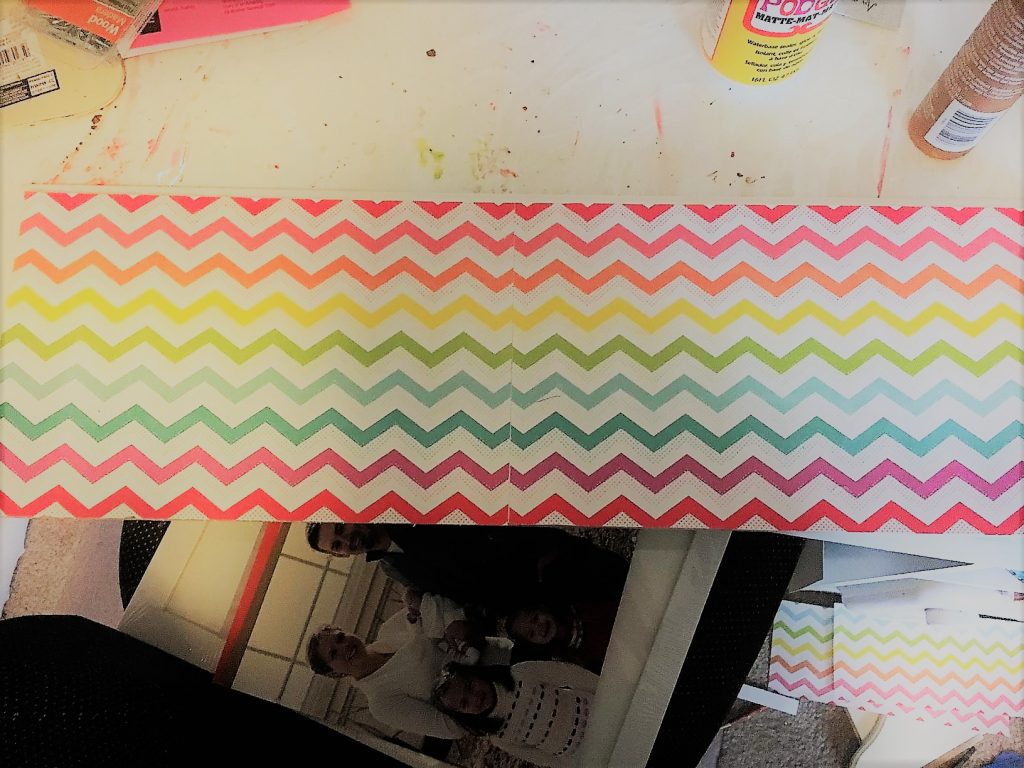
We already had a shelf on hand for the next rainbow incorporation. I decided to do a fun bottom since that would be the only part to really show. I used scrapbook paper and Mod Podge again to adhere the paper to the surface. While cutting the paper to size to fill the length, the chevron pattern matched perfectly. In looking at the photo below, I obviously failed to put the two pieces in the right spots. It’s very likely I was slightly distracted by my chattering girls. It doesn’t take long for Mod Podge to work, so I was stuck (literally) with my mess up. My OCD self still gets annoyed with this mistake, but luckily my middle child was okay with it.

Rainbow scrapbook paper
Rainbow scrapbook paper shelf

Simple and easy is the best way to be when the task list is long. One project down in a night’s time and a daughter over the moon with her finished rainbow project.

Try to be a rainbow in someone’s cloud.
― Maya Angelou

More Fun with Upcycled Frames

As I was rooting through some of the remaining boxes of stuff from our old house, I came across a few items that inspired me to do a little upcycling/crafting. I found childhood frames in need of a facelift to get with the times and my current decor. It was a very simple project aside from deciding what I was going to do and it’s definitely a project anyone could handle. I hope my makeovers inspire you to have a little fun with some of your own frames and you can decide on a direction to take! From drab to fab frames in no time flat try your hand at some upcycled frames.

My Upcycled Frames supplies included:

  • Craft Paint and/or Spray paint
  • Paintbrushes (a wider one for the frame and a thin one for details)
  • Sandpaper (depending on the look you are going for)
  • Scrapbook paper
  • Glue or double-sided tape
  • Razor or scissors or paper cutter
  • That’s it!
Upcycled frame 1 before
The Before: classic 80’s/90’s gold opening border mat and a stained oak frame.

To keep the glass clean of paint, you should definitely start off by taking the glass out and painting everything separately. I painted the frame with inexpensive craft paint from Michaels. There’s a Michaels 1.3 miles away from me, so I tend to get everything I need there.

upcycled frames painted

I painted a full coat, so I couldn’t see any of the wood underneath. Then since I was going for a shabby chic look, I took a piece of sandpaper and lightly rubbed randomly around some edges.

upcycled frames painted mat

I took the mat out to paint it with cheap chalkboard paint from Michaels. It didn’t seem necessary to better paint since it wasn’t going to be used for writing. I used wax paper to paint on to save my kitchen counters.

Accents make the mat

black and white upcycled frames mat

After the paint dried, I used a thin brush to paint some white accents around the photo openings. Feel free to let your creativity come out here! When everything was dry, I put it all back together so it was ready for some pictures of loved ones. It doesn’t get much easier than that.

A close up of some of the sanded parts.

A refinished frame in half an hour (or so)

Frame 2

Before

For my second frame, I took the same concept with the frame. I painted it with a coat of paint and sanded it in a few areas. Instead of painting the mat, I tore vintage 12 x 12 scrapbook paper into pieces and glued the pieces onto the mat. I didn’t worry about cutting the paper around the ovals while gluing. After the glue was dry, I flipped it over so the back was face up. I used a razor to cut the paper overhang around the oval and voila, another finished frame refresh.

After (aka Drab to Fab Frame )

The last frame I redid was a metal gold frame. I took the glass out of each frame and sprayed a few layers of rose spray paint. For those who haven’t had much experience with a spray can, it’s best to do multiple thin layers rather than soaking it with a thick layer that is likely to drip.

Frame 3

upcycled frames spray paint

I had printed 4×6 photos which ended up being too small for the openings. Probably a good idea to measure before you print, but as it turns out, I liked the end look better than if the picture filled the frame. I decided to make due by taping the photos to white cardstock paper and adding a border from scrapbook paper.

I used my paper cutter to ensure I cut straight lines. There’s a range of paper cutters you can get. Mine, in particular, was pretty inexpensive and is two-sided for different types of blades. If you should not happen to have a paper cutter, a ruler to draw a straight line and scissors will do just fine.

upcycled frames mat
I used the sliding blade to cut the scrapbook paper for the border.

I used double-sided tape to adhere the photo and paper to the white back paper.

upcycled frames supplies
The double-sided tape dispenser is shown here. I, unfortunately, found it difficult to use.

I happened upon some paper flowers at, you guessed it, Michaels, that felt like the perfect touch to add to this frameset.

Drab to fab Upcycled frames

3 slot UPcycled frames
Final Product with my three girls to showcase it! I did a quick photoshoot in my bedroom with the girls to get this together.

That’s a wrap on these quick and easy revamps to take them from drab to fab frames. If you are anything like me, you likely already have all the materials. While you’re watching your favorite show tonight, go ahead and let your creativity out.

And if you’re looking for more ideas on how to use those frames, check out Framed Earring Holder

RSS
Follow by Email
Pinterest
Pinterest
fb-share-icon
Instagram

Are you interested in getting alerts and information on all things coming out of Cathartic Crafting?! Then go ahead and submit your info below:

Verified by MonsterInsights