
I referenced my grandparents in my paddle platter post and plan to include them a bit here as well. Within their property, are several treasure trove sheds I thoroughly enjoy rooting through when I visit. During this particular visit, I found an antique trunk my grandmother said was hers from her younger years. I was ecstatic when she granted me the honor of giving it new life. I had actually been on the lookout for a trunk to use as the coffee table in our living room, so it felt quite serendipitous to come across it.


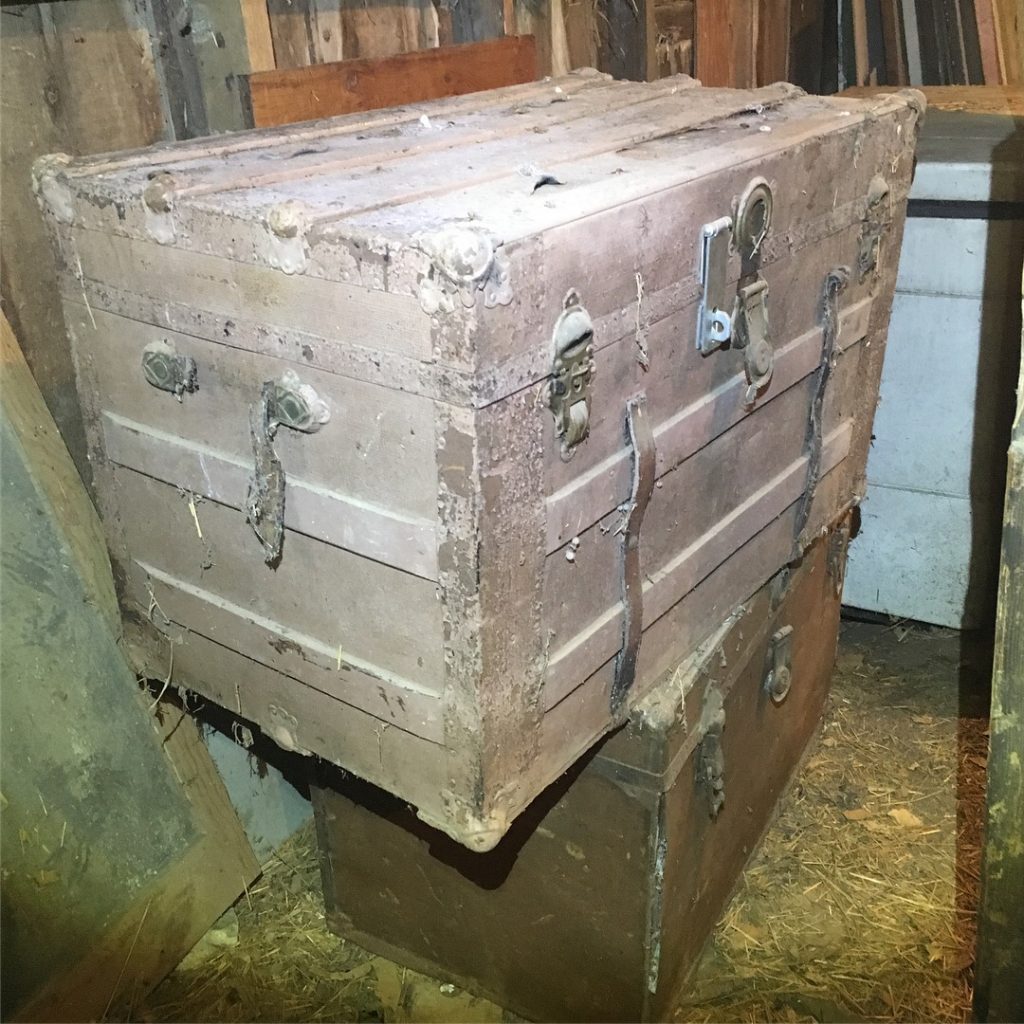
The Before of the Antique Trunk


The inside was covered in old paper and desperately needed to be removed.

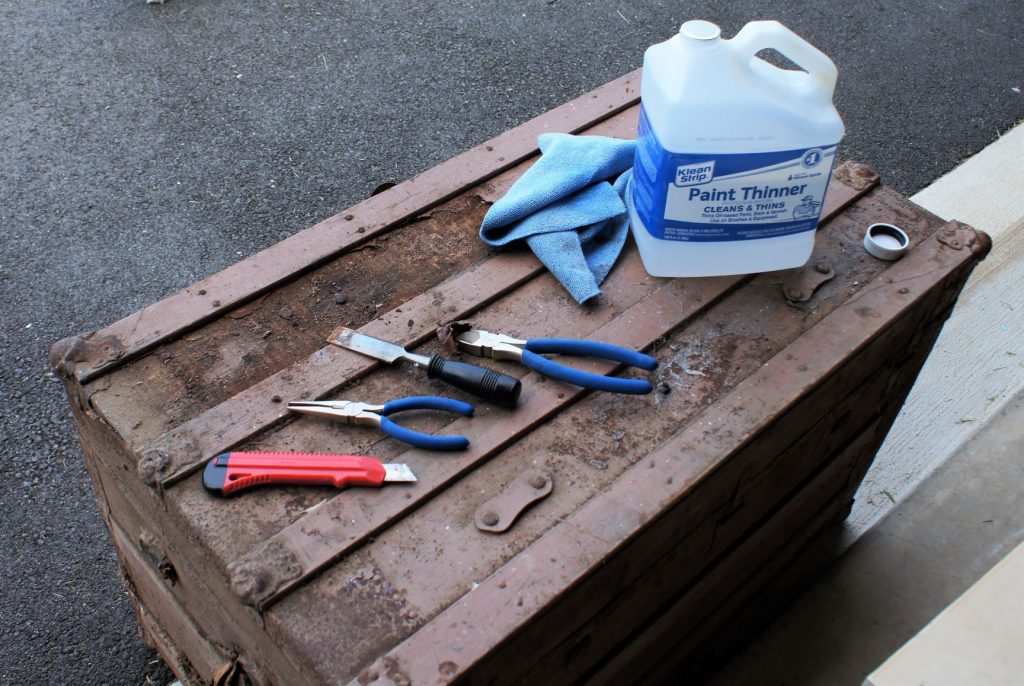
Tools to Refinish the Antique Trunk
I went at the project with just a few tools to start cutting away the jagged metal coating on the top and scraping the paint away. These included:
- Needle nose pliers
- Metal cutters
- Razor
- Scraping tools
- Paint Thinner to clean it up
The Outside
With tools in hand, it was then time for an intense arm workout.


To start: chipping paint and rusty metal. The scraper and elbow grease got the paint and rust off while the paint thinner was pretty effective at cleaning it up. If you’re not looking to scrap your life away, there are definitely products out there that will make this process of paint removal easier. I typically tend to stick with the least inexpensive route.


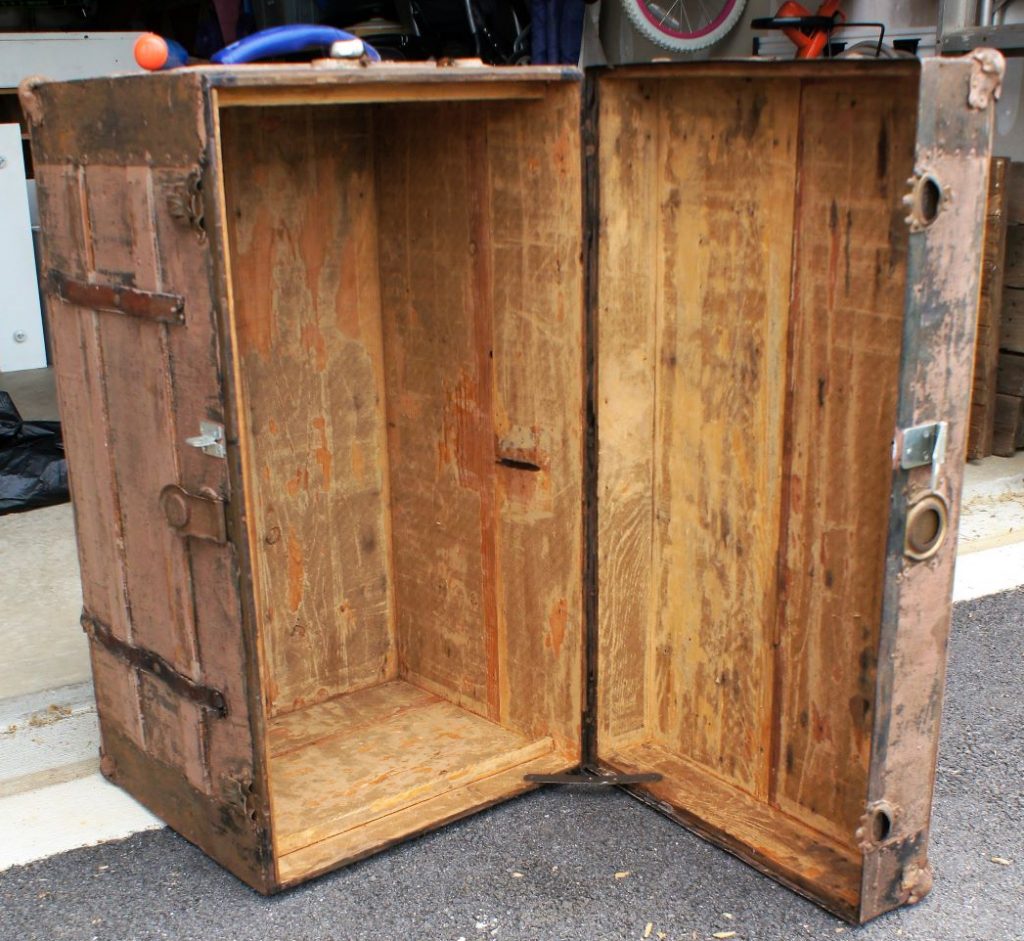
I ended up cutting away the entire metal panel to expose the wood underneath as seen in the right photo. I scored the edges with the razor to make it easier to pull up with the pliers and metal cutters. If I were to have gone 100% at it, I would have had to get some new aluminum to replace the metal I had cut away. Given that the metal was textured, it didn’t feel worth the effort to go the extra mile.

With every flip of the trunk, there was more and more scraping to do. It felt like it would never end. If I were to do this again, I would choose to go at it with a wire wheel rotating brush to save the soreness in my arms. 

Additional materials
- Valspar paint in two brown shades
- Gold Paint
- Painter’s tape
- Mod Podge
- Multiple Paintbrushes
- Fabric
- Fabric Scissors

I used two shades of Valspar paint from Lowes to paint the trunk. The lighter brown went on the majority of the metal covering.

I used blue painters tape to cover the freshly painted light brown to be able to paint the wood strips and corners with the dark brown. This color pallet matched with the leather couches in our living room.
Inside the Antique Trunk
The next step was to clean out the inside paper. I used the technique described by Antique Chests and Trunks instructing to spray the insides with 1 part vinegar and 3 parts water solution and soaking for 15 minutes. I ended up spraying and soaking it twice with the vinegar/water solution to get the majority of the paper and glue off. It definitely helped with the musty odor. Then I had to start with the scraping again. “When is this going to end?!” was what kept running through my head. Being sick of it doesn’t begin to describe how I felt by the end. I dreaded the continuation of the project.

Joann Fabrics happened have the perfect material on clearance, which always feels like a huge win. I love finding a deal when I need something (another generational aspect). After I cut the material to size, I used a wide paintbrush to brush Mod podge on the inside of the trunk to get the material to adhere to the wood.
Another Completed Refinished
I finished the outside by painting all the gold ascents to include all the many grommets. Tedious doesn’t begin to describe doing that, but I felt it needed the distinction. You can determine what you prefer if doing your own.
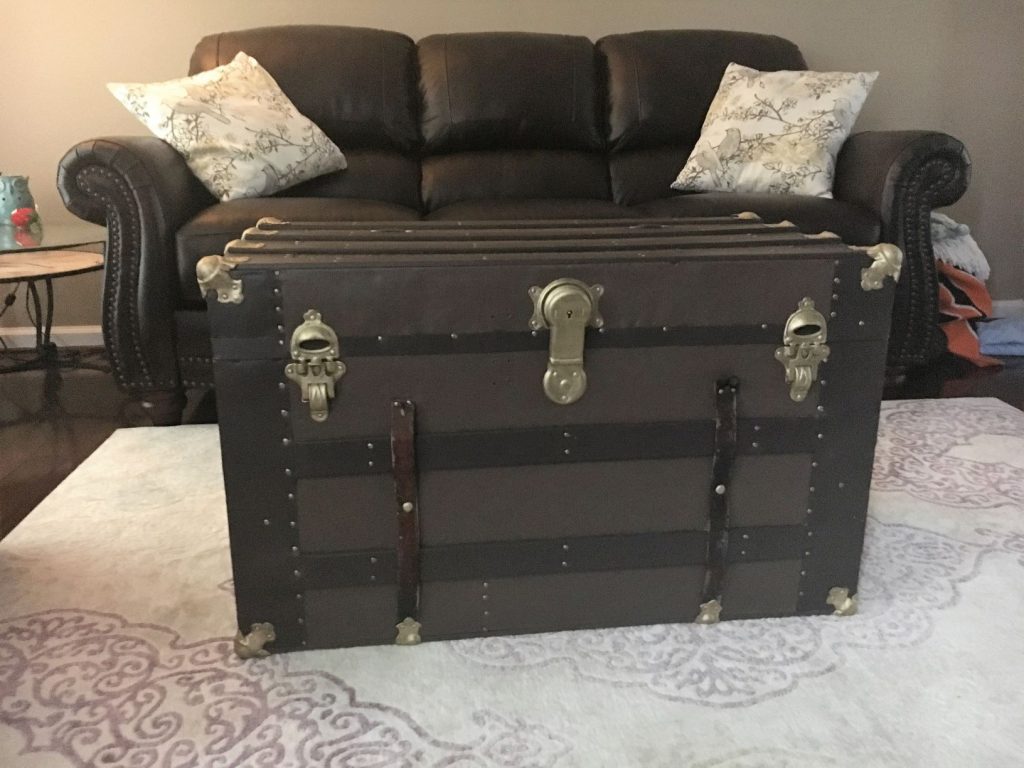
With all the scraping, painting and gluing complete, the antique trunk refinish was finished. It now stores a ton of family games that used to be in the unfinished side of our basement.


I had initially decided it would be a coffee table but ended up preferring it as the side table. If I were to go the extra mile with it, I would buy new leather to replace the missing straps. I didn’t (and still don’t) feel pressed to do that. As you see it here is as it remains.
Antique Trunk Before and After
My husband liked the final look, which is always the true test. I hoped you enjoyed the tutorial! If you’re looking for other refinishing ideas, check out my refinishing page.

