Tag: Family

Little Mermaid Birthday Party for your Ocean Loving Princess

Princesses, princesses, princesses. All three of my daughters were entirely enthralled with them around the ages of 3-6. When we started talking about themes for her 5th birthday, a Little Mermaid themed party was a logical choice. I love a good theme and coordinating party activities. I was excited to take on this party planning. Coming from a child development background, I know there’s a fine balance of free play and structured activity time at a party for young children. Even knowing that, I still struggle to tone done my creative energies. Based on the sentiments spoken in the end, I struck the appropriate balance for those 5-year-olds. 

Snacks and Decor made Sea Simple

Easy table decor in the way of shells and Little Mermaid doll
Veggie corral: a big pile of veggie dip and an arrangement of veggies
A Boat server (a Homegoods clearance find)

Cake

Our typical cake planning method has been me asking the birthday girl what she wants her cake to look like. Sometimes, she plans it all herself, but other times, we peruse Pinterest for ideas. This Little Mermaid cake was my replicated Pinterest selection with the birthday girl’s desired cake and icing flavors. 

I was finishing this cake just before the party started. It’s never how I intend for things to go, but I seem to have a tendency to let my procrastinator habits get to me during the workweek. When making these special cakes, I try to make the layers 3 days ahead. My hope is to give myself a day or two to create the decorations. I, unfortunately, end up staying up late the night before to get the bulk of them finished. Then it turns out the kids only eat the icing and a few bites of the cake, and a little piece of me dies inside.

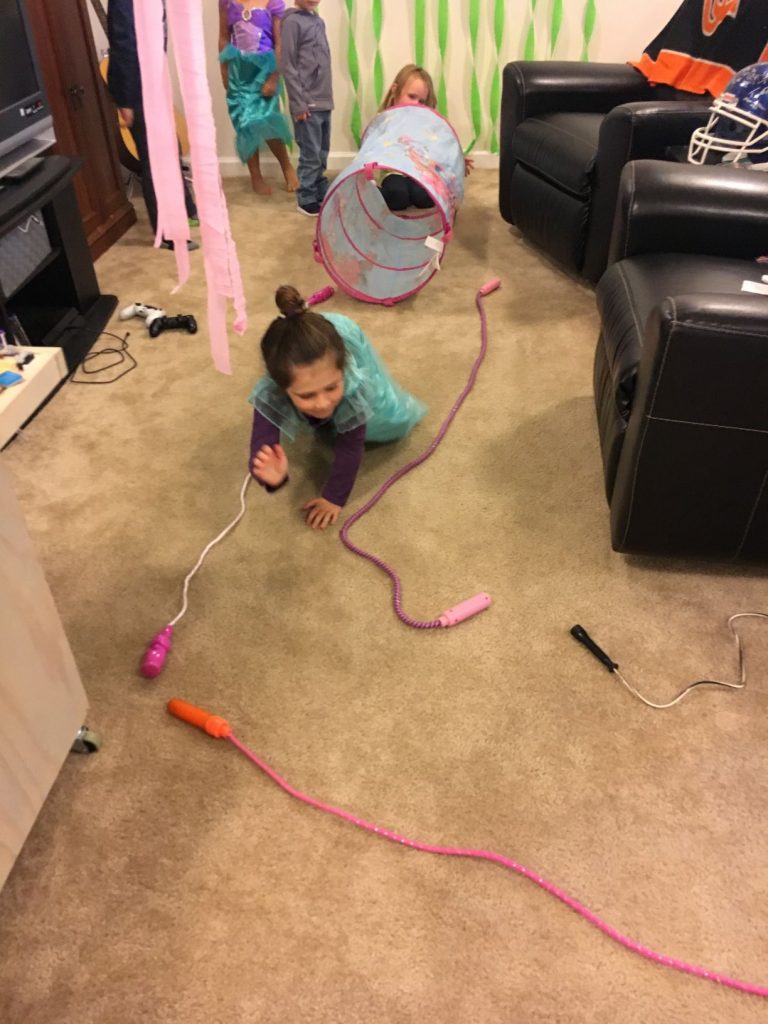
Ocean Obstacle Course

Crafting

The crafting for this party was minimal and made for a more relaxed party prepping experience. Streamers, a cut-up blue table cloth to serve as the water entryway to the ocean, a punch-out board and homemade jellyfish. For the jellyfish, you can make your own using paper lanterns and streamers or there’s a premade version available.

Option 1: Cut a paper lantern in half and glue streamers to the the inside of it. This is obviously the cheaper method.

Option 2: Buy them! These are super cute, but not sure I’d want to pay $50+ for as many I had.

Punch Board

This took a bit of time. You have to cut the circles out of the poster board before gluing the tissue paper to the board. After it dries, glue folded paper bags to the board with something inside. For this obstacle course, the goal was to get to Ariel’s Grotto and find the shell containing Ariel’s voice. 

Green streamers served as the seaweed. The jellyfish were hung with fishing wire at different heights. After that, I just used whatever I had available to make a fun 5-year-old course.

I had them crawl through the tunnel and stay within the jump rope lines. Masking tape would have made for a better path. While traversing the path to cave, they had to avoid touching the jellyfish tentacles.
Then the kids took turns to find the sea shell.

And that’s all it took for those 5-year-olds to have a mermaid fun time. If you’re looking for some other ideas, you could try a Pirate Party or a Detective Party.

Family Command Center to take that Mess to Mastered Organization

Family Organization Command Center
Before and Afters

After we moved into our new house, we had space galore compared to our previous three-bedroom house. The extra space didn’t end up preventing the eventual clutter that was school papers, bills, receipts, carryout menus, etc. It eventually hit a point where I had to do something to get the stuff off our island and into an organized fashion. Family organization was a must. The small wall space by our back door was the only spot that seemed to work for it, so it became the focal point for this endeavor to organize a family command center.

The majority of this project involved finding the items I wanted. I found the hanging metal paper sorter at Ikea and cut pieces of paper to fit the space on the outside. Each section was labeled with a piece of scrapbook paper cut to size to ensure it would remain routinely organized. The weekday chalkboard shelf came from a random find at the store Tuesday Morning. Check out whether you’ve got one near you. It’s a good spot to find unique items at good prices, so I was bummed when the store nearest to me closed. This shelf wouldn’t be too hard to make if you can’t find anything to fit your fancy. Actually, writing that makes me want to make one myself! The whiteboard was from Target, but you can find them anywhere. I liked this one for the pen holders and the cork strips.

Finished Family Organization Command Center
The girls had a place to hang their backpacks, see the dinner menu and store their papers.

A Mom Must Have

With the numerous activities on our schedule between the five of us and the dog’s training and vet appointments, I have found this calendar serves us the best. Family schedule organization at its finest. It’s got a row for each of us to distinguish between activities. I also keep a color-coded Google calendar to alert me, which has saved me a few times. We’ve used like versions of this paper calendar for the last couple of years. It was actually very difficult to find this year. Last year, I got one at Books a Million. They didn’t have them this year. After searching many places, I finally found one at Big Lots. So if you’re looking for one for yourself, I’d recommend checking there first.

Phase 2 of Family Organization


We got a Greater Swiss Mountain puppy this past year, which ended up meaning our shoes were no longer safe. I decided to use some extra wood sitting in the garage to create a shoebox to keep them safe by the back door.

Our puppy Skye, particularly enjoyed our flip flops.

My Materials

  • 3/4″ plywood
  • 1/4″ plywood
  • 2 hinges
  • Spray paint
  • Stain
  • Drawer knob
  • Painter’s Tape
  • Screws

Tools

  • Painter’s Tape
  • Nail gun and nails
  • Kreg jigs
  • Circular saw
  • Drill
  • Saw horses
I decided to use this Rustoleum spray paint I had from an ombre project I completed for my niece. The pop of color was a nice surprise on the inside.
I used some inch long wood screws to attach the bottom to the sides. Since it was just a simple project to keep our shoes safe, I didn’t worry too much about having 1/4″ board on the bottom being attached with glue and screws.

I put on two hinges I had handy. It seemed better that we’d have to pull up on the door to open it and make it puppy proof. I drilled an easy hole in the middle of the front panel and screwed in a knob to finish it off.

Safe and sound

The finished product for family shoe organization and safe keeping!

RSS
Follow by Email
Pinterest
Pinterest
fb-share-icon
Instagram

Are you interested in getting alerts and information on all things coming out of Cathartic Crafting?! Then go ahead and submit your info below:

Verified by MonsterInsights