Tag: Dremel

Use that Hidden Wall Space for a Recessed Bookcase

During our many visits to the build of our new (and now previous) house, I took notice of the framing of an odd space. It seemed like an odd notch to leave, so I assumed it was intended to house ductwork or something of that nature. I kept it in the back of my mind for a future possible recessed bookcase project. As my oldest book-loving daughter crept into her teenage years, she was ready for a change in bedroom scenery. When I mentioned my idea, she wouldn’t stop asking when I was going to complete it. I was finally able to put it on the to do list to complete it over a weekend while my husband was away. That’s incidentally one of my favorite times to get things done because messes stress him out.  This project definitely generated some dust and mess.  

Before Book Shelf

The then existing bookshelf came from my sister when she moved across the country. It certainly served its purpose but wasn’t the nicest piece of furniture.

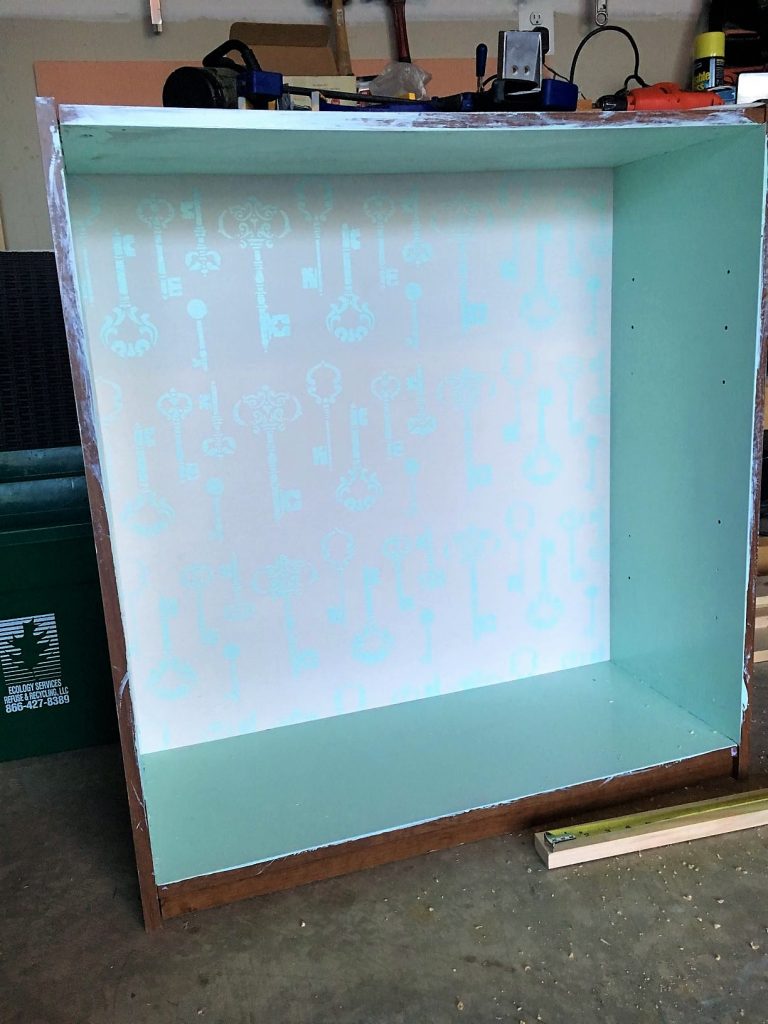
Blank Canvas for a Recessed Bookcase

I started off by drilling a hole at the bottom of the wall to check the depth of the space. It would have been terrible to start going crazy cutting away the drywall to find I wasn’t actually able to use it. The depth was about a foot, so I was safe.

My dad showed up to lend me some tools to make this job a little easier. One of those tools was a drywall saw. Using a square and tape measure, I penciled the line for sawing. It was essentially the edge of the wall’s 2 x 4’s. The top edge aligned with the door frame. My dad is not great at sitting idle, so he helped with sawing the drywall. I’ll rarely complain about free help. 

And of course, the kid crew sat and watched us work. The oldest monitored the progress to gauge how long until she’d get to load the shelves. 

Look at all that dead space behind the wall! I could have gone with a pull out bookcase with a hidden nook. 

 Can’t forget about the drywall behind the trim! I admittedly did at first but quickly realized it when fitting the shelf frame into the space. Certainly, the other option would be to cut out the trim as well, but I didn’t want to have to mess with cutting and all that extra stuff. 

Recessed Bookcase Shelf Build

Tools & Supplies

  • 3/4″ Plywood
  • 1/4″ Plywood
  • Wood Trim
  • Wood Glue
  • Screws
  • Square
  • Tape Measure
  • Nail Gun
  • Level
  • Clamps
  • Sand paper
  • Stain or Paint

Thankfully, this project didn’t stress the wallet (since it was pre-COVID wood price spike). The side pieces were cut to the height of the opening from floor to top. Then it was just a matter of cutting the top and shelves all the same size to fit in between the side panels.

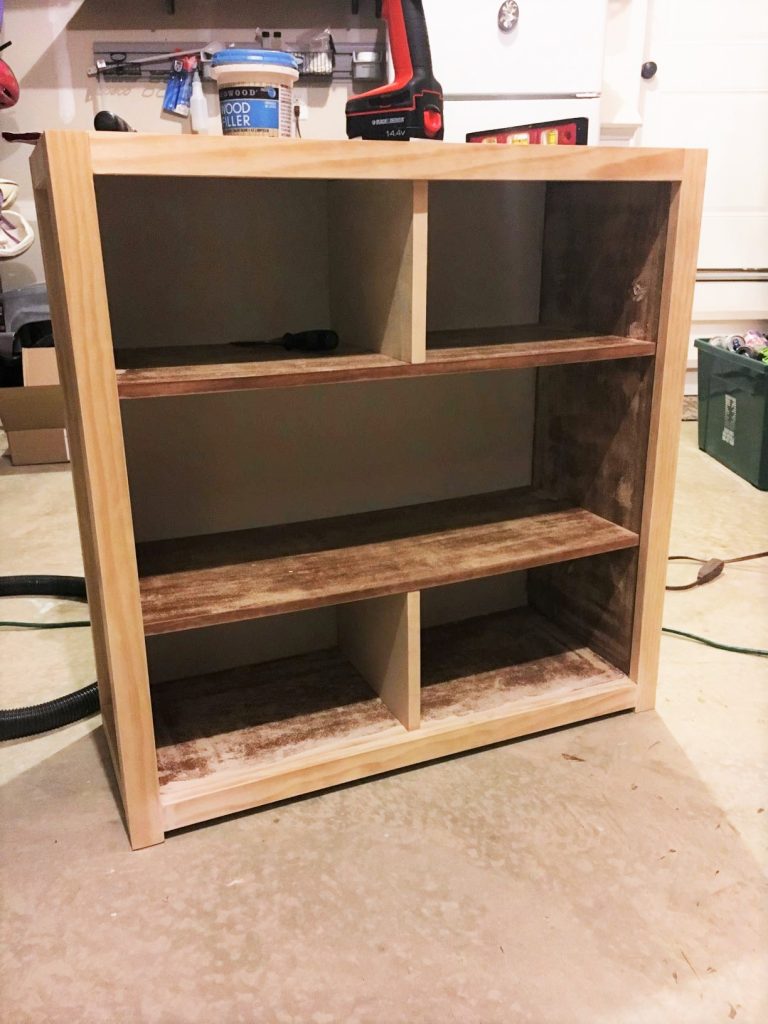
As to be expected with any build, the level and square were necessary to ensure all the shelves would be level to the floor. The bottom shelf aligned with the height of the trim, so the trim would serve as the front space coverup. I stained all of my pieces with a white stain before putting them all together. With some glue and screws drilled into the shelf from the outside, the bookshelf was almost to the finish line. 

The 1/4″ board was cut to the full width of the shelf and nailed down with the nail gun. Let me tell you what; a decent nail gun makes a ton of difference when compared with a cheapy. It’s on my list of tools to geta better version. There are two types, a brad nailer and a finish nailer. A brad nailer would be best for the structural builds, while the finish nailer is best for baseboards or trim. The higher priced versions are both are likely to be battery operated as opposed to the less expensive, which require an air compressor. Just depends on what level of mobility is desired. 

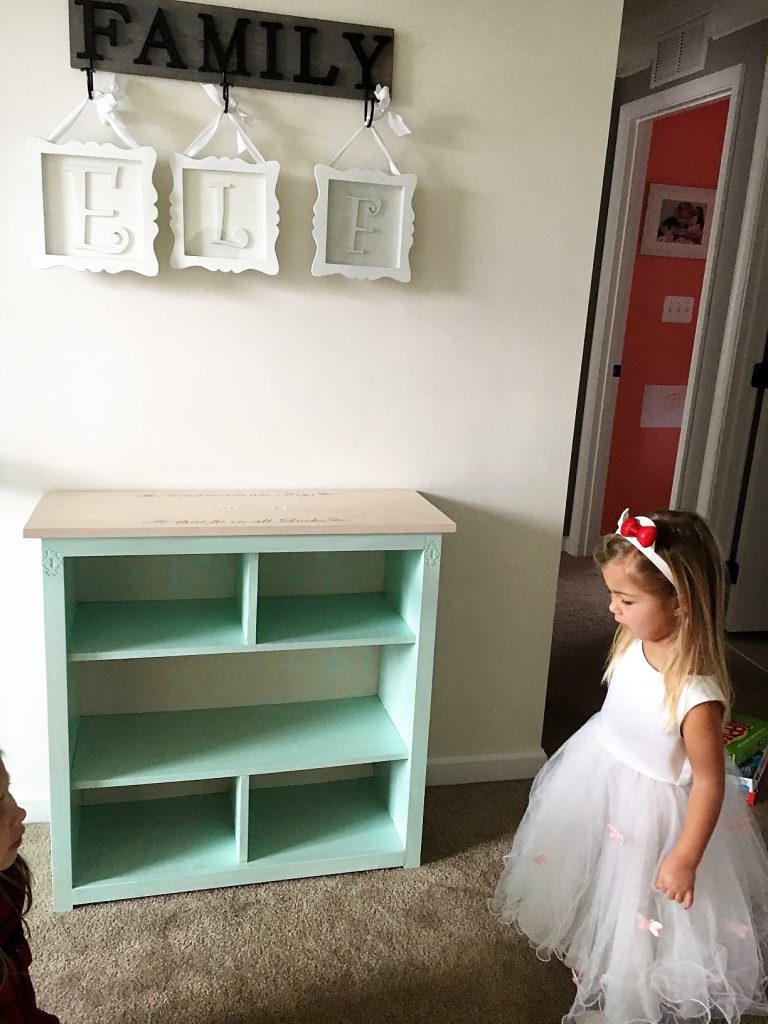
Final Finishings of the Recessed Bookcase

With the constructed bookshelf in place, it was just a matter of affixing the sides to the existing studs with wood screws. I chose to cover the screw heads with wood filler that I then stained white to keep them from sight. 

Some inexpensive trim was last up. I cut the trim ends at the top at 45-degree angles with the miter saw to create the 90-degree angle. I used the finish nailer to secure it to the stud and bookcase edges. A bit of spackle and white paint was all that remained on the project to-do list.

Later, when I wasn’t as happy with the floor ends of the trim being uneven with the floor trim, I decided to fill the space with wood filler. I used the dremel to sand it to a similar shape that melded with the floor. I was glad to have another project on which to practice my dremel skills. It definitely wasn’t excellent, but it did the job well enough.  I also covered the screw holes with wood filler as well. After a coating of stain on the screws and paint on the trim, it was good to go. 

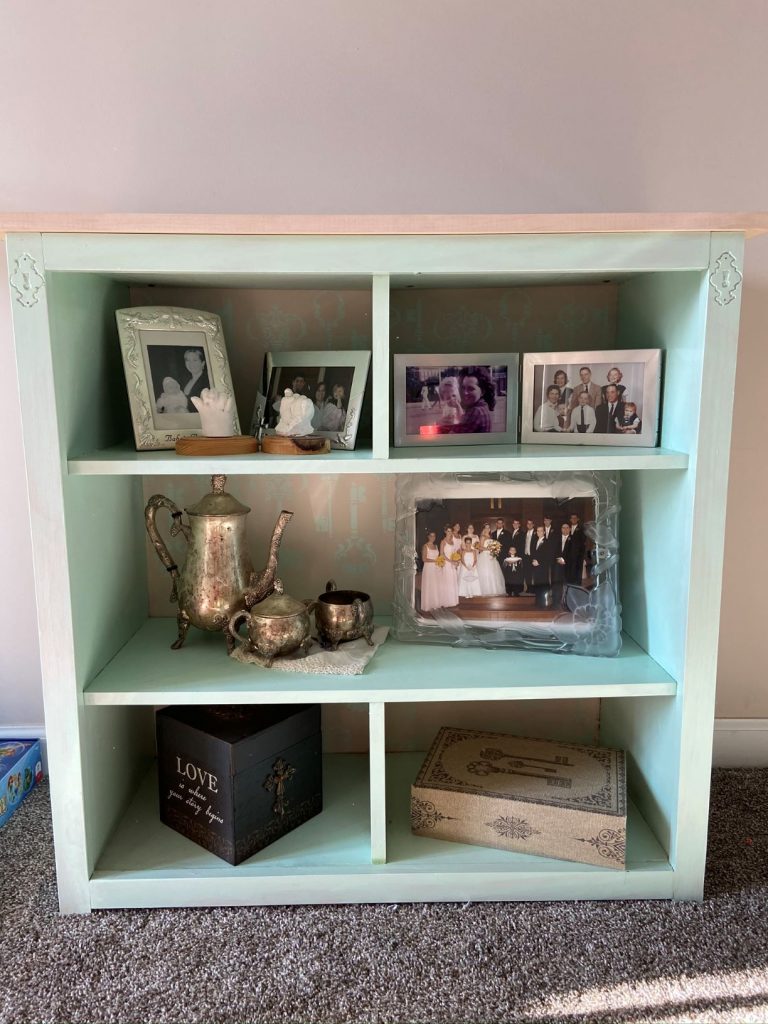
After years of contemplation, it was super exciting to have finally pulled the trigger on the project. The outcome was visually more appealing than the previous bookshelf, a space saver, and my daughter absolutely loved it. Sometimes, I kick myself for waiting too long to try something new that is somewhat scary. I know the project may not always come out the best, but the win is in the free-fall plunge. Check out the rest of the room makeover here and revamp of the old bookcase into a Bakery and Lemonade Stand my 11-year-old used to make money for donation.

Go Ahead and Try Something New Today!

Studies suggest we fear an unknown outcome more than we do a known bad one.

Trying New Things. Why new experiences are so important to have

Benefits of trying something new:

  • Trying something new often requires courage
  • Trying something new opens up the possibility for you to enjoy something new.
  • Trying something new keeps you from becoming bored
  • Trying something new forces you to grow

*This page contains affiliate links. This means if you use one of my links to make a purchase, I will receive a small commission at no additional cost to you. Thank you for supporting Cathartic Crafting!

Composite Bookcase Revamp into Unique Upscale Decor

Have you been hanging on to the affordable furniture you got when you were first married or moved into your first space? Is money still a bit to tight to buy nice stuff? The affordable option is to give that furniture an overhaul. In this post, I’ll show how to revamp a composite bookcase with just a few supplies. My bookcase was one of those items from good old Walmart. I’m sure I’m not the only one to have something like it. After use, these composite furniture items can even be hard to give away since many donation companies won’t take them. That leaves only a few options; the dump, a plea for someone to take it for free or to get into that happy mental space to give it a pleasing boost.

Getting to Work

First step is to give that shiny finish a really rough sanding with some low number grit sandpaper. I give a little more detail about the types of sandpaper in my wood paddle platter post as a reference. If you have an electric sander, you could use it for the outside and shelves. The inside corners will likely need hand sanding. I like the sanding blocks they sell now in stores, but in a pinch, you can use the method my dad always used. Fold the sandpaper sheet around a hand size scrap piece of wood. This makes it easier to hold and to sand. 

Supplies

  • 1/4″ plywood
  • 1×2 boards
  • Paint
  • Stencil
  • Paintbrushes
  • Wood filler
  • Wood glue

Tools

  • Nail gun and compressor (or nails and a hammer)
  • Kreg jig & screws
  • Wood glue
  • Dremel
  • Saw
  • Scraper

New Back Panel

Cardboard backs are pretty much a given with these composite bookcases, so it’s a given that it should be replaced. Cut the 1/4″ plywood to size before starting to paint. Then paint your base color. I wanted to give mine a fun feature, so I went with key stencils in the same color I chose for the outside. I was slightly disappointed about how hard it was to see. If I were to do it again, I would do the stenciling in a slightly darker shade.

Next up is to use the nail gun to attach the plywood to the back of the bookcase. To ensure it stays secure, put wood glue on before nailing the back.


Well on your way now

Composite bookcase painted interior

If you look below, you might be confused as to why it’s painted here and not painted later. That is simply because I didn’t start with the sanding part. I sadly admit to you that I take the lazy way out at times and it normally comes back to bite me in the end. You’d think I’d learn better than I do. This ended up meaning that the paint was scratching off when I started to work with it. I also needed to fill the peg holes with wood filler to create a flat surface. You should definitely do both of those things if you will be securing the shelves in place.

The Wood Frame for this Composite Bookcase

The measurements for the cuts of the 1×2’s really depends on the size of the bookcase. My cuts were:

  • 2   28″ pieces for the front horizontal bars
  • 4   31 3/4″ pieces for the vertical beams
  • 4   8 5/8″ pieces for the horizontal beams on the side

Cut them to size and drill holes with a Kreg jig. When connecting them together, you should start with creating the front square and the side rectangles. After those are together, it’s time to connect the sides with the front through the pocket holes. 

After the frame is completely built, it can be attached with glue and a nail gun. You should also attach the shelves with glue and a nail gun from the outside. There are a variety of nail guns out there. Mine is on the cheap side so doesn’t have any bells or whistles.

Even though I tried to keep the gun straight as can be, there were a few of the 1.5 inch nails that went askew. It meant they were sticking out of the shelves and needed to be cut. Talk about wanting to pull your hair out, I was completely annoyed. So be warned that it doesn’t always go smoothly. I chose to add vertical boards to support the sagging shelves, but you can leave without them if you like. Mine had experienced years of holding kids books. I used wood glue and nailed the boards from both the top and the bottom.

revamped composite bookcase with new frame
You can see here that the bottom board is not flush to the ground. That is with the intention of being flush with the bottom shelf and giving a bit of a gap with the floor. Be sure to measure where your bottom shelf falls before securing the horizontal beams to the vertical.
Composite bookcase with new frame

Time to Dremel for a Unique Touch

At the time, I hadn’t had a lot of experience with a dremel. I chose to add this touch to practice the skill. Obviously, you don’t have to go the same route, if you don’t have a dremel. If you are opting in, trace the stencil with pencil onto the wood before starting to cut it out. Take your time, go at it at a bit of an angle and you’ll be fine.

Paint

After all the cutting and drilling, it’s time to move into the home stretch with paint. I chose affordable paint from Michaels in Sea Glass. It went on easy and has held up perfectly well over the years.

For the top, cut a piece of wood or plywood that is an inch bigger on the sides and 1/4″ extra on the front than the bookcase measurements. The back of the top is flush (aka even) with the back. I used a white stain applied with a clean white rag on my piece to match more with my paint. If you don’t have much experience with stain, don’t worry. The important thing to remember is to go with the grain of the wood and not to allow large pools of stain to sit on the surface. Doing so will leave you with a spotty uneven look that can only be corrected with significant sanding. You can end it there with the stain or keep going as I did. 

DIY Rub-On Words

I came across this awesome tutorial on Pinterest on how to transfer images using wax paper and was pumped to try it with this project. If you are looking for a way to accomplish the task with materials you have at home, this is it. The hardest part is getting the printer to feed the wax paper without crumpling it. It was another one of those screaming in frustrating experiences. I found the best method was to tape the wax paper to a piece of computer paper to ensure 100% success every time.  I also had to learn how to get the words to be reversed for printing. This can be accomplished with 3-D Rotation of a text box in Microsoft Word. 

Reference below:


“Kind words are keys that fit in all locks.”

Revamped Composite Bookcase

The Final Look


It’s a bit hard to see here, but I added a white key and 2 lock stencils to the outside panels as well. 


Empty composite bookcase
I made the FAMILY hanger and placed the initials of my three girls to finish off the space.

Filled with Family:

Finished composite bookcase

That’s it! Not a terribly difficult project to take that humdrum composite bookcase to a new posh look. I hope you are happy with how yours turns out!

RSS
Follow by Email
Pinterest
Pinterest
fb-share-icon
Instagram

Are you interested in getting alerts and information on all things coming out of Cathartic Crafting?! Then go ahead and submit your info below:

Verified by MonsterInsights