Category: Parties

The Ultimate Cake Wars Birthday Party for Your Itty Bitty Baker

When I say I love baking competition shows, I mean it. Around the time my oldest was preschool-aged and making her own friends to invite to parties, I was learning all about cake decorating from cake shows. I love learning by watching and it really helped that my mother already had all the tools ready for borrowing. Over the years, my middle girls have developed their love of them alongside me. When it came time to decide on a theme for Lily’s 9th birthday party, we landed smack dab on a cake wars theme. From there, it was all about the planning.

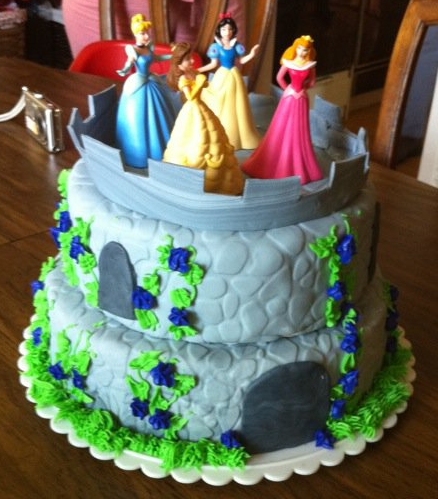
Some of my favorite cakes over the years!

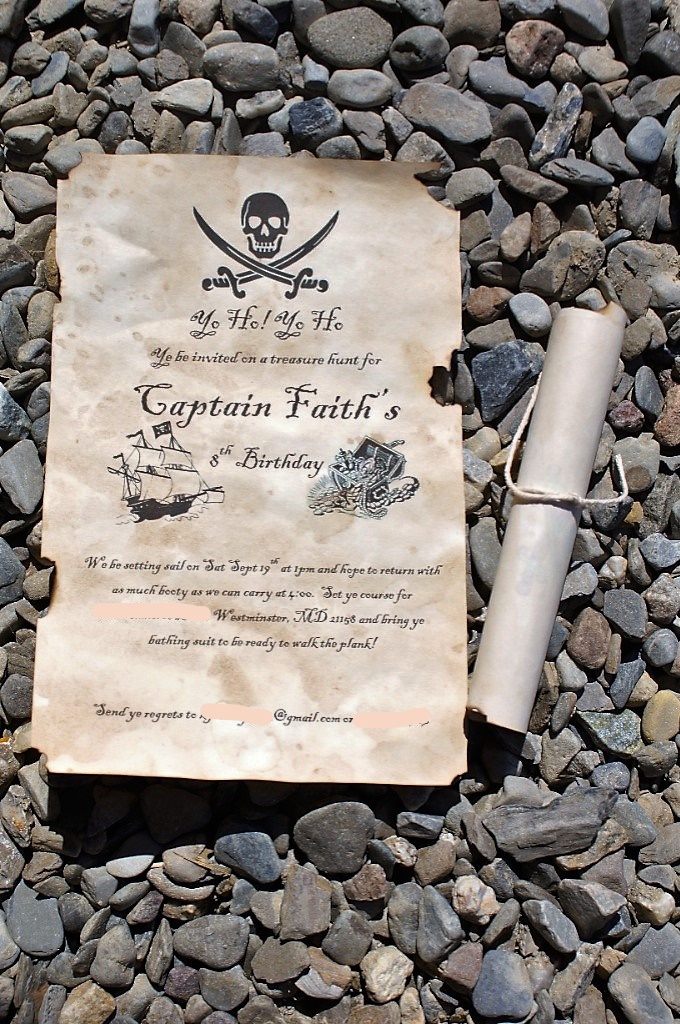
Cake Wars Party Invitation

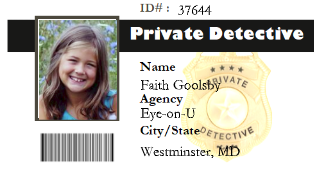
I’m a fan of including pictures of the birthday girl (and party guests like in my Detective Party) into the whole party planning process. For a true Food Network feel, I went the route of setting up the photo as you might see on a show billboard. With a few fun graphics, the picture was ready to be paired with a backing. Simply printing the party details on fun paper makes it an easy task.

Invitation Template

If you’d like an easy to update Canva Invitation Template (seen below) fill out the quick form.

The Ice Cream Round

Call me what you will (crazy, a glutton for punishment), but I love to amp up my party plans. Just doing cake seemed like a missed opportunity to throw in all the stops, so I decided to add an ice cream round. Be warned; when you peruse Pinterest enough, you may find you’re overly inspired and ambitious. So in much of the way of a Pinterest junky, I saw way too many easy ice cream recipes made in zip lock bags to not to give it a try. Little Sprouts Learning was the site that really inspired me, so I used the recipe there. My girls and I had already been accustomed to making our creamy desserts in the ice cream maker, so it really didn’t feel like that big of a leap to do it in a big instead.

Supplies

Spills, Messes, and More

There’s no getting around the fact that this Cake Wars Challenge was going to be a mess. It was a good thing my husband was not in the kitchen to see the milk spills and the candy scatters because he would have lost his gourd. I had set out the measuring cups and the bags and throw-ins all around the kitchen island. I wasn’t about to try to set up stations for each child with extract and all the things because I wanted them to choose their own versions of flavorings and throw-ins. The biggest problem with this process was that the little gals all needed help pouring the cream and milk into the bags, so with only my two hands to help combined with the impatience of the children, we had an island of mess to contend with.

ADVICE!!!

Do yourself a huge favor to avoid my experienced pitfalls. Provide each ‘competitor’ with a bowl or oatmeal container cut in half, etc, for them to use to hold the bag upright while they put in all the ingredients. This will save paper towels and mental angst.

My other piece of advice; buy a bag or two of ice. You’ll see that the recipes that say it’ll only take 5 minutes for the ice cream to start to solidify. It was really not working well for my party crew and I think it boils down to the girls not putting in enough ice and rock salt in their bags. I would recommend you divide the ice and rock salt into the galloon size bags ahead of time to store in the freezer in preparation for the girls to grab when they are ready.

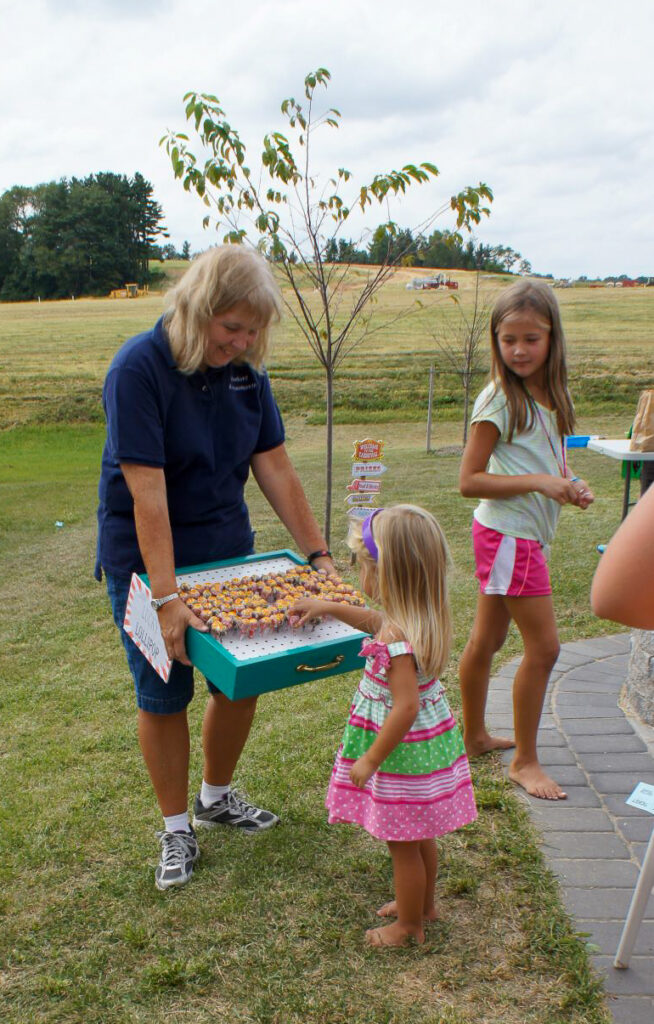
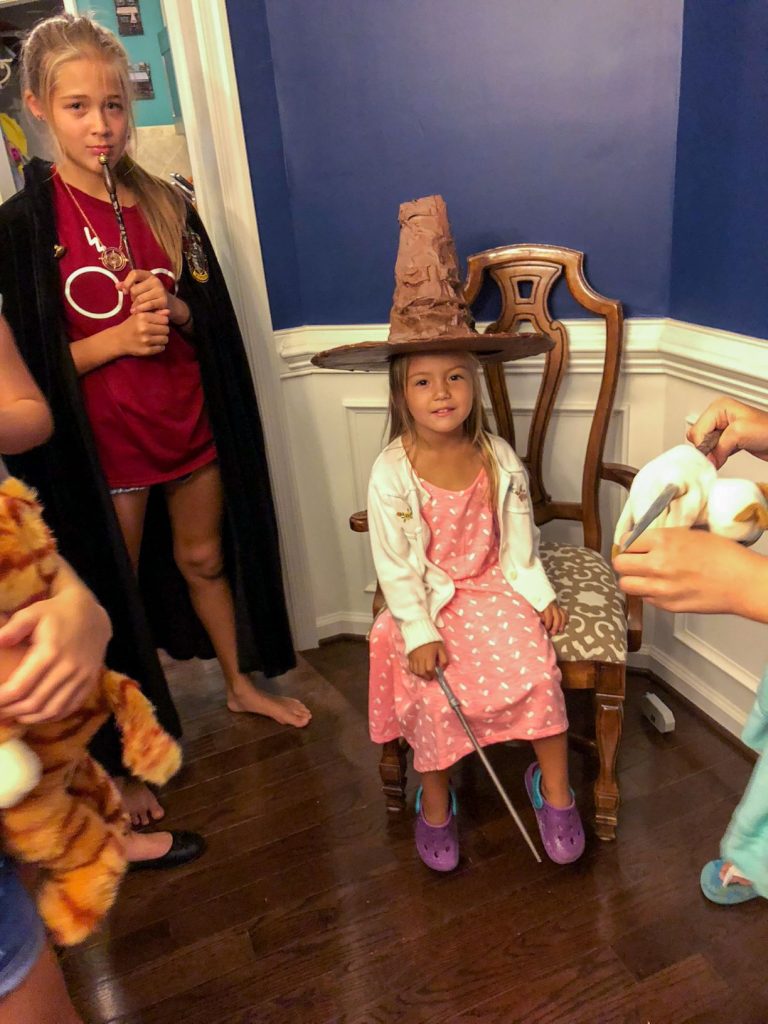
Our Itty Bitty Judge

What’s a cake wars competition without a judge?! Our judge was our very own ice cream and cake-loving 6-year-old. As each child competitor finished their ice cream creation, they took their bowl over to the judge for a taste test. She would get one bite (with a clean spoon) to try it out before the competitor could eat the rest themselves. Most got an excited thumbs up from our little judge while others found they would prefer not to eat their creations. Let’s just say mixing extracts might not turn out to be so tasty! Lessons were learned.

This was the only photo I have of the round. Sadly, because of the developing mess and the fact that my camera card failed. 🙁

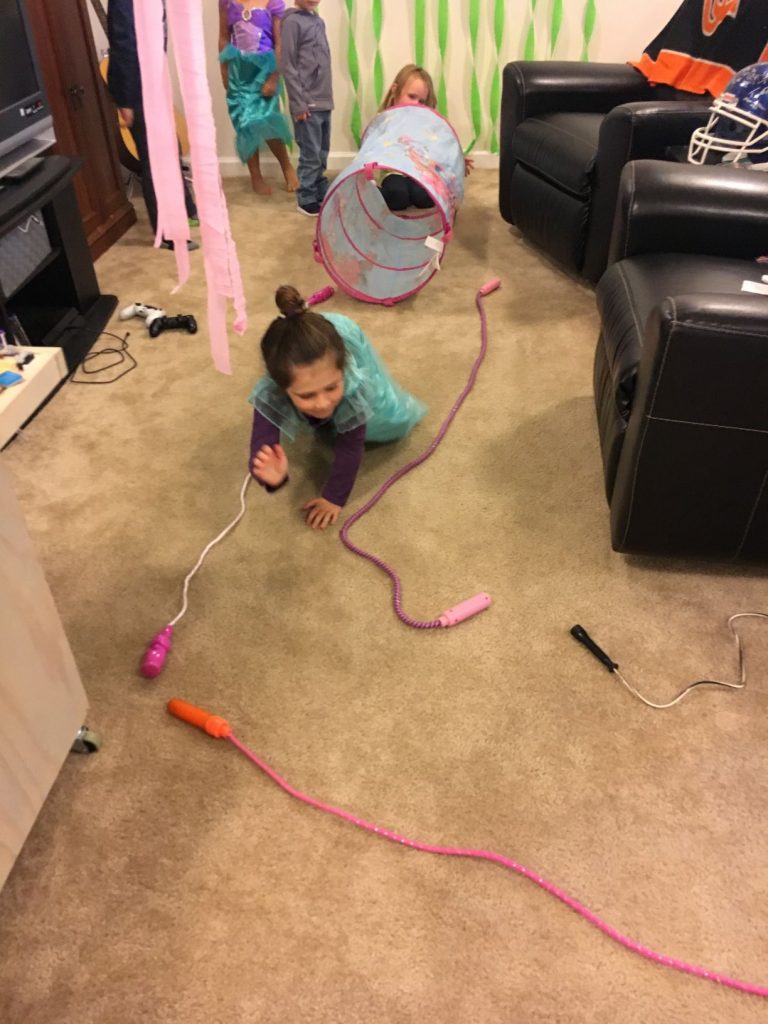
After they finished their cakes, it was time for a commercial break. The girls went downstairs to play together, while the cleaning crew (aka mom) went on set to clean and prep for next round.

The Cake Round

The only way I could imagine this round working was to bake a bunch of cake rounds beforehand. I made strawbridge, vanilla, and chocolate 4 inch round cakes ahead of the party. They were cooled and cut flat, so they would be ready for selecting and pairing with the icing and extras.

Supplies

  • Variety of Same Size Cake Rounds
  • Store bought Icing flavors
  • Icing Bags
  • Cake Decorting Icing Gels
  • Icing spreaders
  • Fruits
  • Fondant
  • Rolling Pins
  • Cookies
  • Paper Plates
  • Small Cake Boxes

Bakers At Work

Round 2 kicked off with excitment to get all the desired decorations and food additives. Quite thankfully, these gals weren’t hard set on perfection, so it wasn’t too long before their masterpieces were ready for judging on the basis of design and flavor.

Cake Wars Takeaway

With the judging complete, it was time only a matter of cleaning the aftermath while the girls played.

Cute little cake boxes housed the pretty cakes to take home as party gifts.
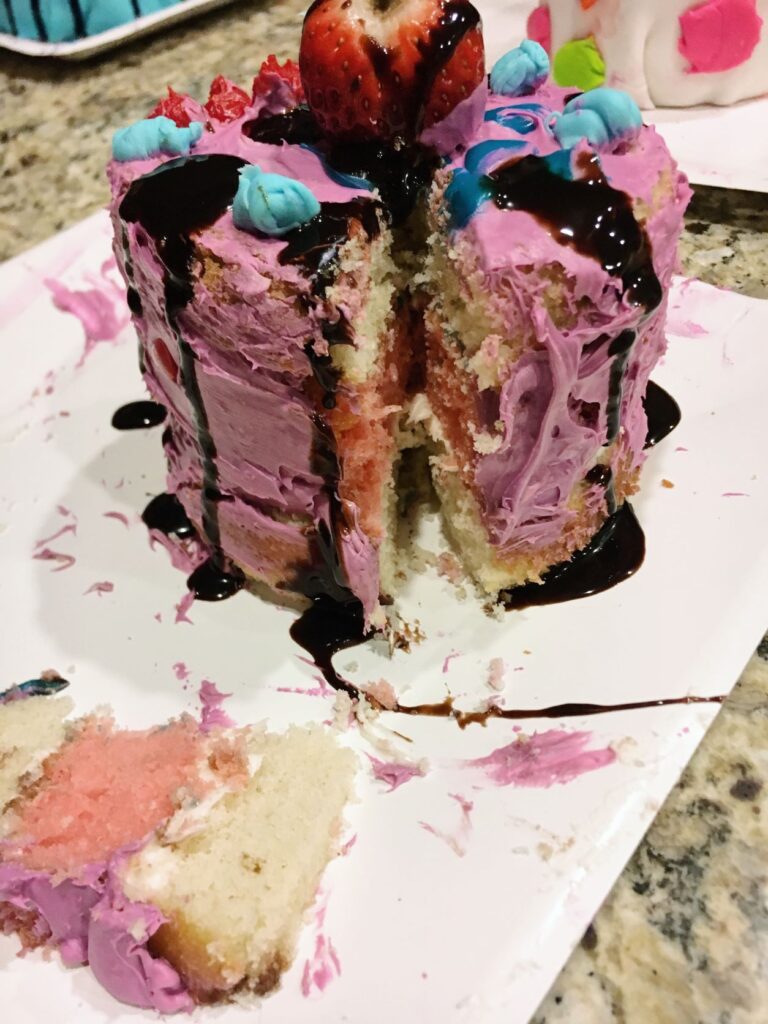
Clean once again.

Final Prize

To merge the ice cream round with the cake round, we had a homemade Neopolitan ice cream cake per the birthday girl’s wishes. While it was obviously messy, this Cake Wars-themed birthday party was a hit!

*This page contains affiliate links. This means if you use one of my links to make a purchase, I will receive a small commission at no additional cost to you. Thank you for supporting Cathartic Crafting!

Ultimate Carnival Theme Party Ideas for Fun Lovers

With the anticipation of spring weather, it’s thankfully time to think about all the outdoor possibilities. For me, what comes to mind are ways to reconnect with people. Essentially, I’m kind of pandemic’ed’ out at this point after the last two years and all the winter spikes in cases. With outdoor being a ‘safer’ place, my mind is teeming with ways to utilize my larger outdoor space. This anticipation also reminds me of one of favorite birthday parties for my oldest daughter. So if you’re looking for an all-out fun party theme, follow along for some carnival theme party ideas.

Carnival Theme Food Ideas

You can’t think of a carnival and not think about all the delicious food options. An at-home carnival wouldn’t be the same without it, so it’s definitely an important checklist item.

My parents helped supply this party with pretty much all the fanfare from popcorn and sno kones makers to my mom’s carefully crafted carnival games. Let’s just say they are still kids at heart and have collected all the things to share fun with others. My mom in particular was a huge help with these carnival theme party ideas.

Our snacks included:

  • Popcorn with authentic popcorn bags
  • Cotton candy in clown bags
  • Funnel cake
  • Soft pretzels
  • Carousel Cake
  • Candy!!

Carnival Theme Party Game Ideas

The games are a combination of purchases and crafts, which can go in either direction depending on the amount of effort desired.

Fish Bowl Toss & Lucky Duck

Baby pools are a super easy and cheap way to accomplish this game. You can find clearance pools at the end of the summer season. The prize for the fish bowl toss was a sandwich bag filled with water and a fake fish.

Spill the Milk and Down a Clown

Spill the milk has a wooden stand built from a 3/4″ thick board, a round wooden disk and a 4×4. The metal bottles are going to a bit hard to find. Any bottles with flat bottoms and tops will work. The Down a Clown frame is built from wood, hinges and purchased from a toy show. If you really want to be authentic, the best place to look would be antique fairs or toy shows. My mom touched these up with paint.

Ring the Bell

Now this next one isn’t going to be an easy to find item. It reiterates that my parents have it all. They also have a larger version in their backyard that doesn’t travel as well as this smaller version. It was certainly a hit with our little carnival goers!

Ring a Bottle & Bucket Toss

The Ring a Bottle game is constructed with antique bottle crates, so you may have to do a bit of searching to find that exact thing. Otherwise, some crates, and glass bottles should work okay. The bucket toss is another easy find incorporating like size buckets and ping pong balls.

Bullseye Toss, Pin the Tail on the Donkey & Raise the bottle

These targets were purchased but could also be made from poster board for those who enjoy the opportunity to make their own. The bottle stand is also an easy project using a 2×4 and square wood panels. One of the long sides should be shorter in height from the other side. This can be accomplished easily with a table saw or saw with a guide. Nail or screw it all together and you have the stand! The fishing rods are long dowels with a small hole drilled into the end. Then string can be tied to it without slipping off and connected to the ring.

Face Painting

I personally love face painting so my carnival party wouldn’t have been complete without it. I was pretty tickled that my husband did several of the paintings. The easiest way to go about it is to have a selection of face paintings you can feasibly do for the kids to pick from.

Prize Table

With each game, the carnival goers won tickets. At the end, everyone was able to cash in their tickets for prizes from the prize buckets. We had pencils, clackers, yo-yo’s, candy, etc. Party City is an excellent place to check for inexpensive prizes. All they need is a paper bag to put their prize selections into for safe keeping. Our party rounded out with lollipops from the lollipop peg box. This can be constructed with a box, peg board or wood/cardboard with holes drilled into it.

Pandemic effects on mental health

As I said at the beginning, I’m mentally exhausted from the length of the pandemic and itching to engage more with friends near and far. We were able to get together with friends last summer, but it still wasn’t the same as before. In the article Seven Ways the Pandemic is Affecting Our Mental Health, it notes,

“And, indeed, nearly 1 in 7 U.S. adults said they were often or always lonely in April 2020, up over 25 percent from 2018. But another study in the U.S., Canada, and the U.K. found that people’s feelings of connection to others didn’t change much from before to during the pandemic. When one group of researchers surveyed over 1,500 people in the U.S. from January to April, they were surprised to find “remarkable resilience.” ……”one study in the U.S. in April and May (before any restrictions were lifted) found that almost two thirds of people under 30 had high levels of loneliness, and 37 percent felt they had low support from their family.”

Seven Ways the Pandemic Is Affecting Our Mental Health

So now’s the time to find safe ways to engage with others, to take care of yourselves, and to find a way back to some normalcy. As with anything, the affects of the pandemic really depend on your outlook and resilience.

This page contains affiliate links. This means if you use one of my links to make a purchase, I will receive a small commission at no additional cost to you. Thank you for supporting Cathartic Crafting!

How to Throw a Magical Harry Potter Party


My oldest and I were (and still are) true Harry Potter fans, so we planned years ahead that she would have a Harry Potter Party theme for her 11th birthday. I was beyond excited about the idea. I started my Pinterest board and made it my mission to create a fantastical version for my daughter. With her birthday being in mid-September, I started with preparations in July with the wands. My husband may have asked a few times how long I would be working on making wands, but you can’t mess with the artist’s methods and desires. Below is the full rundown on our Harry Potter Party. 

We blew up white balloons and drew owls on them with Sharpies. We attached an owl balloon to each invitation and hand-delivered it to each house for a truly authentic experience.

Harry Potter Party: The Journey begins with Platform 9 3/4

“For in dreams we enter a world that is entirely our own.”

Albus Dumbledore

Diagon Alley

I used the same technique for both Platform 9 3/4 and Diagon Alley. This involved shades of brown and shades of red, a paper plate, water, and a sponge cut to brick size. I put a mix of the cheap acrylic paint shades on a plate and thinned them with water in a syringe. The sponge would absorb the color before I stamped it onto the curtain. I used a curtain panel I found at Goodwill for Platform 9 3/4 and butcher paper for Diagon Alley. 

Using cardstock in shades of red, clear fishing wire, and hot glue I made the rotating ‘bricks’ to keep with the authentic Harry Potter Party feel. This may well have been my favorite part of the whole party.

Quick Stop at Gringotts Bank for some Spending Gold

Each wizarding student received a gold coin from Gringotts Bank. On the back of the coin was a unique Harry Potter image. I had printed off images onto one piece of paper and taped them to the back of the coins. This was intentional so there wouldn’t be fighting at Eeylops Owl Emporium.

Eeylops Owl Emporium & Magical Menagerie

In order to keep party costs as low as I could, I asked family to help me check out Goodwill stores for good condition cats, owls and frogs to stock the menagerie. Now here is where the coins came into play. I picked a pet out of the stock and would call out the Harry Potter image I’d placed on it. This matched with the coin. I knew that kids would likely like specific animals and didn’t want to have them fighting over the same one. This pet was one of their party favors as well.  

Monster Book of Monsters at Flourish and Botts

For the full tutorial on my DIY Monster Book of Monsters, check out the instructions here.

Ollivander’s Wand Shop

There are definitely lots of options for you to pick from when it comes to wands. Premade is always an option, but if you’re like me, you enjoy the opportunity to express your creativity and save some money at the same time. I used Long Cooking Chopsticks as the base of the wand. From there, I used a variety of clay, hot glue, spray paint, and paint to create my own wands. The only one I made true to Harry Potter was the elder wand.

My mother in law happened to have a tall wide vase for me to use for the wand to choose the wizard. I used some purchased fairy lights inside the vase and left the on/off switch outside of it for me to be able to control the light. Each little wizard came up to pick a wand. They would continue to touch different wands until the lights lit up to indicate the wand had chosen. It was great fun. 

On to Hogwarts and the Sorting Hat

I seemed to do a fair bit of paper Mache these days. My sorting hat may very well have been the kick-off to that trend. Cardboard served for the brim, butcher paper to shape the point, then newspaper and flour-water mixture as the glue. I rejected not looking at a picture of a sorting hat while doing the face, but it is what it is. It also ended up being slightly small but worked out. 

The Great Hall

I bought battery-powered candles to hang from the ceiling with fishing line and tape.

I called each wizard to the chair and place the hat on their hat. There was a blue tooth speaker behind the chair connected to my phone. Based on the birthday girl’s list of picks, I played the particular Youtube bite on the Wizarding house selection. 

Classes Begin

With the wizards sorting into their houses, it was time for classes to begin…

I bought this Marauder’s Map for my daughter. If you really want to up your game though, check out this one: 

Herbology

For Herbology, I bought clay and tiny pots for the wizards to make their own mandrakes. They did a great job with them. I baked them in the oven while we completed the other classes. 

Live Portraits

We were cleaning out a storage room at work which had started to mold. It was just my luck that one of those items that had significant mold was a large painted picture with a magnificent frame. They were going to toss it, so instead, I took it home to take the painting out and repurposed it. It was a perfect set up for some live motion photos of each youth. It’s one of my signature party favors to include a photo of each youth with the theme. Just like in my detective party with the arrest photo.

I did a photo and a boomerang photo as they finished up with their mandrakes, which helped fill in time during the transition to Potions class.

Potions Class

This was supposed to be a growing snake, aka Basilisk, but I can’t say that it really worked very well. I was fairly worried I would set off the sprinklers.

Professor Flitwick’s Charms class

Wingardium Leviosa

Using their wands, they have to say “Wingardium Leviosa” and keep the balloons up as long as they could. The wizard who was able to keep it up the longest was the winner. 

We rounded out the classes with a games tournament. They sorted into their houses and played board games until their was only one winner for each house. Then the house winners, played against each other to get to win the house championship. With classes complete, it was time for a trip to Hogsmeade.

Day Pass to Hogsmeade

Honeydukes

I used Muggle Magic’s Honeydukes Chocolate Frog Box design for these boxes. For the frogs, I used Nerdy with Children’s recipe and tutorial. I ordered the Bertie Botts Every Flavor Beans and the frog mold from Amazon.

Harry Potter Party Must Have: Butter Beer at the Leaky Cauldron

For adult and youth wizards alike, I used this Butterbeer recipe that includes Schnapps. For youth, I obviously took out the schnapps. They weren’t much fans of it, so I had a fair amount left after the party. I will have to use the ice cream version next time.

Next time I do this party (for the next two girls). I may opt for some premade options like Flying Cauldrons Butterscotch Beer.

Dumbledore’s Pensieve

I borrowed this Pensieve idea from Raegun Ramblings. It did not turn out that great, because I was rushing to get it done between getting home from work and the party starting.

To top off the sweets, I made a chocolate book cake to fulfill my cake decorating hobby needs. 

So that’s the rundown, I truly hope you enjoyed it and are able to grab some ideas for your very own Harry Potter Party.

*This page contains affiliate links. This means if you use one of my links to make a purchase, I will receive a small commission at no additional cost to you. Thank you for supporting Cathartic Crafting!

Little Mermaid Birthday Party for your Ocean Loving Princess

Princesses, princesses, princesses. All three of my daughters were entirely enthralled with them around the ages of 3-6. When we started talking about themes for her 5th birthday, a Little Mermaid themed party was a logical choice. I love a good theme and coordinating party activities. I was excited to take on this party planning. Coming from a child development background, I know there’s a fine balance of free play and structured activity time at a party for young children. Even knowing that, I still struggle to tone done my creative energies. Based on the sentiments spoken in the end, I struck the appropriate balance for those 5-year-olds. 

Snacks and Decor made Sea Simple

Easy table decor in the way of shells and Little Mermaid doll
Veggie corral: a big pile of veggie dip and an arrangement of veggies
A Boat server (a Homegoods clearance find)

Cake

Our typical cake planning method has been me asking the birthday girl what she wants her cake to look like. Sometimes, she plans it all herself, but other times, we peruse Pinterest for ideas. This Little Mermaid cake was my replicated Pinterest selection with the birthday girl’s desired cake and icing flavors. 

I was finishing this cake just before the party started. It’s never how I intend for things to go, but I seem to have a tendency to let my procrastinator habits get to me during the workweek. When making these special cakes, I try to make the layers 3 days ahead. My hope is to give myself a day or two to create the decorations. I, unfortunately, end up staying up late the night before to get the bulk of them finished. Then it turns out the kids only eat the icing and a few bites of the cake, and a little piece of me dies inside.

Ocean Obstacle Course

Crafting

The crafting for this party was minimal and made for a more relaxed party prepping experience. Streamers, a cut-up blue table cloth to serve as the water entryway to the ocean, a punch-out board and homemade jellyfish. For the jellyfish, you can make your own using paper lanterns and streamers or there’s a premade version available.

Option 1: Cut a paper lantern in half and glue streamers to the the inside of it. This is obviously the cheaper method.

Option 2: Buy them! These are super cute, but not sure I’d want to pay $50+ for as many I had.

Punch Board

This took a bit of time. You have to cut the circles out of the poster board before gluing the tissue paper to the board. After it dries, glue folded paper bags to the board with something inside. For this obstacle course, the goal was to get to Ariel’s Grotto and find the shell containing Ariel’s voice. 

Green streamers served as the seaweed. The jellyfish were hung with fishing wire at different heights. After that, I just used whatever I had available to make a fun 5-year-old course.

I had them crawl through the tunnel and stay within the jump rope lines. Masking tape would have made for a better path. While traversing the path to cave, they had to avoid touching the jellyfish tentacles.
Then the kids took turns to find the sea shell.

And that’s all it took for those 5-year-olds to have a mermaid fun time. If you’re looking for some other ideas, you could try a Pirate Party or a Detective Party.

Pirate’s Treasure Hunt Party for Your Little Swashbuckler

When birthdays start closing in, I try to ask my girls what theme they want for their parties. Sometimes, I infuse a slight suggestion on what I think would be fun. I can’t remember if this was a fully-fledged idea from my oldest or if I had some influence. Based on these photos, I’d say it was likely her idea. Either way, I had fun planning this Pirate’s Treasure Hunt party!

Treasure Hunt Invitation

I created my invitation in Microsoft Word, as I generally do, and printed two invitations per page on computer paper by using horizontal orientation. Then, I took a wet tea bag and blotted the paper with the tea bag to stain it for an antique look. They dried out on baking sheets. When the paper was completely dried out, I used a long stick lighter over the sink to burn some of the perimeters for an extra warn look. I finished it up by rolling it into a scroll and tying it off with a bit of string.

Treasure Hunt Invitation

Activity: Treasure Hunt

You’re not a true pirate unless you are hunting for some treasure!

Every pirate needs a treasure map to go on a treasure hunt. X marks the spot! I didn’t want all the kids to be standing around waiting for each to move through the activities, so I created three treasure maps in total with variations of each route. This ensured the groups wouldn’t go to an activity at the same time.

The list of ship stops included:

  • Pirate’s Port
  • Pirates Pick
  • Wandering Eye
  • Shark Bay
  • Cannon Cabin
  • Parrots Cove
  • Ye Pirate Flag
  • Davey Jones’ Locker
  • Sunken Ship Yard
  • Bone Yard
Treasure Hunt Map

Pirate’s Port

There’s not much I love more than cardboard. It’s a running joke with my coworkers because they are fully aware of my adoration from the many times I have asked for big boxes. I was inspired by this pirate ship. My goal for this party was to have a ship for each pirate grouping to take along the map route for a true sailing pirate experience, but this was most certainly the time-intensive part of this party prep. I spent hours in the garage cutting and hot gluing the cardboard together into pirate ship shapes. By the third ship, I had perfected the curve at the front of the boat. I put portholes reinforced with borders on the sides to make it easier for the little pirates to carry their ships.

If you’re planning to make your own, I’d try to get 5 or 6 LARGE cardboard boxes. The back section on each boat is one box with the front panel cut out. Then the sides of the ship are one long box side each with the folding flaps. Use the extra pieces of the cardboard to glue as the top of the cabin, the trim around the windows and portholes and as supports for the front curve.

Cardboard Pirate Ships for the treasure hunt

I also made these super cute and easy Pirate’s Cardboard Spyglasses for each Pirate Ship.


Pirage Spyglass

Pirates Pick

The next stop for all the pirates was to pick up their pirate hats and choose their pirate names. I bought inexpensive paper hats from somewhere off the internet and had a list of pirate names for them to review.

Pirate's Pick on the Treasure Hunt
Pirates picking their Pirate names

From here, their paths diverged.

Wandering Eyes

Plastic eyeballs from the dollar store and one of my Halloween cauldrons were all that were necessary for this eyeball toss. The eyeballs were kind of bouncy, so I cushioned it to prevent them from bouncing out. I also put the eye patches in the cauldron for them to pull out for themselves after the activity.

Wandering Eyes on the treasure hunt

Shark Bay

I used some extra cardboard to create this shark cut out. It’s painted with acrylic paint and a black felt board was used to try to make the mouth background dark. After the pirates took their picture, they got a piece of treasure from the little treasure box to the side there in the picture.

Spy a Pirate Flag

I used the big field in the back of our property to hide three colored pirate flags for the pirates to find. I made the flags out of felt and glued paper skull and crossbones to it with a thin dowel for the post. When they found the flag, they could place it on their ship.

Ye Spy a Pirate Flag on Treasure Hunt

Davey Jones’ Locker

My mom let me borrow the toddler ball pit she had made for her grandkids, so I could fashion it for Davey Jones’ Locker. I hid four different items in the balls for each group to be able to find. They were only allowed to take one of each item.

Davey Jones on Treasure Hunt

Cannon Cabin

My kids love having balls in our netted trampoline, so it was easy to make that into a cannonball activity for the party. They didn’t get anything out of completing this activity except for getting some energy out.

Cannon Cabin on treasure hunt

Parrot Cove

Parrot Cove on treasure hunt

Up next was Parrots Cove to add to their Pirate cliches. I provided paper with parrot outlines, scissors, feathers, markers, and glue for them to create their feathered friends. This activity took them the longest, as any craft is want to do.

Sunken Ship Yard

The Sunken Shipyard came next with an inflatable ship. The object of the activity was to throw hoops to hook the masts. After they were able to get all three, they were allowed to take their sword.

Sunken Ship Yard Treasure Hunt

Bone Yard

I don’t honestly know how an eyeball would free your ship, but I was running out of ideas.

Bone Yard on Treasure Hunt
Bone Yard in Treasure Hunt
They had to pick up the skeleton hands from the pile of bones, severed fingers, rats and spiders.

Walk the Plank

Then I forced them all to walk the plank into the ocean!

Pool time at the Treasure Hunt Party

Pirate’s Grub

Easy snacks are my go-to at parties, especially when so much is involved with the other aspects. I made some super simple labels in Word and called it a day.

Pirate’s Cake!

Pirate Party Treasure Hunt Cake

Hope you enjoyed the run down and are able to use some of these ideas for your own party planning! If pirates aren’t your thing, how about Detectives?

Detective Party: Case of the Missing Cake

I was unaware of my passion for themed parties until I had my first child. Her first two birthdays were your run-of-the-mill easy parties sans a full-fledged theme. By her third birthday, I started making my own invitations and more intricate cakes. Each subsequent year, I seemed to take it up a notch to coincide with her increased ability to participate in party activities. I was completely pumped about planning this detective party.

I’m jumping out of order a bit posting this 10th birthday Detective Party, but to put it simply; I really enjoyed the planning and easier preparation with this one. When I say easier preparation, I’m speaking of physical or crafting labor. Much of the work was in creating the plan and creating documents in Microsoft Word. I can be honest enough to say I really took some pride in the development of the mystery details and case files. To kick things off, let’s start with the invitations.


Invitations

I went over to my fav spot, Michaels, and got a pack of inexpensive brown cardstock cards and envelopes. I then cut the card to the shape of a manila folder and wrote “Top Secret” on the front with a red marker. The envelope followed suit with “Urgent” attention addressed to the invited detective (friend). Completely easy, am I right?!

For the inside, I took a picture of the birthday girl with a Snapchat filter for added fun and printed them on plain paper. The details of the party were drafted in Microsoft Word and printed on plain computer paper before being cut to size. In order to fill a 2-hour party span, I included a detective training camp.

Detective party cakes

Decorations

For the main party area, I kept decorations simple with crime scene tape, silly nose glasses, mini magnifying glasses, and bowler hats I borrowed from my parents’ hat collection. My parents tend to be an excellent source of all randomly necessary items, which I’m continuously thankful for when I come up with an idea.


Snacks

Since this was an activity-focused party, I went simple with the snacks. Donuts (cause duh, Detectives), peanuts (no allergies to worry about), pretzel rods covered in chocolate to look like pencils and hot chocolate in cute toss-away coffee cups. I got the coffee cups for the best price I could find at Walmart. The last edible would obviously be the cake.

Detective party snacks

Activities

For Detective training camp, I had 5 different activities, which ended up being a tad ambitious with the time frame. I’d recommended scaling back on the word puzzle side. My husband tends to think I’m a bit crazy and create too lofty expectations with things like this. He may be right but what fun are low expectations?

Word Puzzles to hone those deductive reasoning skills
Sensory skills training: The Test? Determine the type of candy
Lazer path to develop refined agility
Detective party shooting practice
Target shooting (again super easy and done on posterboard)
Detective party criminal pic
Lastly, developing mug shot camera skills. This ‘placard’ was drafted in Word and printed on regular paper before gluing it onto a piece of cardboard.

Private Detective Badge

Detective party detective badge

As parents RSVP’d, I asked them to send me a picture of the child, which I used to create a Detective Badge. I created a badge for each child with his/her picture and name because a detective party wouldn’t be much with the detectives. As they finished their detective training, I symbolized “passing” by giving them their badge.


Time to Solve the Case

Here’s where my mental fortitude was really tested by the detail of ensuring all the pieces would come together into a workable mystery. The mystery to be solved was who took Faith’s birthday cake and finding where it had been hidden. I crafted files for each of our family members to serve as suspects. I gave the file collection to each detective group (there were three groups). Each group received a file and their detective tool kits; an invisible pen with a light on it (thanks Amazon), a regular pen, their paperwork, and a ruler.

Detective party suspect files
Detective party suspect file information
I took everyone’s fingerprints with ink and made copies to have in each file. I wrote down a few facts for each suspect to include a microscopic image of their clothing and a foot outline.
On the top of the file, I included a brief write-up of the mission, some questions they could ask the suspects, and space to write to whom each clue pointed.

Detective Party: The Clues

Detective party clue 1
A powdered footprint made by cutting out the inside of the foot outline, then using a shifter to ‘rain’ the powdered sugar into the opening. There were two different sizes, so it wouldn’t immediately start to point to one person.
Detective party clue 2
A fingerprint from two suspects found on the kitchen counter.
Detective party clue 3
Slides of clothing fibers to look at with the microscope. I had to scour the internet to find images to match the slides we had on hand. I used those images for the suspect files.
Detective party cake 4
A secret coded message to help the detectives on the way to finding clue 5 and solving the case.
Detective Party clue 5
An invisible clue as to where the cake was hidden.
Here’s where those invisible pen lights came into play

Detectives hard on the case


The Missing Cake

In the end, one group found the cake ahead of the rest. That was the only competitive aspect of the party. The kids were then ready to sit down to eat a slice of the found cake.

Detective Party briefcase cake
This cake was much easier than last year’s pirate ship cake and for that, I was thankful.

In the end, the party seemed to be a real hit. The girls were invested in every activity, which is never guaranteed when overplanning. There were requests to be able to take my suspect files home because they enjoyed them so much. I hope you enjoyed the run-through and collected some ideas for your own Detective party.

If you’re looking for some other ideas, check out this Treasure Hunt Party.

RSS
Follow by Email
Pinterest
Pinterest
fb-share-icon
Instagram

Are you interested in getting alerts and information on all things coming out of Cathartic Crafting?! Then go ahead and submit your info below:

Verified by MonsterInsights